
How to Design and Install a Gallery Wall
If there’s a space in your home that feels empty, bland, or altogether blah, adding a gallery wall is an affordable way to spruce it up. A well-designed gallery wall has the power to transform any room into a visual masterpiece that reflects your personality and style. If you've been yearning to create your own stunning gallery wall but feel a bit overwhelmed, fear not! This blog is your ultimate guide to designing and installing a gallery wall that will leave your guests in awe.
Plan and Gather Inspiration:
Before hammering any nails, it's crucial to plan and gather inspiration for your gallery wall. Take a stroll through art galleries, browse on social media, search on Pinterest and flip through interior design magazines to get a sense of different gallery wall styles and arrangements.
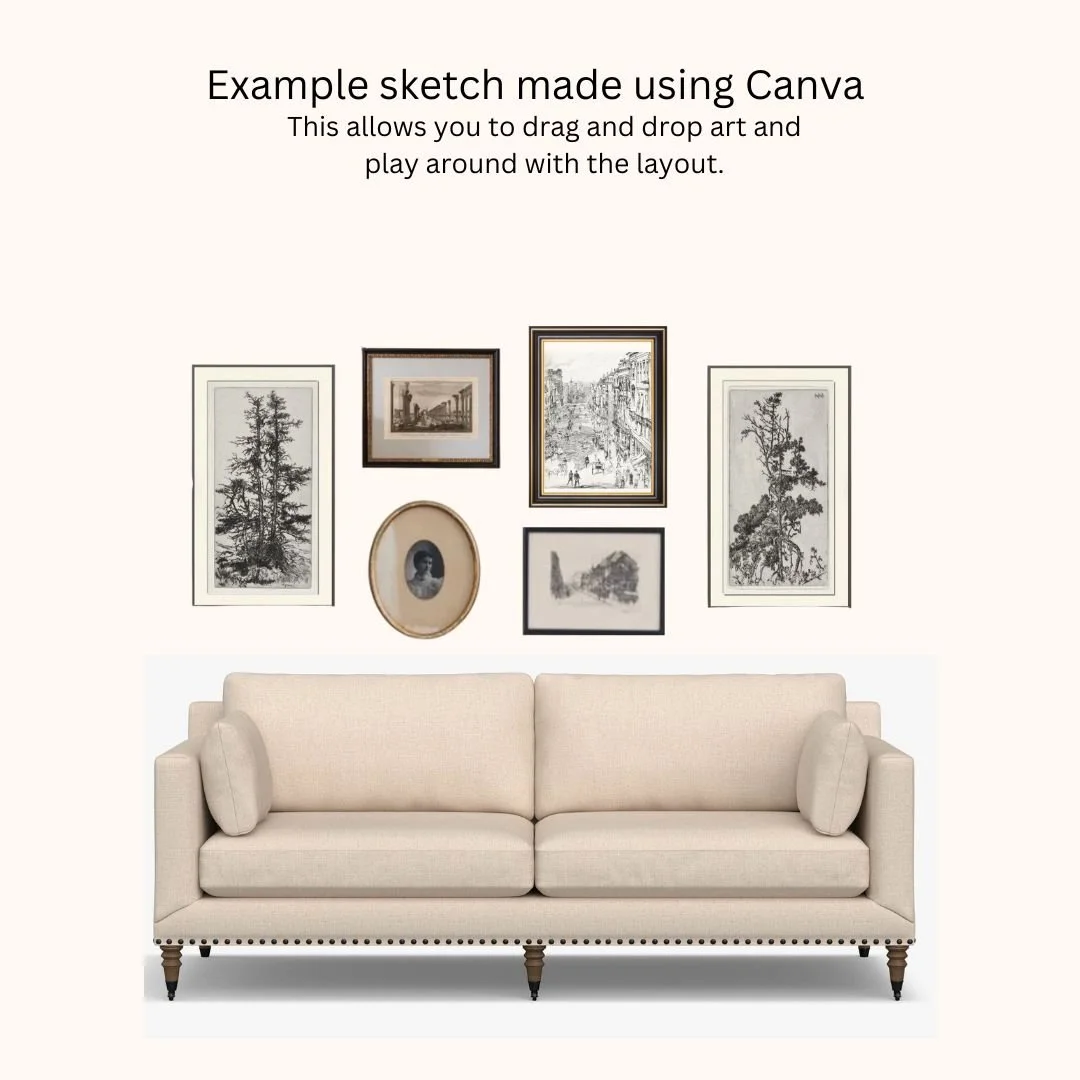
You may even want to create a mood board by sketching it out or using technology, to see how various art pieces and photographs can come together cohesively. I create mine on Canva.
Choose Your Theme and Style:
Decide on a theme or style that resonates with you and complements your existing decor. Whether it's a collection of abstract art, family photographs, or a mix of vintage and contemporary pieces, a clear theme will guide your gallery wall's composition and create a harmonious visual narrative. You want your pieces to feel like they’re all from the same family — even if the colors, subjects, or shapes are different.


One of the keys to a captivating gallery wall is that interplay of different frame styles, shapes, and sizes. Experiment with a mix of frames in various colors, materials, and finishes to add depth and character to your arrangement. This eclectic mix will create an organic and personalized touch to your gallery wall.
Where to Find Art for a Gallery Wall:
I have made much of the art in our home, but have also found a ton of resources for collecting art on a budget. If you don’t want to DIY your art, try the thrift store, Etsy shops, or home decor stores.
Places like Goodwill are filled to the brim with large-scale art, unique frames, and wall decor. Keep in mind that color and style are fairly easy to change, but shape can be trickier. Look for frames in the right shape or size you’re after and know you can always swap out the art itself or paint over it.
In addition to framed art, incorporating some other 3D items to hang can add a ton of character to a gallery wall. Look for things like copper pans, woven baskets, mirrors, hanging planters, decorative plates, woven wall hangings, and clocks. Click here for a great set of gallery wall frames.

If you’re looking for more traditional artwork, but don’t want to spend hundreds of dollars, Etsy is home to lots of digital art that you can download and print yourself — saving you money. Many stores even often print bundles with 3-5 pieces of art that all feel similar yet will keep your display interesting.

In addition to shopping at your favorite decor stores, consider shopping within your home. Family photos, pressed flowers, or heirlooms make a gallery wall feel personal and unique just to your home. Checkout my blog post on making DIY art using pressed flowers.


For added dimension and interest, consider incorporating shelves into your gallery wall. These provide space for decorative objects like small plants, candles, or sculptures, giving your wall an extra layer of depth and charm.
How to Space Out a Gallery Wall:
1. Lay It Out on the Floor First
Before hanging anything, you can arrange your frames on the floor in front of the wall space. This helps you visualize proportions and make adjustments easily.
2. Choose a Central Anchor Piece
I recommend picking a larger or eye-catching piece to serve as the center of the arrangement, then build outward around it. This keeps the layout grounded.
3. Maintain Consistent Spacing
The key to a perfectly imperfect looking gallery wall is to use uniform spacing between pieces — typically 2 to 3 inches between each frame works well. Even with different frame sizes, consistent spacing helps the wall feel organized rather than chaotic.
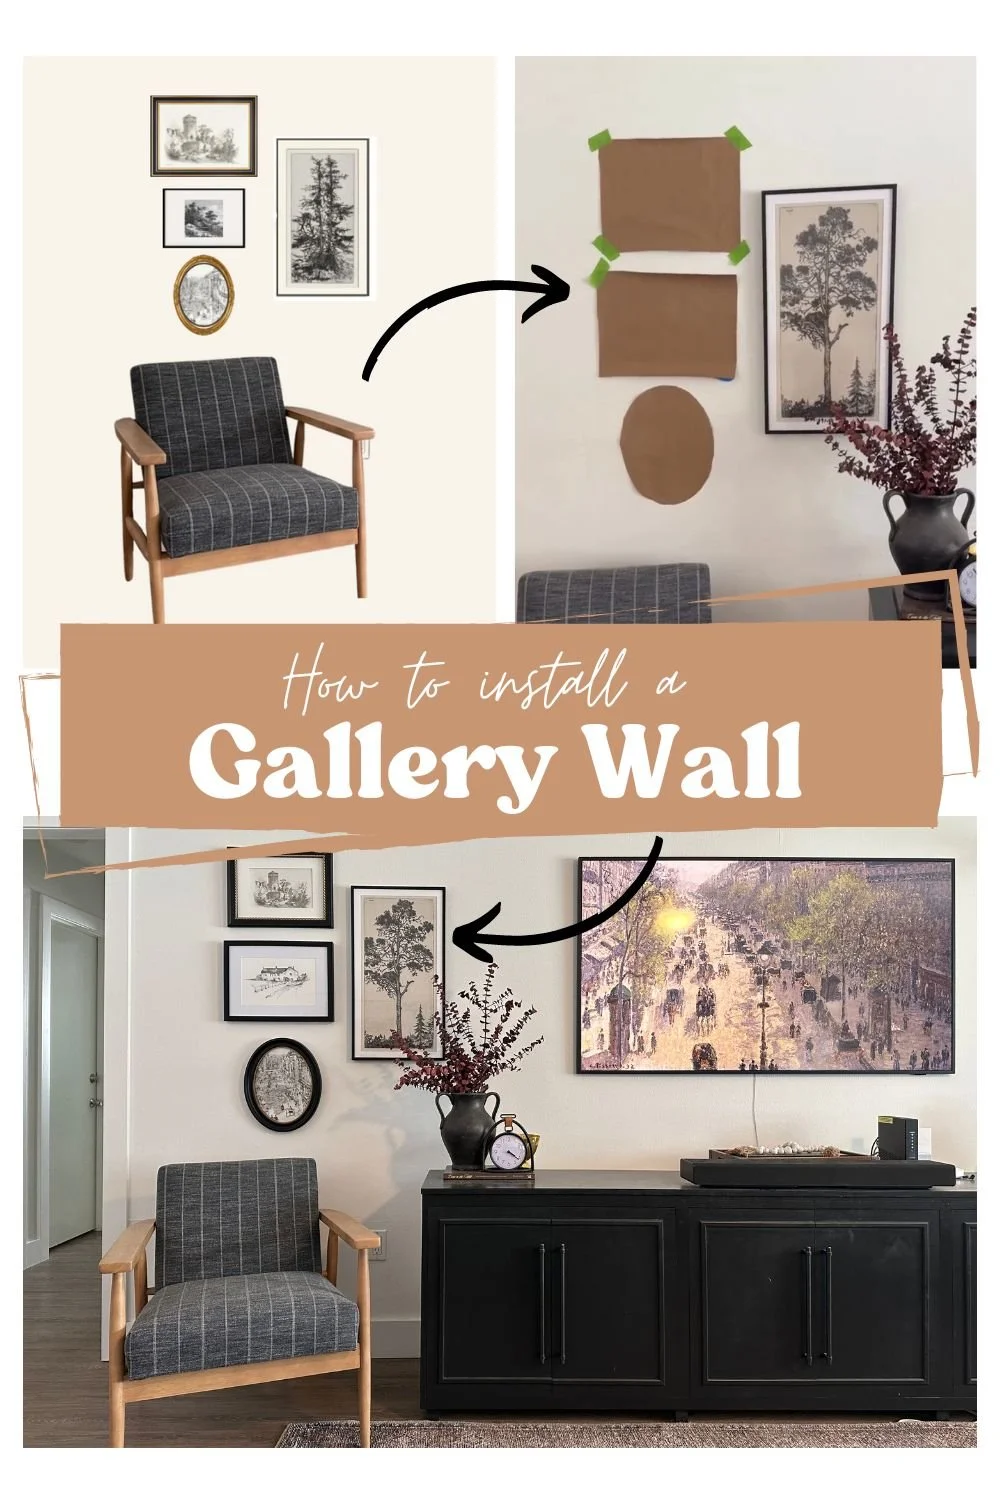
4. Use Paper Templates on the Wall
Cut out kraft paper or newspaper to match the size of each frame, then tape them to the wall with painter’s tape. This allows you to move things around without making holes.
5. Align Edges or Centers (Your Choice)
There are two common alignment approaches you can try:
Edge alignment: Align top, bottom, or side edges of nearby frames to form a clean visual line.
Center alignment: Align frames so their centers are level — good when frame sizes vary greatly.
6. Work Within an Imaginary Grid or Shape
Contain your layout within an invisible boundary — a rectangle, square, or organic shape — to make it feel intentional, even if sizes differ. You can even use painter’s tape to tape off the boundary area you want to keep your frames or art within.
7. Start Hanging from the Center
Begin hanging with your anchor piece, then work outward. This helps keep the arrangement balanced.
8. Level and Measure Carefully
Use a level to make sure frames are not hanging crooked. I recommend using a measuring tape for precision if you are keeping an equal distance between frames.
Tips For Installing Your Gallery Wall:
Before you start hanging, lay out your art pieces on the floor to visualize the arrangement. This allows you to play with different compositions and easily make adjustments until you find the perfect balance. Take a step back and assess the overall flow and symmetry of your gallery wall before proceeding to the installation stage.
Once you've settled on the layout, it's time to measure and mark the wall to ensure a seamless installation. A great way to see the actual layout on your wall is to use newspaper or wrapping paper cut to the sizes of your frames and to tape these to the wall to see the layout and spacing. This preparation will prevent unnecessary holes and ensure an organized gallery wall.

Begin your gallery wall installation with a centerpiece or focal point. It could be a large statement piece or an arrangement of frames that anchors the design. From there, work your way outward, adding art pieces and photographs while maintaining a consistent distance between frames to create a cohesive look.
There’s no right or wrong way here and entirely depends on the space you’re working with. Let your imagination run wild and create something you’ll love.
Use a level and a measuring tape to hang each frame accurately. Pro tip: I love using a laser level when hanging any kind of art or photo on my walls. If you're using different frame sizes, start by hanging the larger ones first and then fill in the gaps with smaller pieces. Don't be afraid to rearrange as you go to achieve the perfect balance.
Regularly Refresh and Revamp:
As your style and preferences evolve, don't hesitate to refresh and revamp your gallery wall. Add new art pieces, swap out frames, or reposition items to keep the display dynamic and reflective of your ever-changing tastes.
Designing and installing a gallery wall will infuse your home with artistic flair and personal touches. With careful planning, a mix of frames, and attention to detail, your gallery wall will become a stunning showcase that tells your story and captivates anyone who enters your space.
So, unleash your creativity and let your gallery wall shine as a visual masterpiece in your home! Happy decorating!


HEY THERE, I’M ASHLEY!
Here to inspire beginner DIYers!