
DIY Spring Wall Art
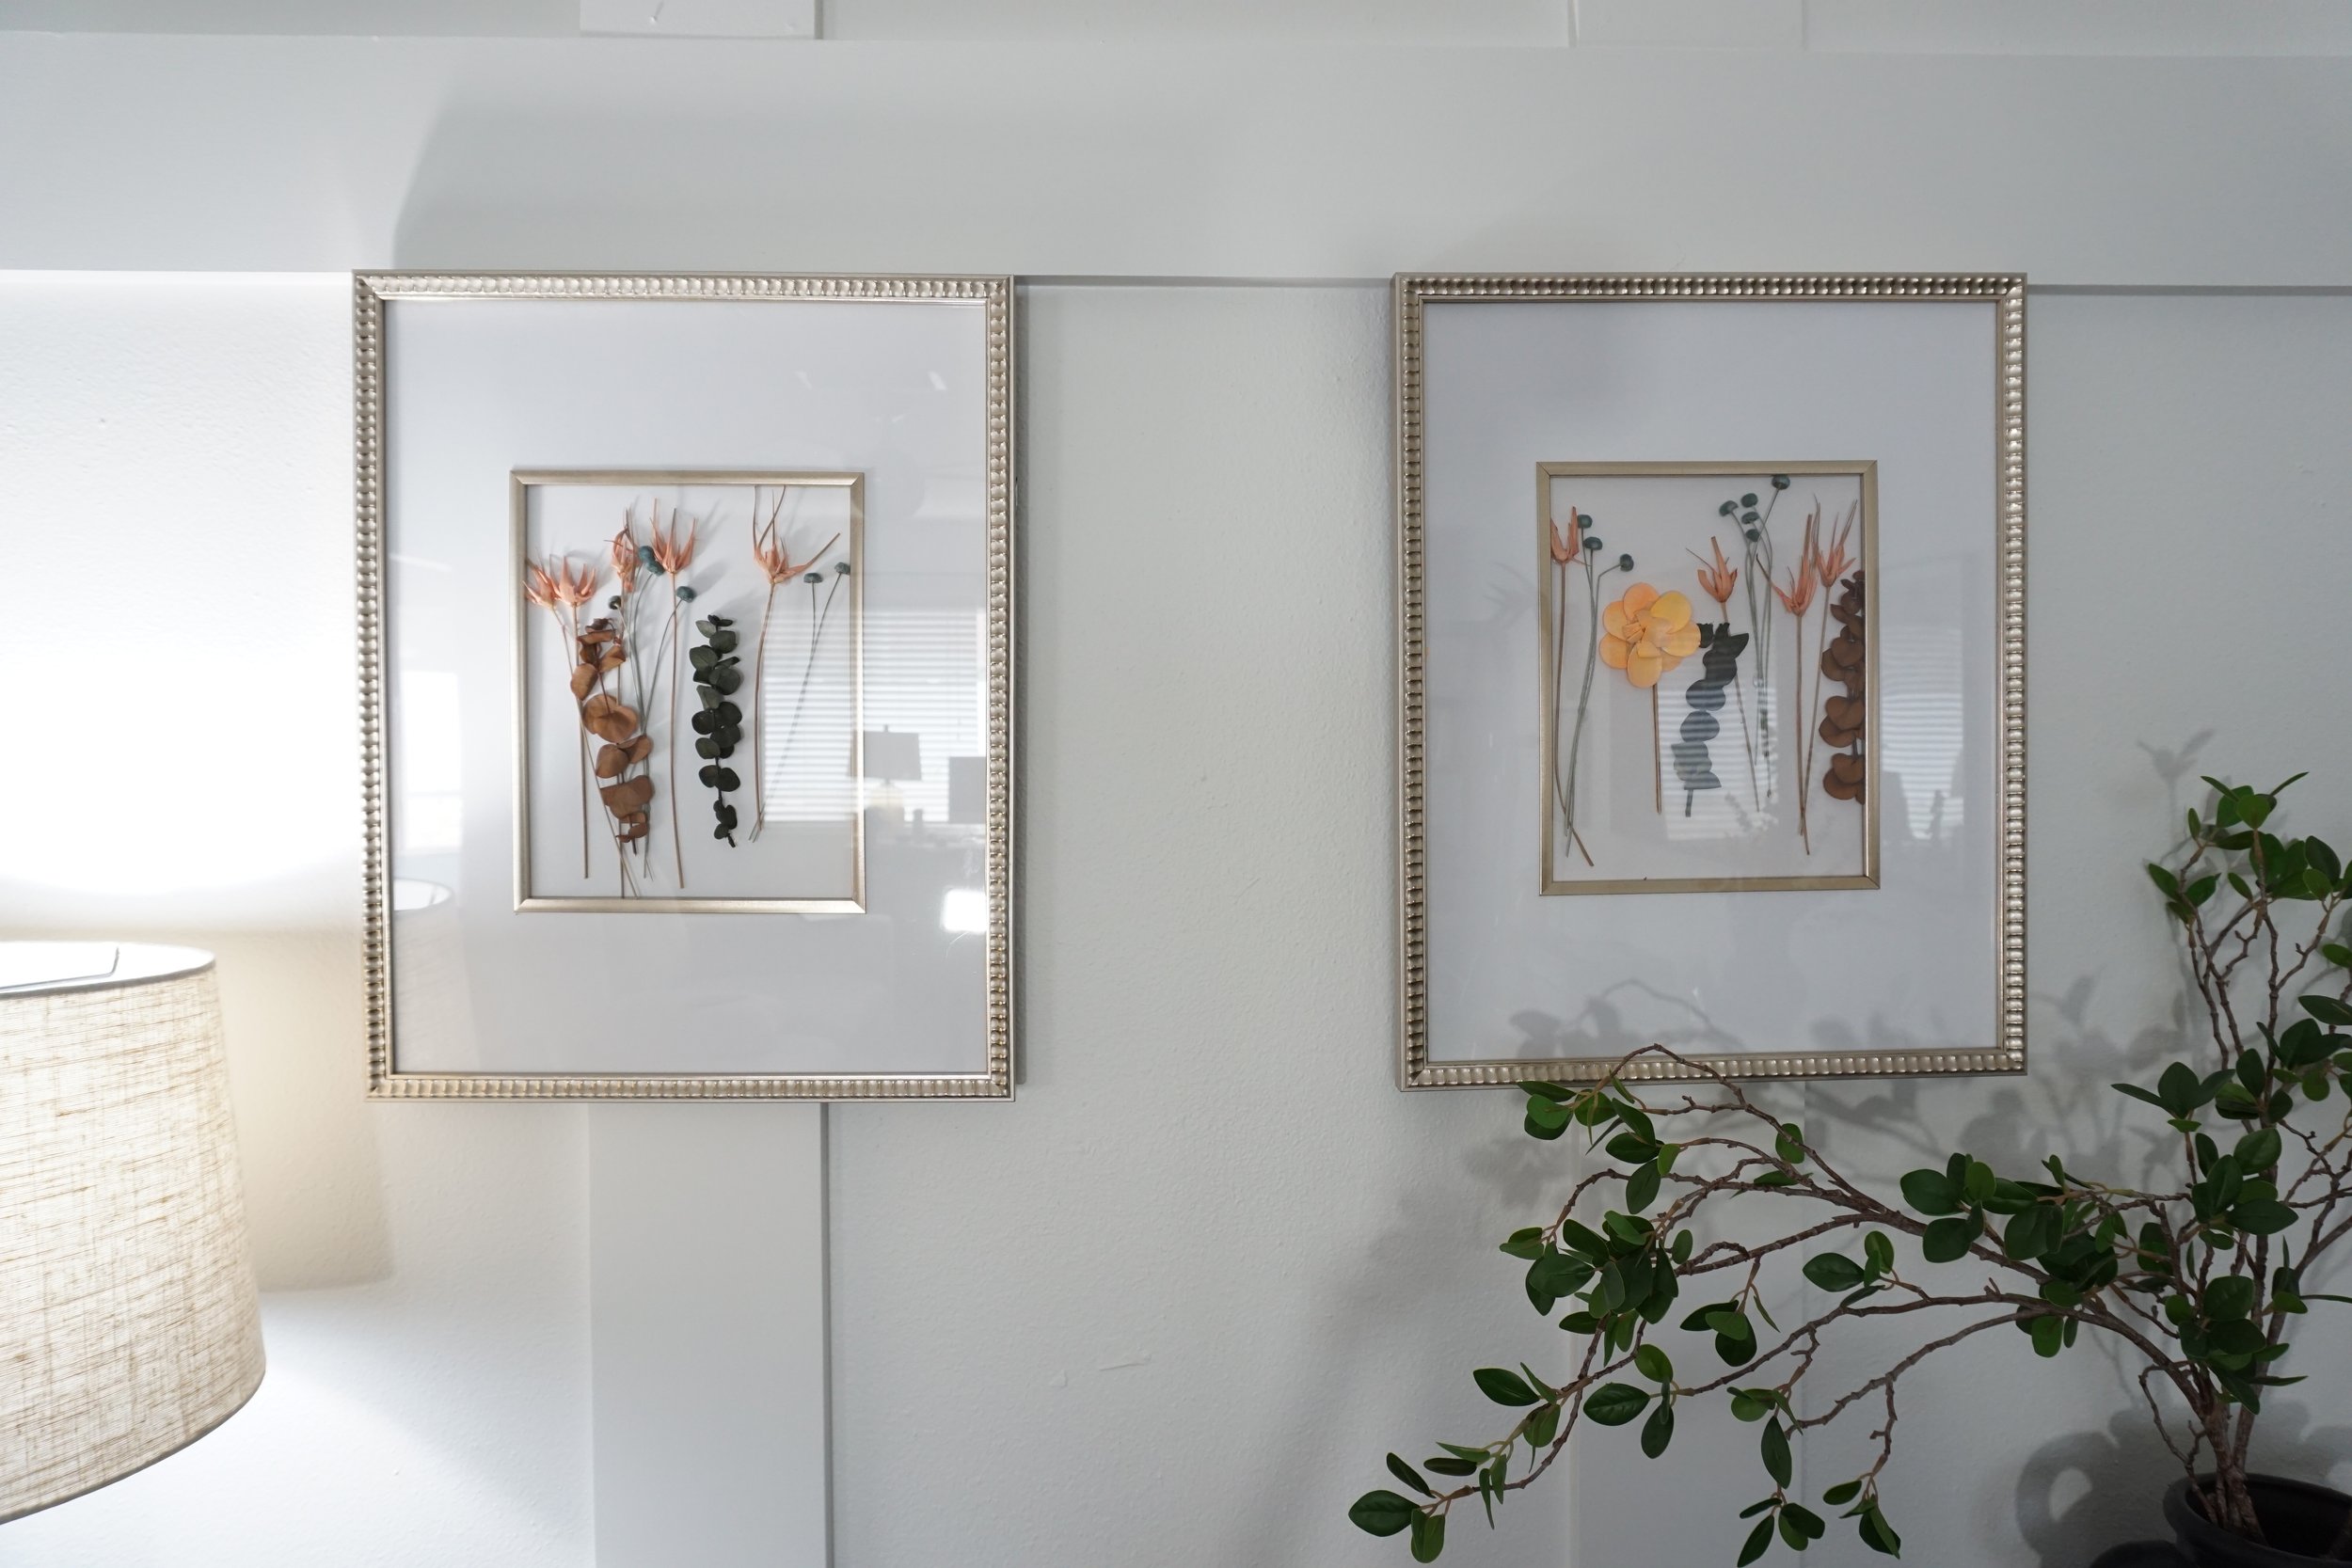
This week I made the easiest DIY Spring wall art using two frames and some dried floral stems and flowers. The only tools needed for this project are a pair of scissors and a hot glue gun. For the dried florals, I picked up some dried eucalyptus stems in a couple different colors, some dried flowers, and some dried button flowers all from Michael’s. I also used two beautiful silver frames that I found at Michael’s.
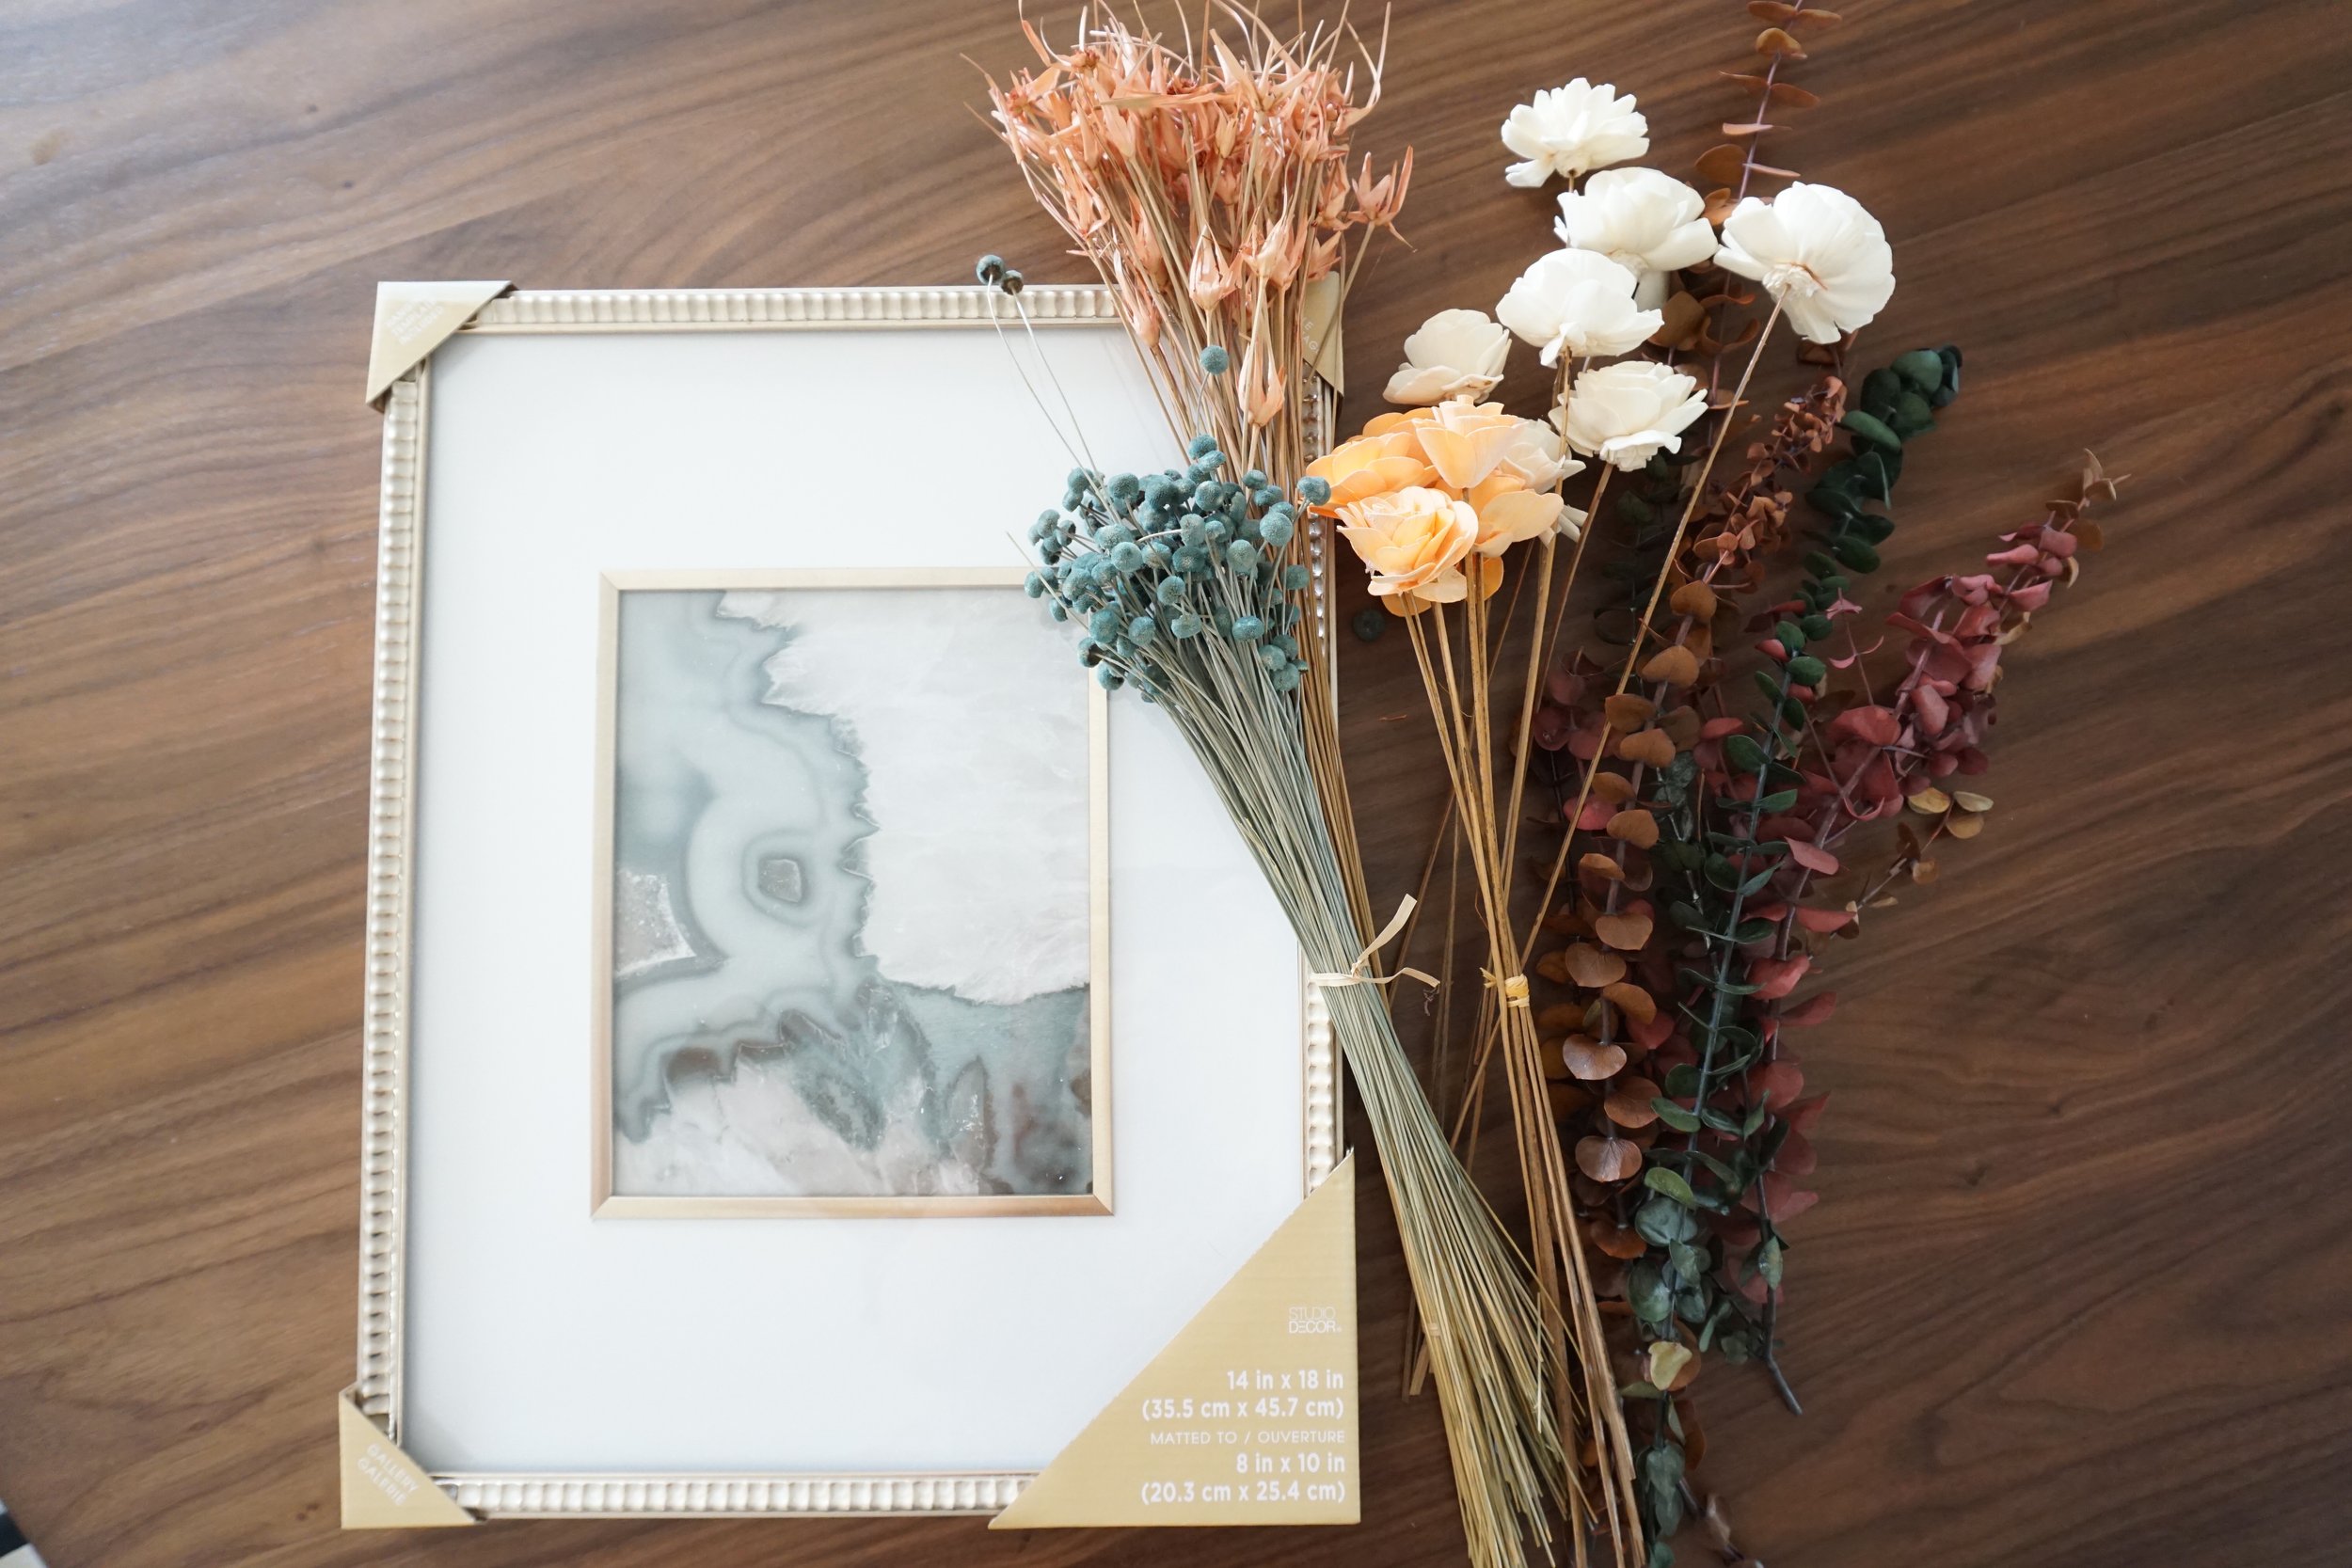
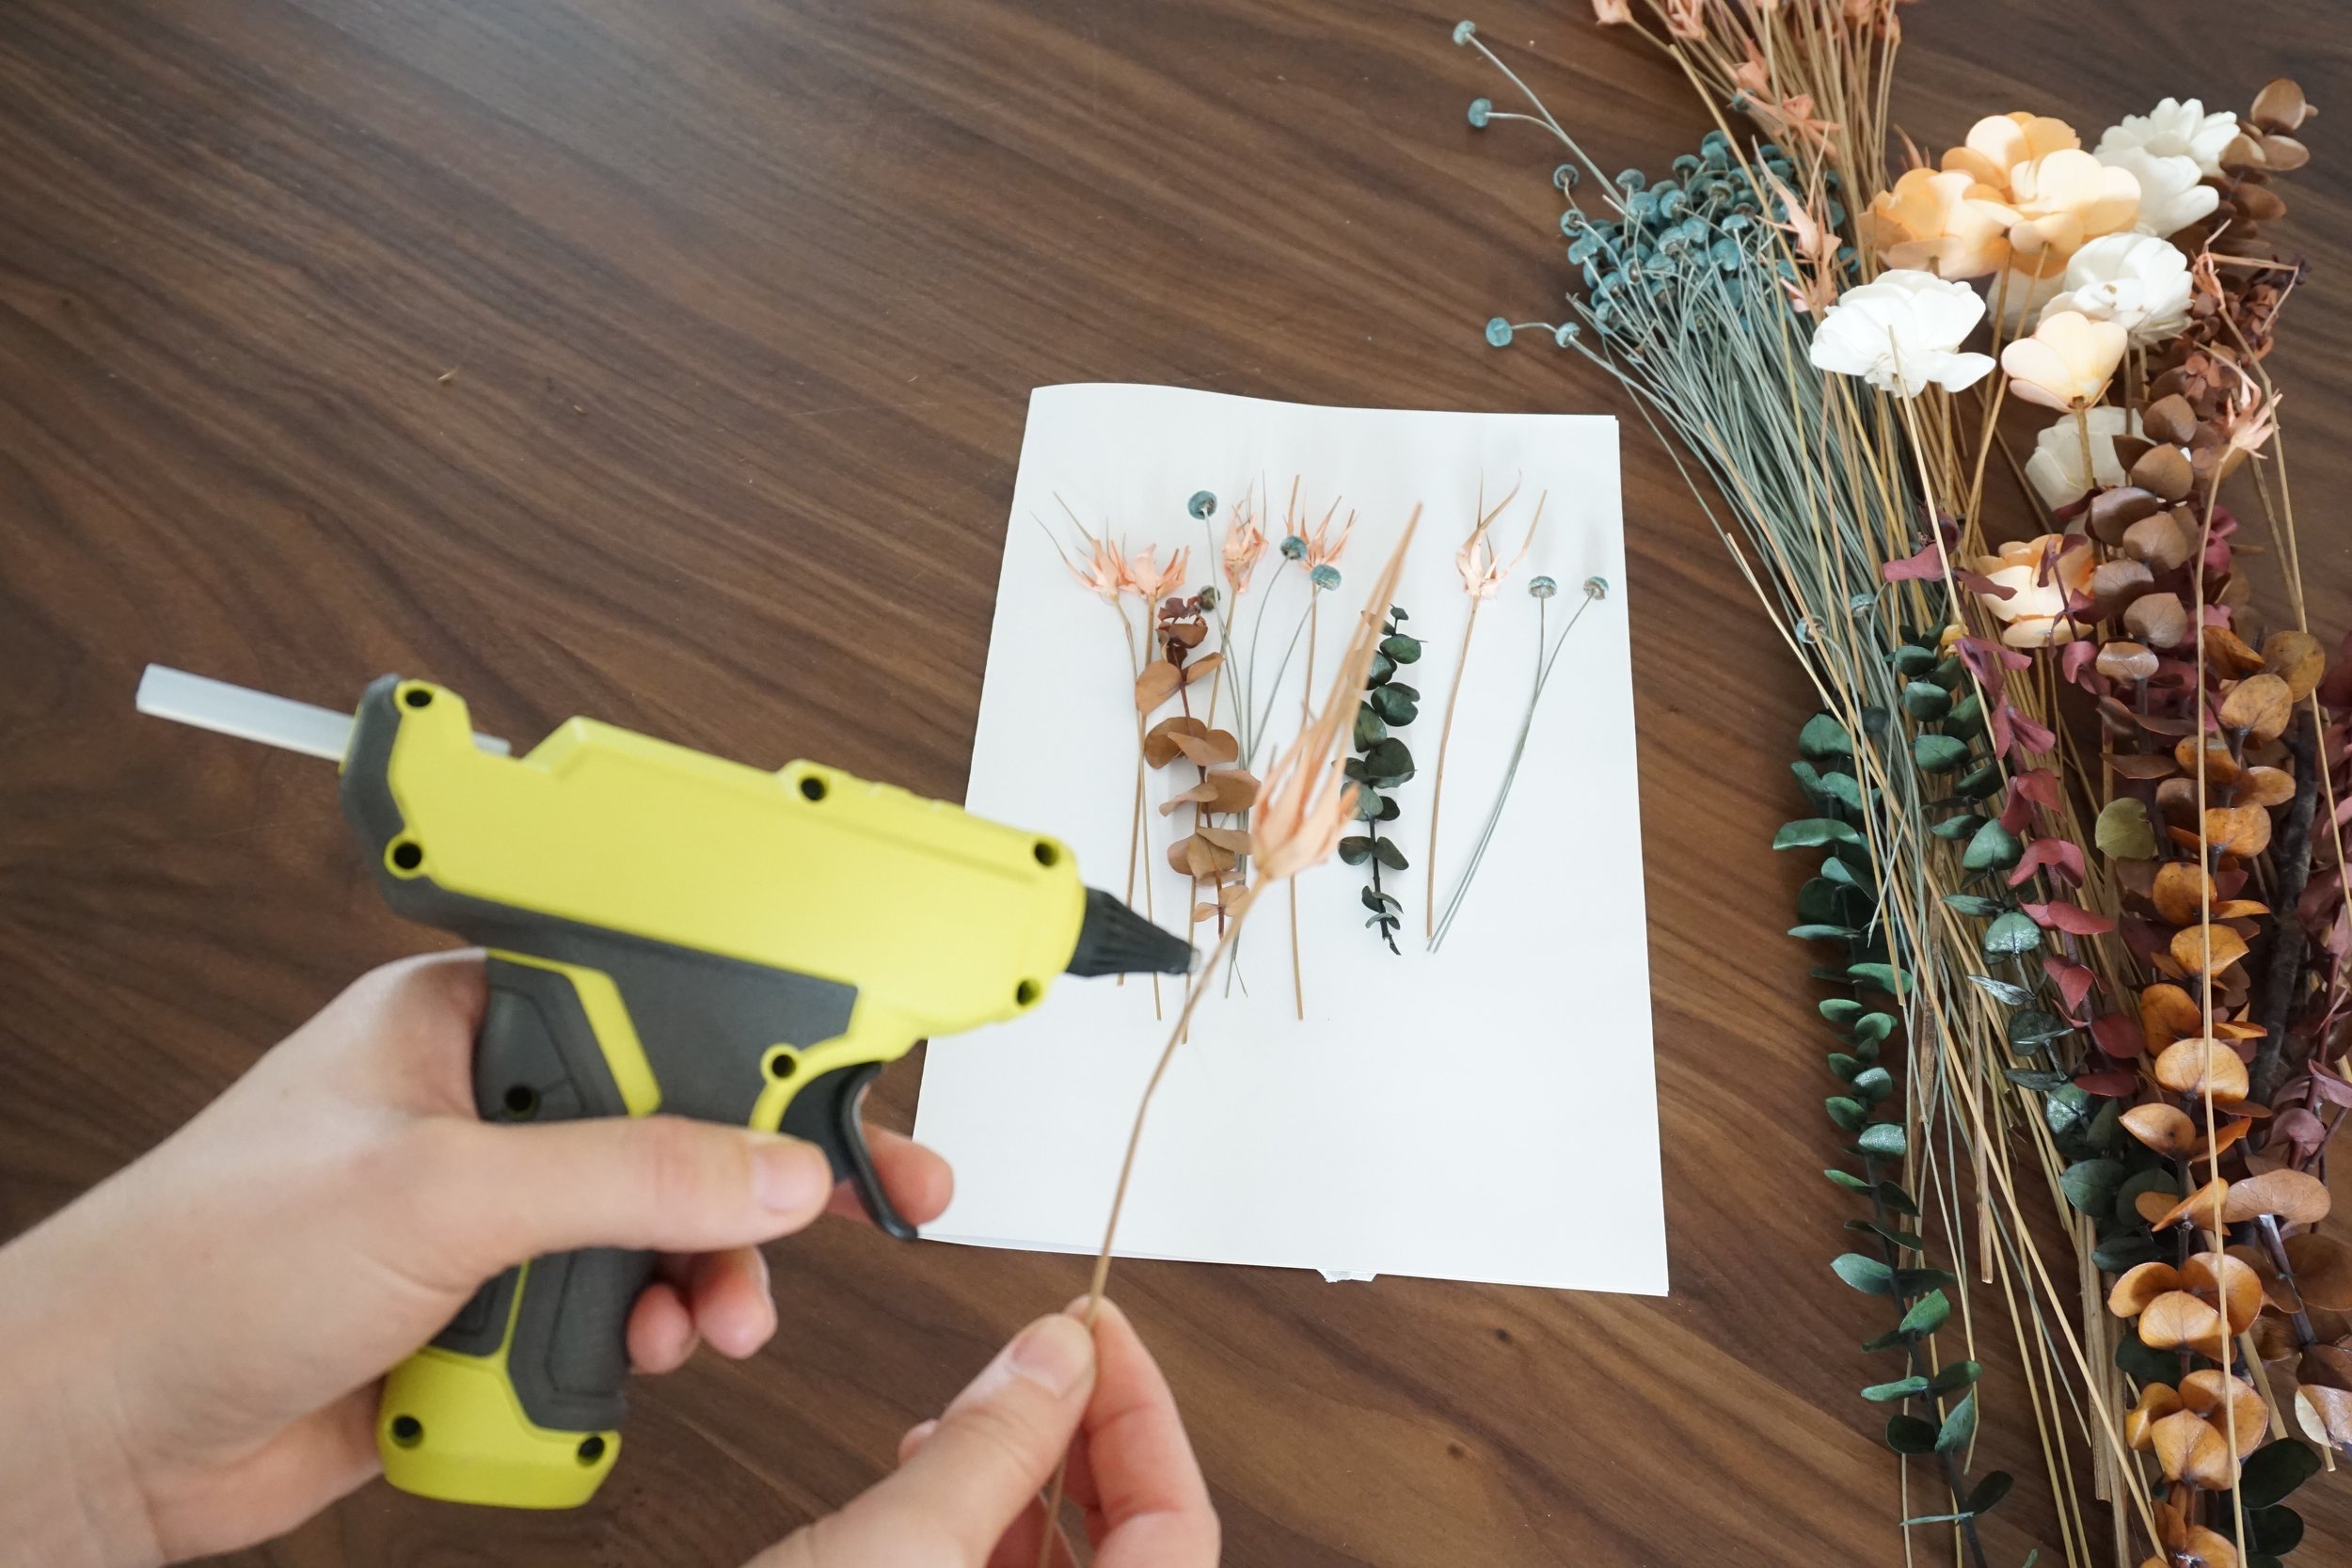
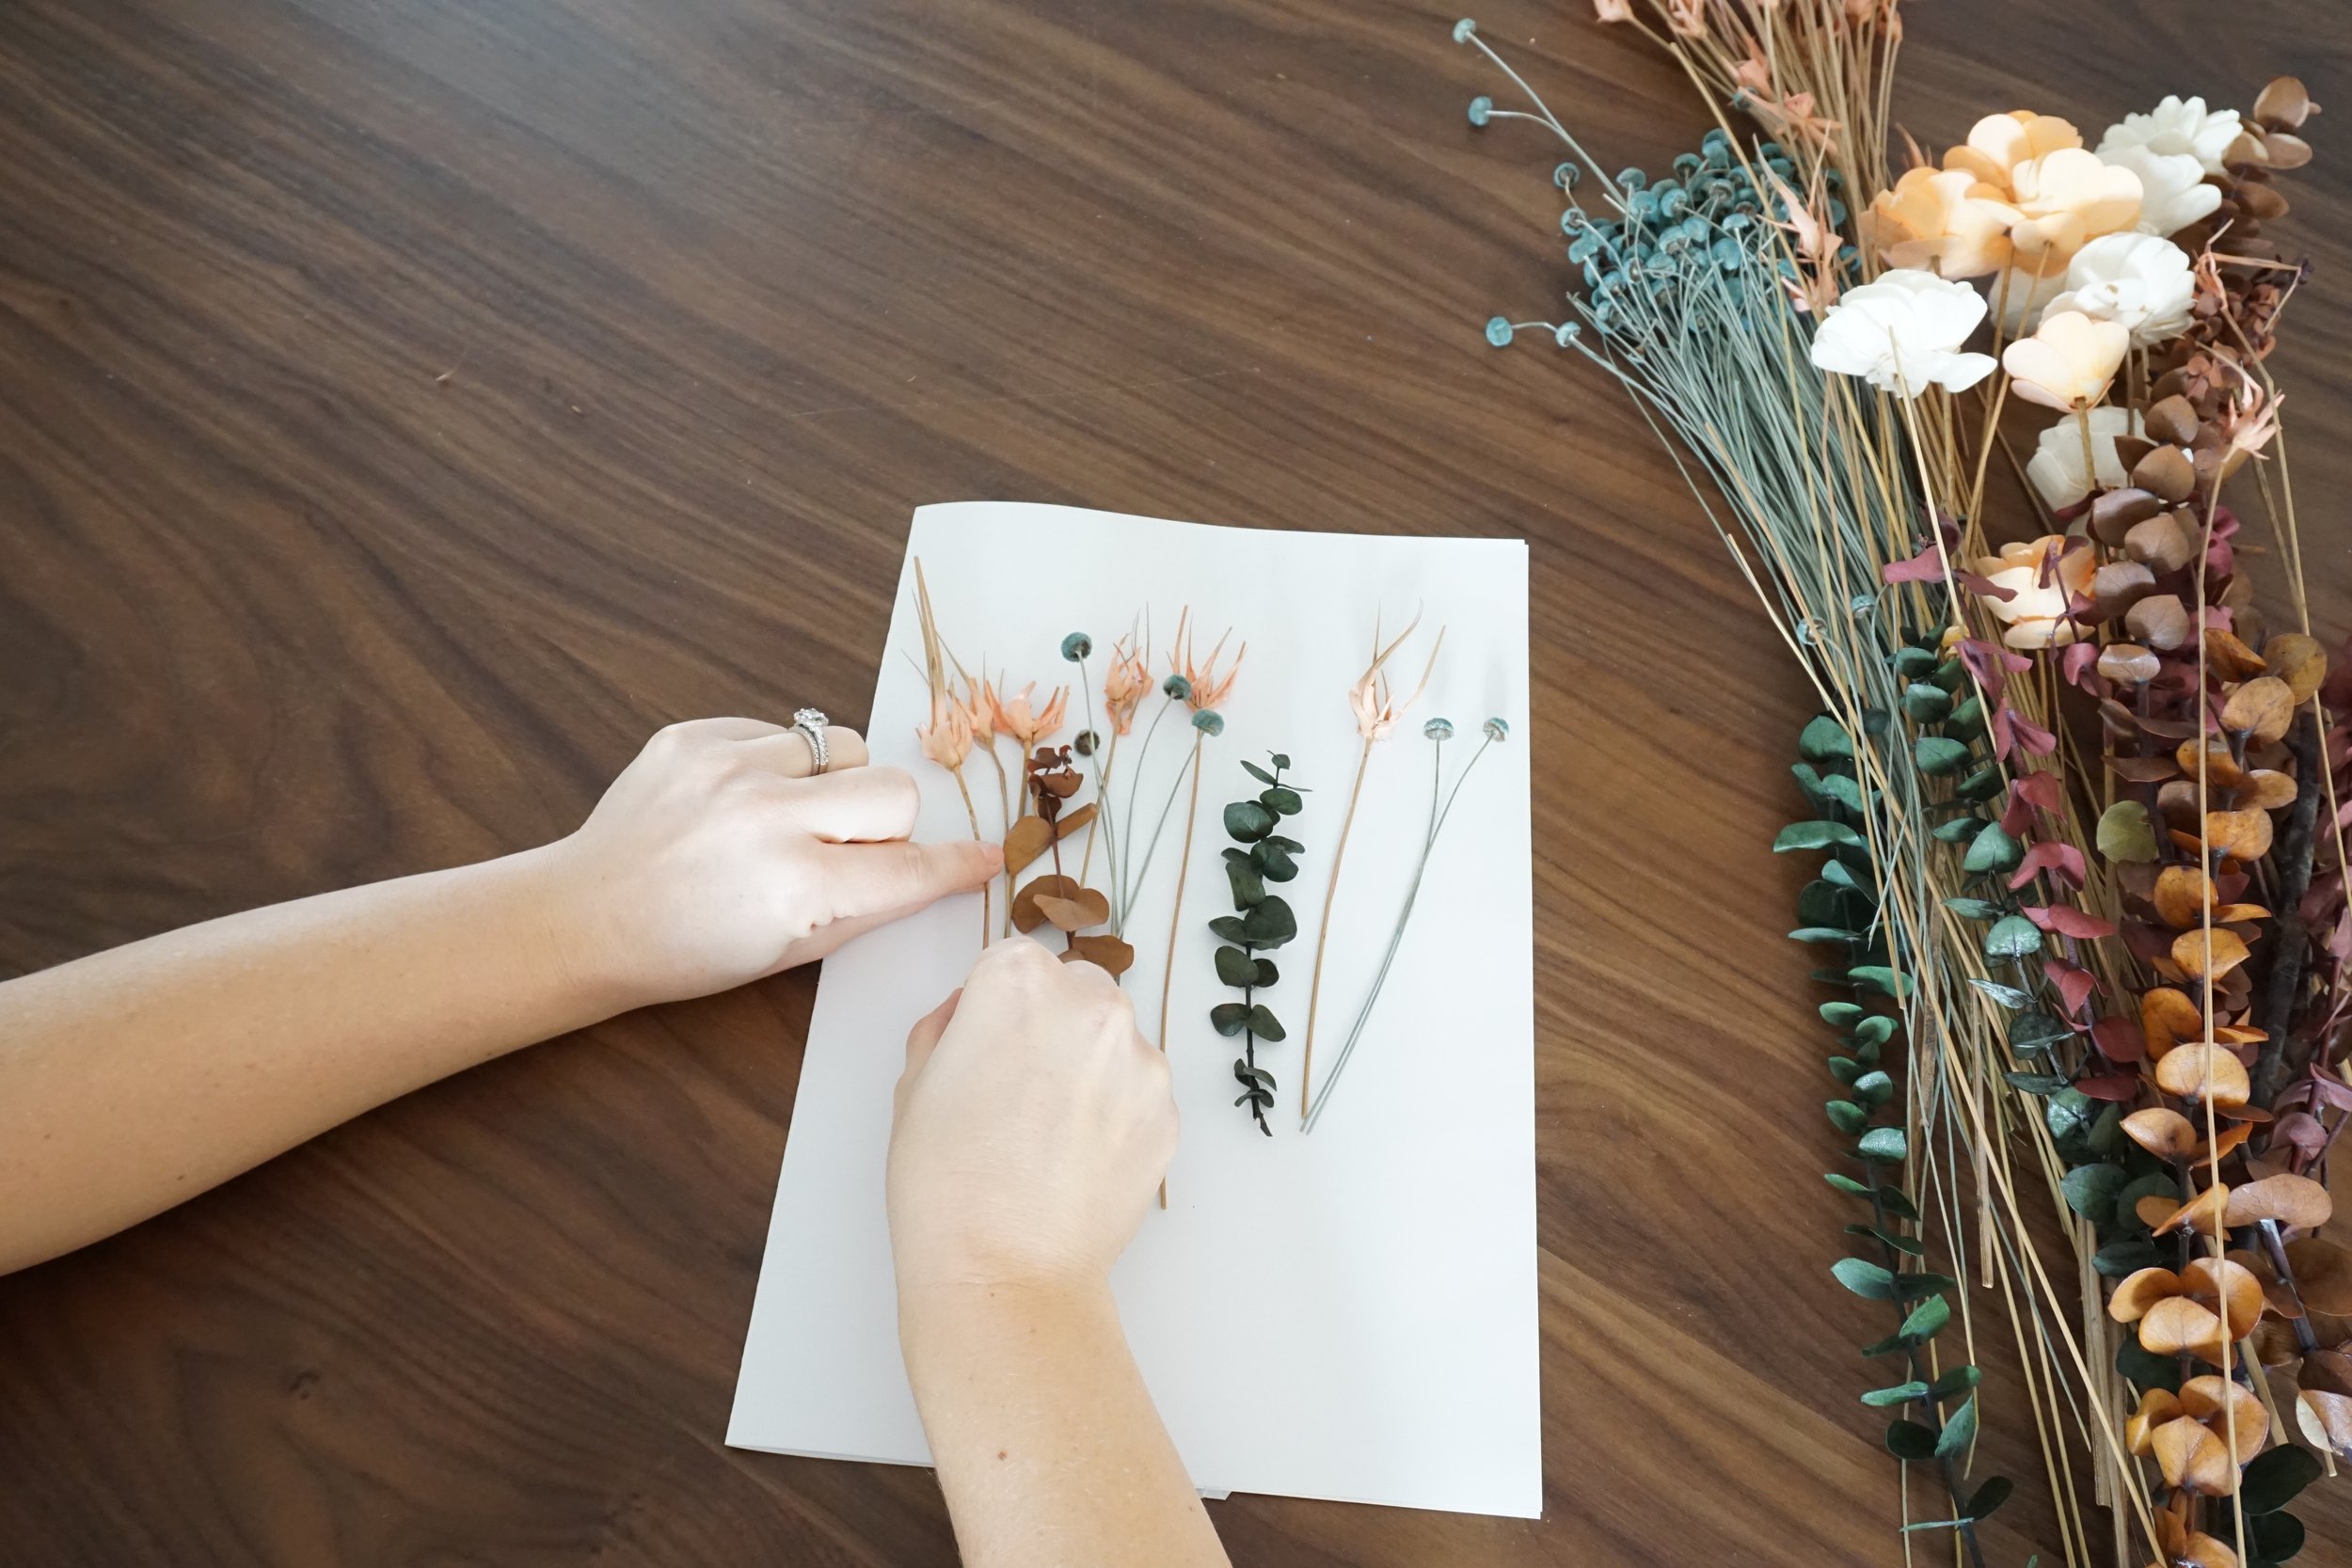
To get started, I removed the back of my frames and took out the white paper that was inside. I folded this white paper in half and used it to glue my flowers onto but you can also use cardstock paper or a very thin canvas. Then I picked out a few individual stems and started laying them on the paper to see how I liked the look of the different stems together. Once I decided which flowers I wanted to use, I began glueing them onto the center of the paper by just adding a tiny dot of glue onto each stem. I tried to keep the positioning and spacing of the stems organic and tried not to make them look too perfectly lined up or spaced out. Once the glue was dried I carefully put the paper with the flowers back into the frames and secured the back.
This project can be customized any way that you like. I chose to use a different mix and pattern of stems on each of my two frames. What I love about this project is that there is no one particular way to do it - you can get creative! I think this would be an easy and fun project to do with children or with friends. They can be designed for different seasons and even given as a gift!

