
How to Install Wallpaper: Beginner Easiest Method
Wallpaper is making a huge comeback in home design. From bold florals to subtle textures, wallpaper is an easy way to add personality and charm to any room. If you’ve never installed wallpaper before, don’t worry—you don’t need to be a professional to get great results. With the right tools, a little patience, and this simple step-by-step guide, you can transform your walls in just a weekend.
In this tutorial, we’ll focus on the paste-the-wall method. This is one of the easiest ways to hang wallpaper, especially for first-timers. Instead of applying adhesive directly to the paper, you’ll paint wallpaper paste onto the wall and then apply the wallpaper strip on top. It’s clean, beginner-friendly, and works beautifully with most types of traditional wallpaper.
Materials Needed for Best Results
Before you start, gather everything you’ll need for a smooth process. Having the right tools on hand ensures you’ll get the best results.
Wallpaper roll(s) – make sure you buy enough for your project, plus extra.
Wallpaper paste – specifically made for paste-the-wall installation. This one is my favorite.
Utility knife – for trimming excess wallpaper.
Smoothing tool – removes air bubbles and helps the wallpaper stick evenly.
Seam Roller - to smooth out seams.
Laser level or Plumb Line Level– to create a straight line for your first piece.
Paint roller or large brush – to spread paste across the wall.
Measuring tape – for accurate wallpaper strip lengths.
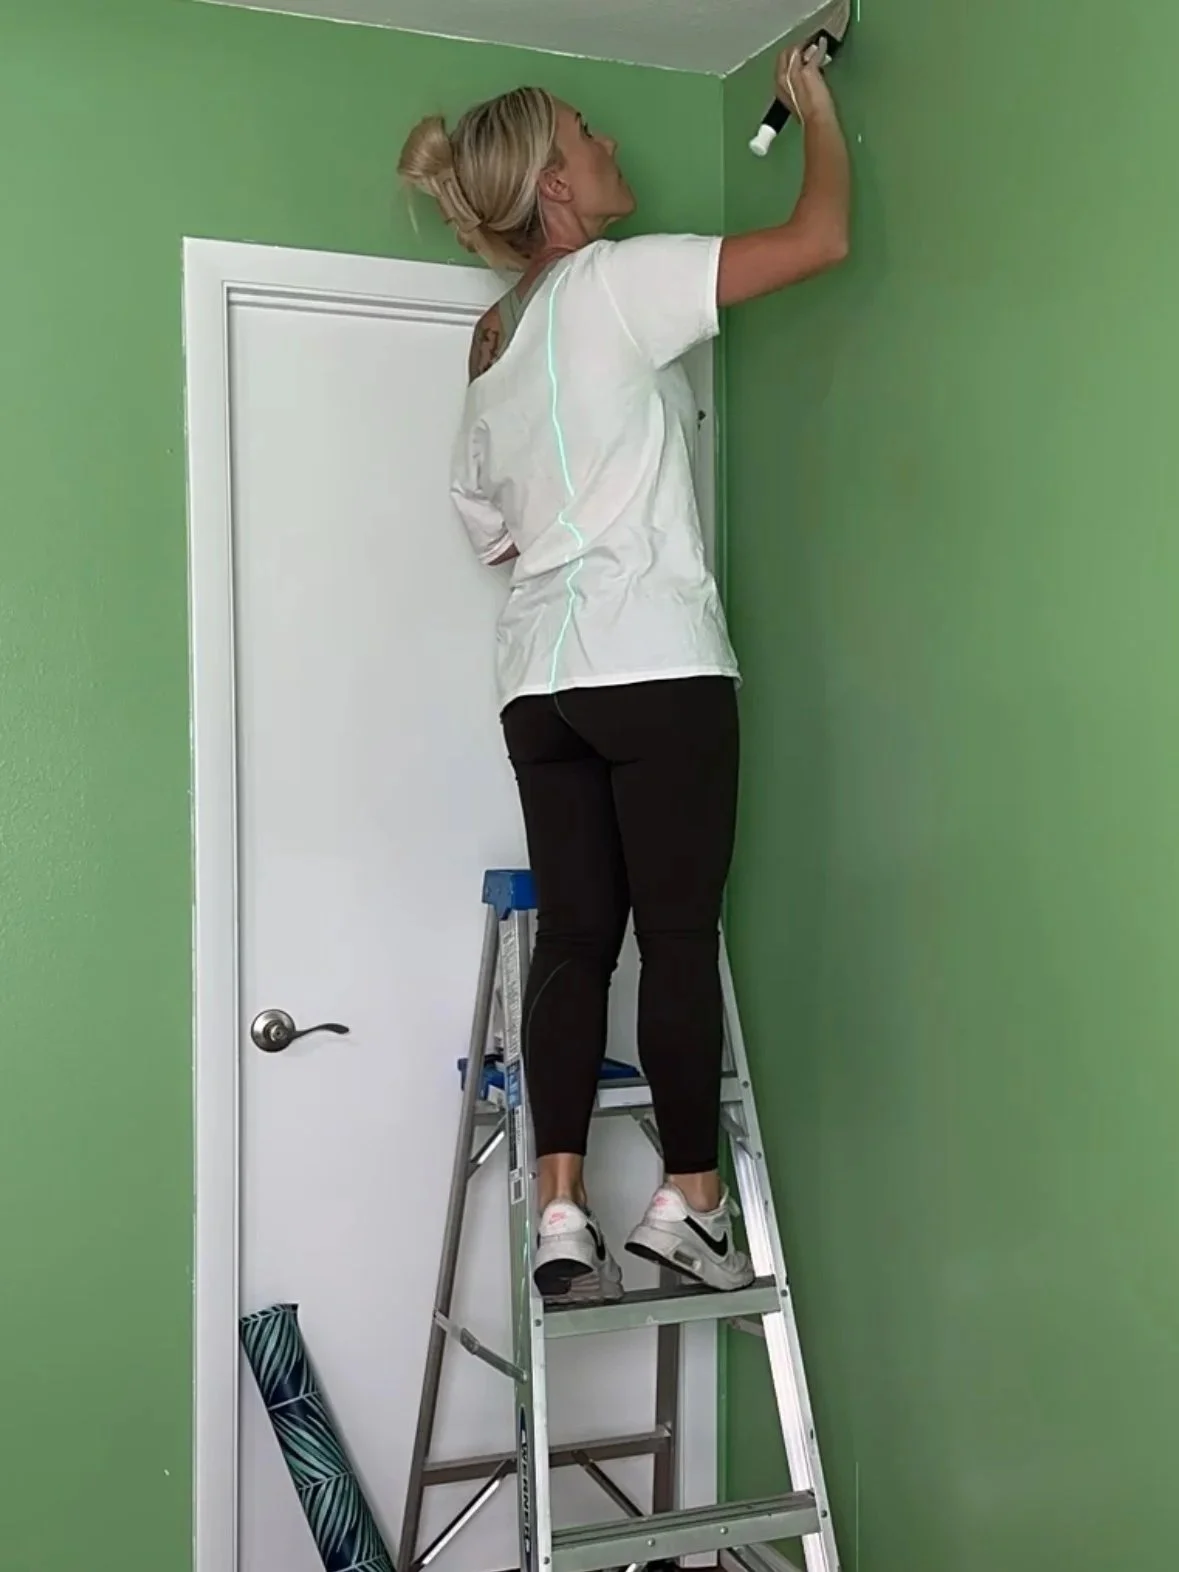
Step ladder – for reaching the top of the wall.
Drop cloth and sponge or paper towels – to protect floors and clean extra paste.

Step 1: Prepare a Clean Surface Before Hanging Wallpaper
Wallpaper will only look as good as the surface beneath it. To create a clean surface:
Fill and sand any cracks or nail holes using nail hole filler.
Wipe walls with a damp rag to remove dust or dirt. Use mild soap if walls are extra dirty or greasy.
If your walls are fresh drywall, be sure to paint them with primer first. If walls are already painted, no need to prime.
This step ensures the wallpaper adheres well and won’t peel later.
Can you apply wallpaper to textured walls? I have found that the paste-to -wall method of installing wallpaper has worked well on lightly textured walls. The walls in my home have an orange peel texture and this method has worked great. I have not experienced any issues with the wallpaper not adhering or being able to see the texture through the paper. Short answer, YES you can install wallpaper on lightly textured walls.
Step 2: Use a Plumb Line to Mark Your First Straight Line
Your first piece sets the tone for the entire project. Use a plumb line or level to mark a perfectly straight line from the top of the wall to the baseboard. This is where a laser level can be very handy.
Measure the width of your wallpaper roll.
Mark a vertical line out from the corner of the wall that is 1/2 inch smaller than the width of your wallpaper roll. The half inch will makeup for any discrepancies in your wall as most walls and not perfectly straight and plumb.
Double-check the line for accuracy.
This guideline ensures your first strip of wallpaper doesn’t start out crooked and continue to drift crooked as you work your way down the wall.


Pro Tip: I find it easiest to cut your first strip of wallpaper and work with a single strip instead of the whole roll. Before applying paste to the wall, measure the exact height of your wall from the edge of the ceiling to the top of the baseboard to determine the length of your first strip of wallpaper. Add 4 additional inches to this measurement and then cut your first strip of wallpaper. The extra 4 inches you added will give you 2 inches of excess at the top of your first strip and 2 inches of excess at the bottom.
Step 3: Apply Wallpaper Paste to the Wall
Instead of pasting the paper, this method has you coat the wall directly:
Use a paint roller or large paint brush to apply wallpaper paste from the top of the wall down.
Cover only enough space for one wallpaper strip at a time.
Keep coverage smooth and even.
This 'paste-to-wall' method is the easiest way to start wallpapering, especially for your first time.
Step 4: Hang the First Wallpaper Strip
With the paste applied, it’s time to hang your first wallpaper strip:
Start at the top, leaving 2 inches of excess wallpaper above.
Align the edge of the wallpaper with your plumb line for a perfectly straight line. You should have a little wallpaper that overhangs on the corner of the wall since your plumb line is a half inch smaller than your wallpaper roll.
Gently press the paper against the wall and smooth it downward using your hand at first and then going back over it with your smoothing tool to push air bubbles out from the center toward the edges.
If you get a wrinkle that cannot be smoothed out, gently lift the paper off the wall and reapply. The beauty of this method is that it is easy to pull off or move the wallpaper around as you are installing it.


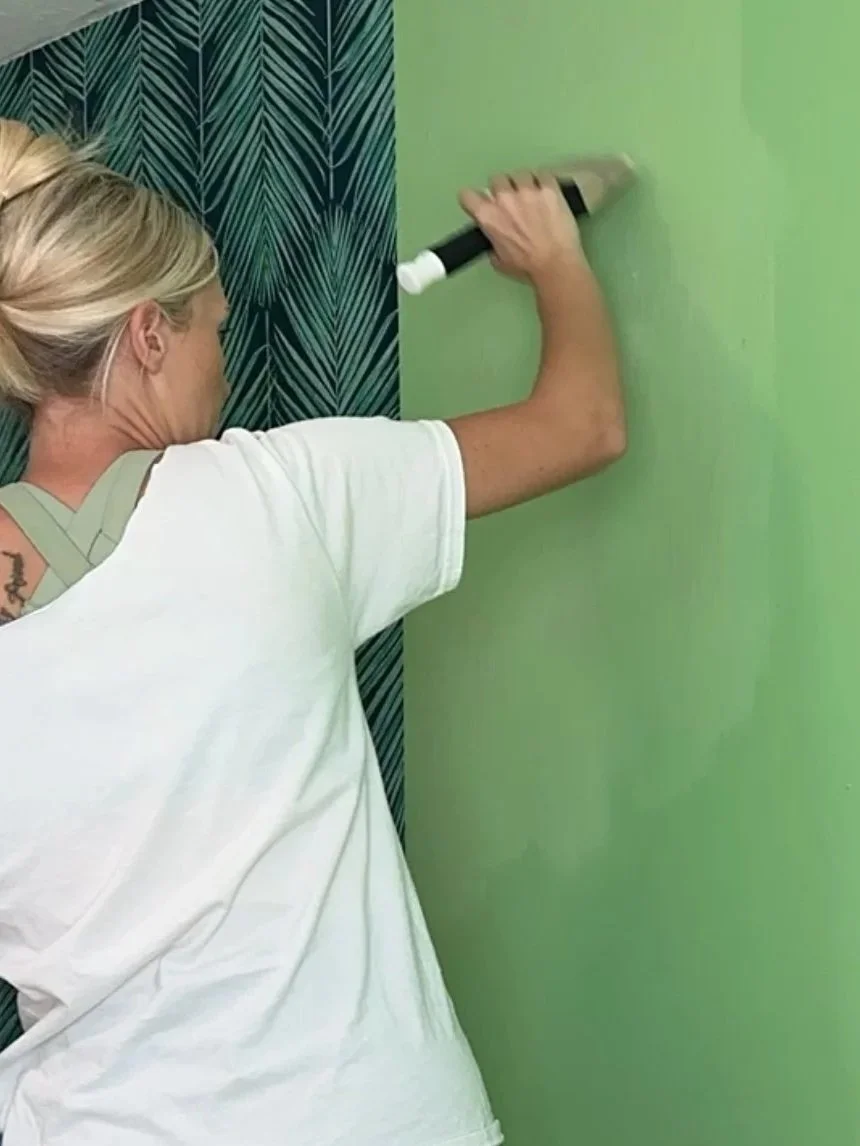
Step 5: Trim Excess Wallpaper with a Utility Knife
Once the strip is secure, use a sharp utility knife to trim away extra material:
Trim the excess wallpaper at the starting corner, ceiling and baseboard.
Use the straightedge of your smoothing tool to press firmly against the edge you are cutting and run your knife along the tool for crisp cuts.
Wipe away leftover paste immediately with a damp rag or paper towels.
A sharp blade ensures the best results without tearing the paper.

Step 6: Install the Next Strip of Wallpaper
Now it’s time for the next strip:
Before applying paste, hold up your wallpaper roll to the wall and match the pattern carefully with the previous strip. Making sure you have a couple inches of excess at the top and bottom, mark your roll and cut your second strip of wallpaper.
Apply paste for another wallpaper roll width (this time apply paste a half inch wider than your wallpaper roll).
Gently press the paper against the wall and smooth it downward using your hand and smoothing tool to push air bubbles out from the center toward the edges.
Butt the edges together to match the pattern without overlapping the wallpaper strips.
Smooth thoroughly with your smoothing tool to avoid bubbles and gaps.


Step 7: How to Tackle the Corner of the Wall
Corners are one of the trickiest parts for beginners. Here’s the easy way:
Don’t wrap a full strip around a corner of the wall.
Instead, cut a piece slightly wider than the remaining space (2-3 inches wider). You will want to ensure your cut is perfectly straight down the wallpaper roll if you plan to continue the wallpaper onto the next adjoining wall and continue the pattern.
Apply it so it just overlaps the corner.
Start the next strip on the adjoining wall matching up the pattern.
If you are not continuing the wallpaper onto the next adjoining wall, then you will simply use your straightedge tool to cut off the excess wallpaper.
Pro Tip: Working around corners can be very difficult and frustrating. The easiest way is to end your wallpaper into the corner and then start a new strip on the adjoining wall working from the corner out. You will have to determine if this will effect your pattern too much or look odd in the space. If ending your wallpaper and starting a new strip in the corner won't look right in your space, then follow the steps above.

Step 8: Finishing Touches for Best Results
After hanging all the strips:
Check seams and smooth them again with your tool. I like using this seam roller.
Clean extra paste off the wall and seams with a damp cloth.
Take a step back—your first time wallpapering should already look professional!
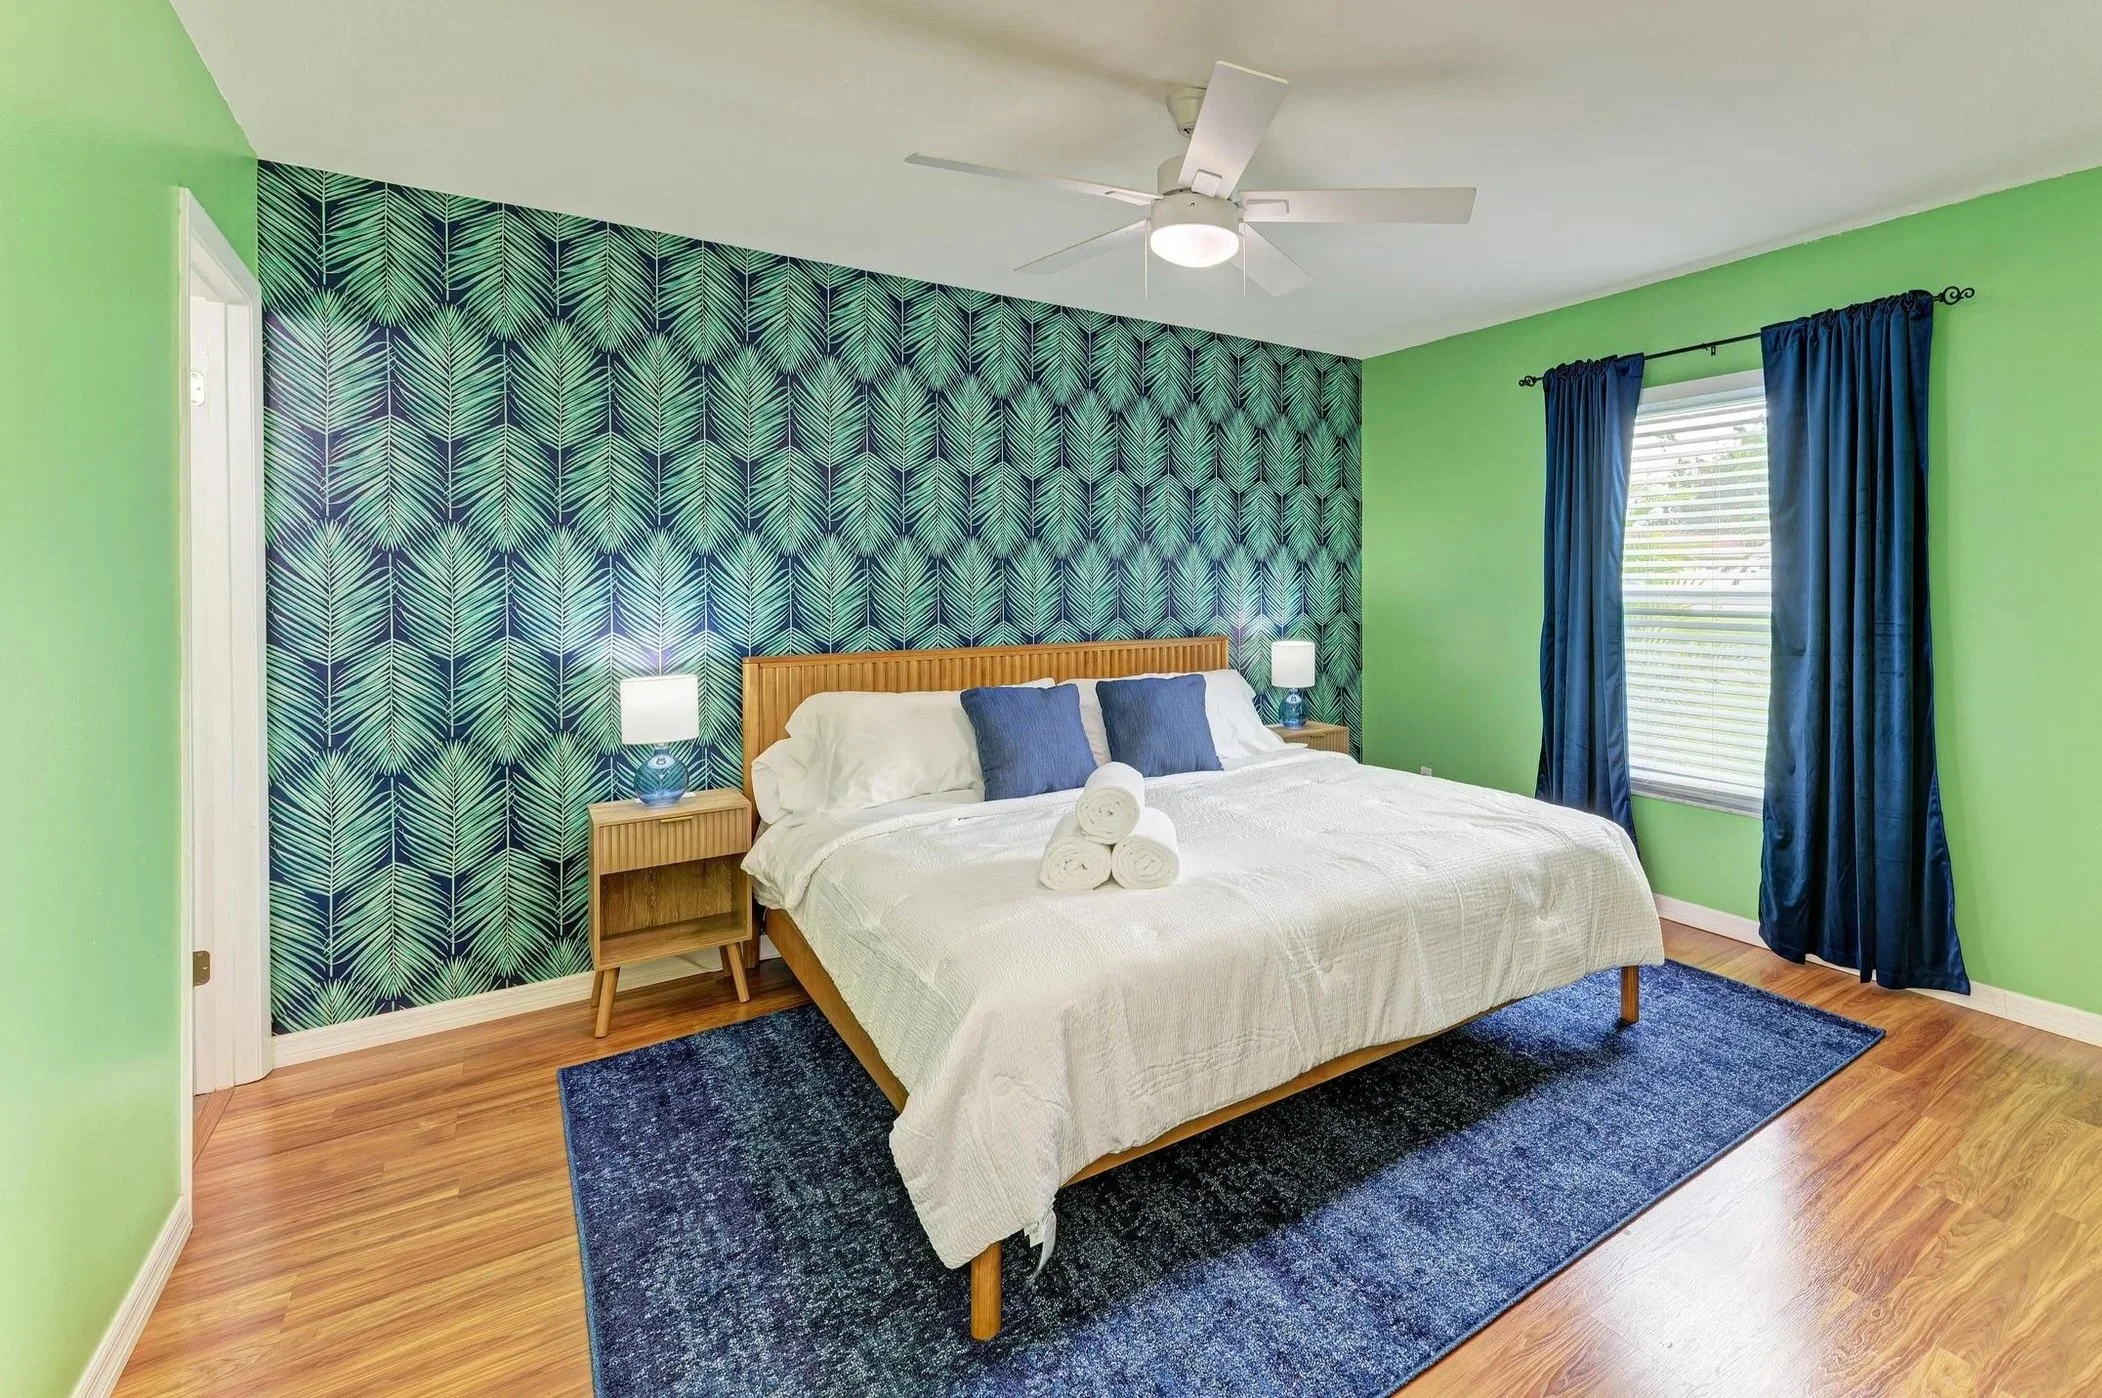
Choosing the Right Type of Wallpaper for Paste-the-Wall
There are different types of wallpaper, and each works a little differently with this method. In my own personal experience, I have had success using this method on all different types of wallpaper.
Traditional wallpaper – requires paste and gives a timeless look. Paste-the-wall technique works well.
Non-woven wallpaper – designed for paste-the-wall.
Vinyl wallpaper – durable, washable, and great for kitchens or bathrooms. Paste-the-wall technique works well.
Peel and Stick Wallpaper - designed with a pre-applied adhesive on its back. Not easy to work with and cannot be moved around on the wall once applied. Paste-the-wall technique works well.
The good news is that you can use the paste-the-wall method on almost any kind of wallpaper!

Final Thoughts: The Easy Way to Install Wallpaper for Beginners
Installing wallpaper may seem intimidating, but the paste-the-wall technique is an easy way for beginners to achieve professional-looking walls. By starting with a plumb line, applying wallpaper paste correctly, and smoothing each wallpaper strip as you go, you’ll get the best results even on your first time.
Whether you’re tackling an accent wall or an entire room, this step-by-step beginner's guide will help you confidently transform your space. Grab your tools, prep your walls, and roll out that wallpaper—you’ll be amazed at how quickly your room is transformed using wallpaper.


HEY THERE, I’M ASHLEY!
Here to inspire beginner DIYers!