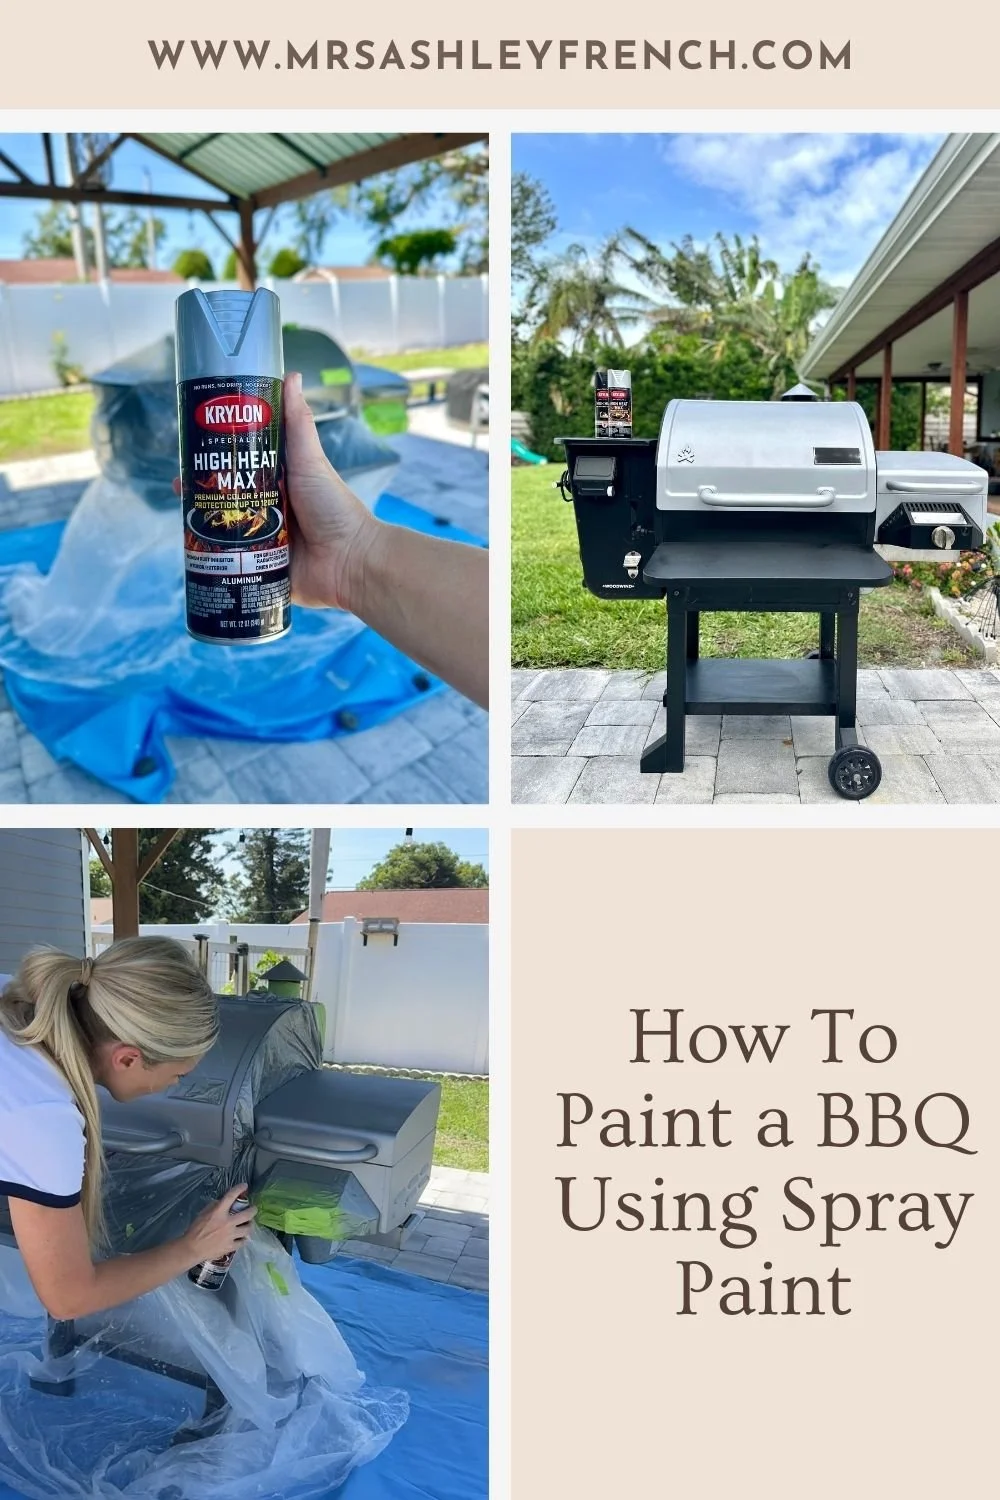
How to Paint a BBQ Grill Using Spray Paint
If your outdoor grill is looking faded, rusty, or just outdated, don’t rush out to buy a new one. With a little time and the right products, you can completely transform your barbecue using a specialty spray paint designed for high temperatures. I recently tested and used Krylon's High Heat Max spray paint to give our BBQ grill a refresh and was ecstatic over the results. Before you wonder, no this blog post is not sponsored. This is my experience and honest feedback from using this new spray paint from Krylon.
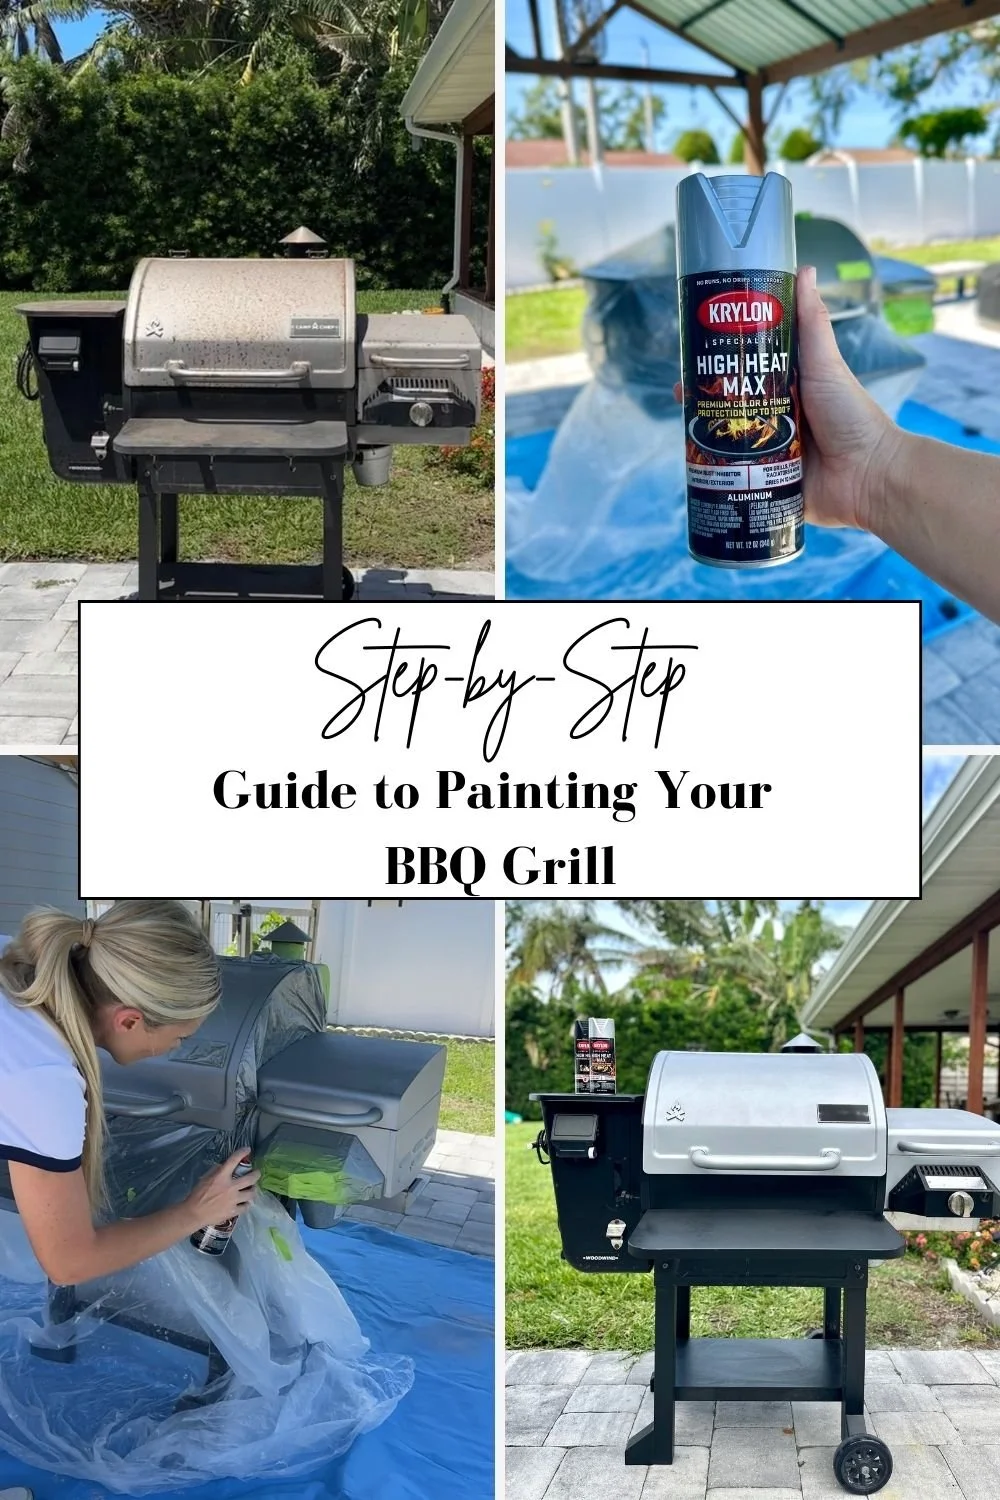
In this guide, I’ll walk you through how to paint a grill—from cleaning and prepping the surface to spray painting a professional looking finish. With the proper prep work, your grill will look brand-new and last for many more backyard cookouts.

Supplies You’ll Need
Before you begin, gather these materials so the project goes smoothly:
Krylon High Heat or High Heat Max Spray Paint (color and finish of your choice)
Grill cleaner or degreasing solution - I tried these: Bar Keeper's Friend and Zep Oven and Grill Cleaner
Bucket with warm, soapy water or garden hose
Scrub brush or sponge
Wire brush, steel wool, or sandpaper for rust removal (orbital sander optional)
Mineral spirits or rubbing alcohol (for final wipe down)
Painter’s tape
Aluminum foil or plastic wrap (to cover areas you don’t want painted)
Drop cloth, old sheets, or cardboard (to protect the ground)
Safety goggles, gloves, and a mask/respirator
Screwdriver or wrench (to detach grill parts if needed)
Having everything ready before you start ensures a stress-free painting process.
Why Use Krylon High Heat Spray Paint for Your Grill?
High heat resistance – Unlike regular paint, it is formulated to handle the temperatures your grill reaches.
Rust protection – Helps prevent corrosion and extend the life of your grill.
Smooth coverage – The spray formula ensures even coats without brush strokes.
Variety of finishes – Choose matte, gloss, or metallic tones to match your style.
Step 1: Clean the Grill
Before painting, your grill must be completely clean and free from grease, rust, and peeling paint. This ensures proper adhesion and a long-lasting finish.
Disconnect and remove parts – Make sure the grill is off, the propane tank is removed, and any detachable grates, shelves, or side burners are taken off.
Degrease thoroughly – Use a grill cleaner or degreasing solution with warm, soapy water. Scrub all surfaces with a stiff brush or sponge.
Rinse and dry – Rinse off any cleaner residue and let the grill dry completely.
Remove rust and flaking paint – Use a wire brush, steel wool, sandpaper or orbital sander to smooth rough spots and eliminate rust patches.
Wipe down with mineral spirits – This removes lingering dust, grease, and sanding particles (an optional step but highly recommended).
Pro Tip: Focus only on the exterior metal surfaces of the grill. The interior cooking area should never be painted.


Step 2: Prep and Mask Off the Grill
There are areas of the grill that you should not spray paint so you will need to cover these areas before you begin.
Mask off areas not to be painted – Use painter’s tape and foil to cover handles, knobs, logos, or any areas you want to keep paint-free.
Cover areas for two-toned paint jobs - Use an old towel, sheet or drop cloth to cover sections of the grill if you are doing a two-toned color paint job like I did.
Prevent overspray - Use crumpled up newspaper or foil to put in areas that may have holes to prevent overspray. You can also use a large piece of cardboard and hold it up as a shield while you spray the paint.
Step 3: Prep the Painting Area
Spray painting can get messy, so taking the time to set up your workspace is essential.
Choose a well-ventilated space – Ideally outdoors, or in a garage with doors open.
Protect surrounding areas – Lay down drop cloths, plastic sheeting, or cardboard around and under the grill to catch overspray.
Wear protective gear – Safety goggles, gloves, and a mask or respirator (if not painting outside) will protect you from paint fumes.


Step 4: Apply High Temperature Spray Paint
Now comes the fun part—transforming your grill with a fresh coat of paint. You can stick to one color on the entire grill or choose to do a two-toned look like I did.
Shake the can well – At least 1–2 minutes before starting, and re-shake every few minutes while working.
Spray light coats – Hold the can about 8–12 inches away from the surface. Use smooth, sweeping motions, slightly overlapping each pass for even coverage.
Start with hard-to-reach areas – Spray corners, edges, and around hardware first. Then move to the larger flat surfaces.
Apply multiple thin layers – Three to four coats are usually best. Let each coat dry according to the instructions on the Krylon label (usually 10–15 minutes between coats).
Avoid drips – Light, even layers prevent runs and ensure a professional finish.


Step 5: Cure and Reassemble the Grill
Allow full drying time – Most Krylon high-heat paints require 24 hours to fully cure. Check the can for specific recommendations.
Reattach parts – Once the paint is fully dry, reassemble grates, burners, and accessories.
Heat cure if required – Some high-heat paints perform best after being exposed to heat. Check your paint for details on this.


FAQ: Painting a Grill with Spray Paint
Can you paint the inside of a grill?
No. Never spray paint the inside of a grill or any surface that comes into direct contact with food. Paint is only safe for the exterior and non-cooking areas.
Do you need to use high-heat spray paint on a grill?
Yes. Regular spray paints will bubble and peel when exposed to high temperatures. Krylon’s high-heat formulas are designed specifically for grills, fire pits, and other metal surfaces exposed to heat.
How long does it take for Krylon spray paint to dry on a grill?
Most coats dry to the touch in 10–15 minutes, but a full cure typically takes 24 hours. Always check the instructions on the can for exact drying times.
Will the paint peel or chip when the grill heats up?
Not if you use a high-heat resistant paint and follow proper prep steps. Removing rust, cleaning thoroughly, and applying thin, even coats all help the paint last longer.
Can I change the color of my grill completely?
Yes! Krylon high-heat spray paint comes in several finishes and shades, allowing you to update your grill’s look to match your outdoor space.
How long will the paint job last?
With proper prep and care, a painted grill can stay looking fresh for several years. Storing the grill with a cover and avoiding harsh scrubbing on painted areas will extend the life of the finish.
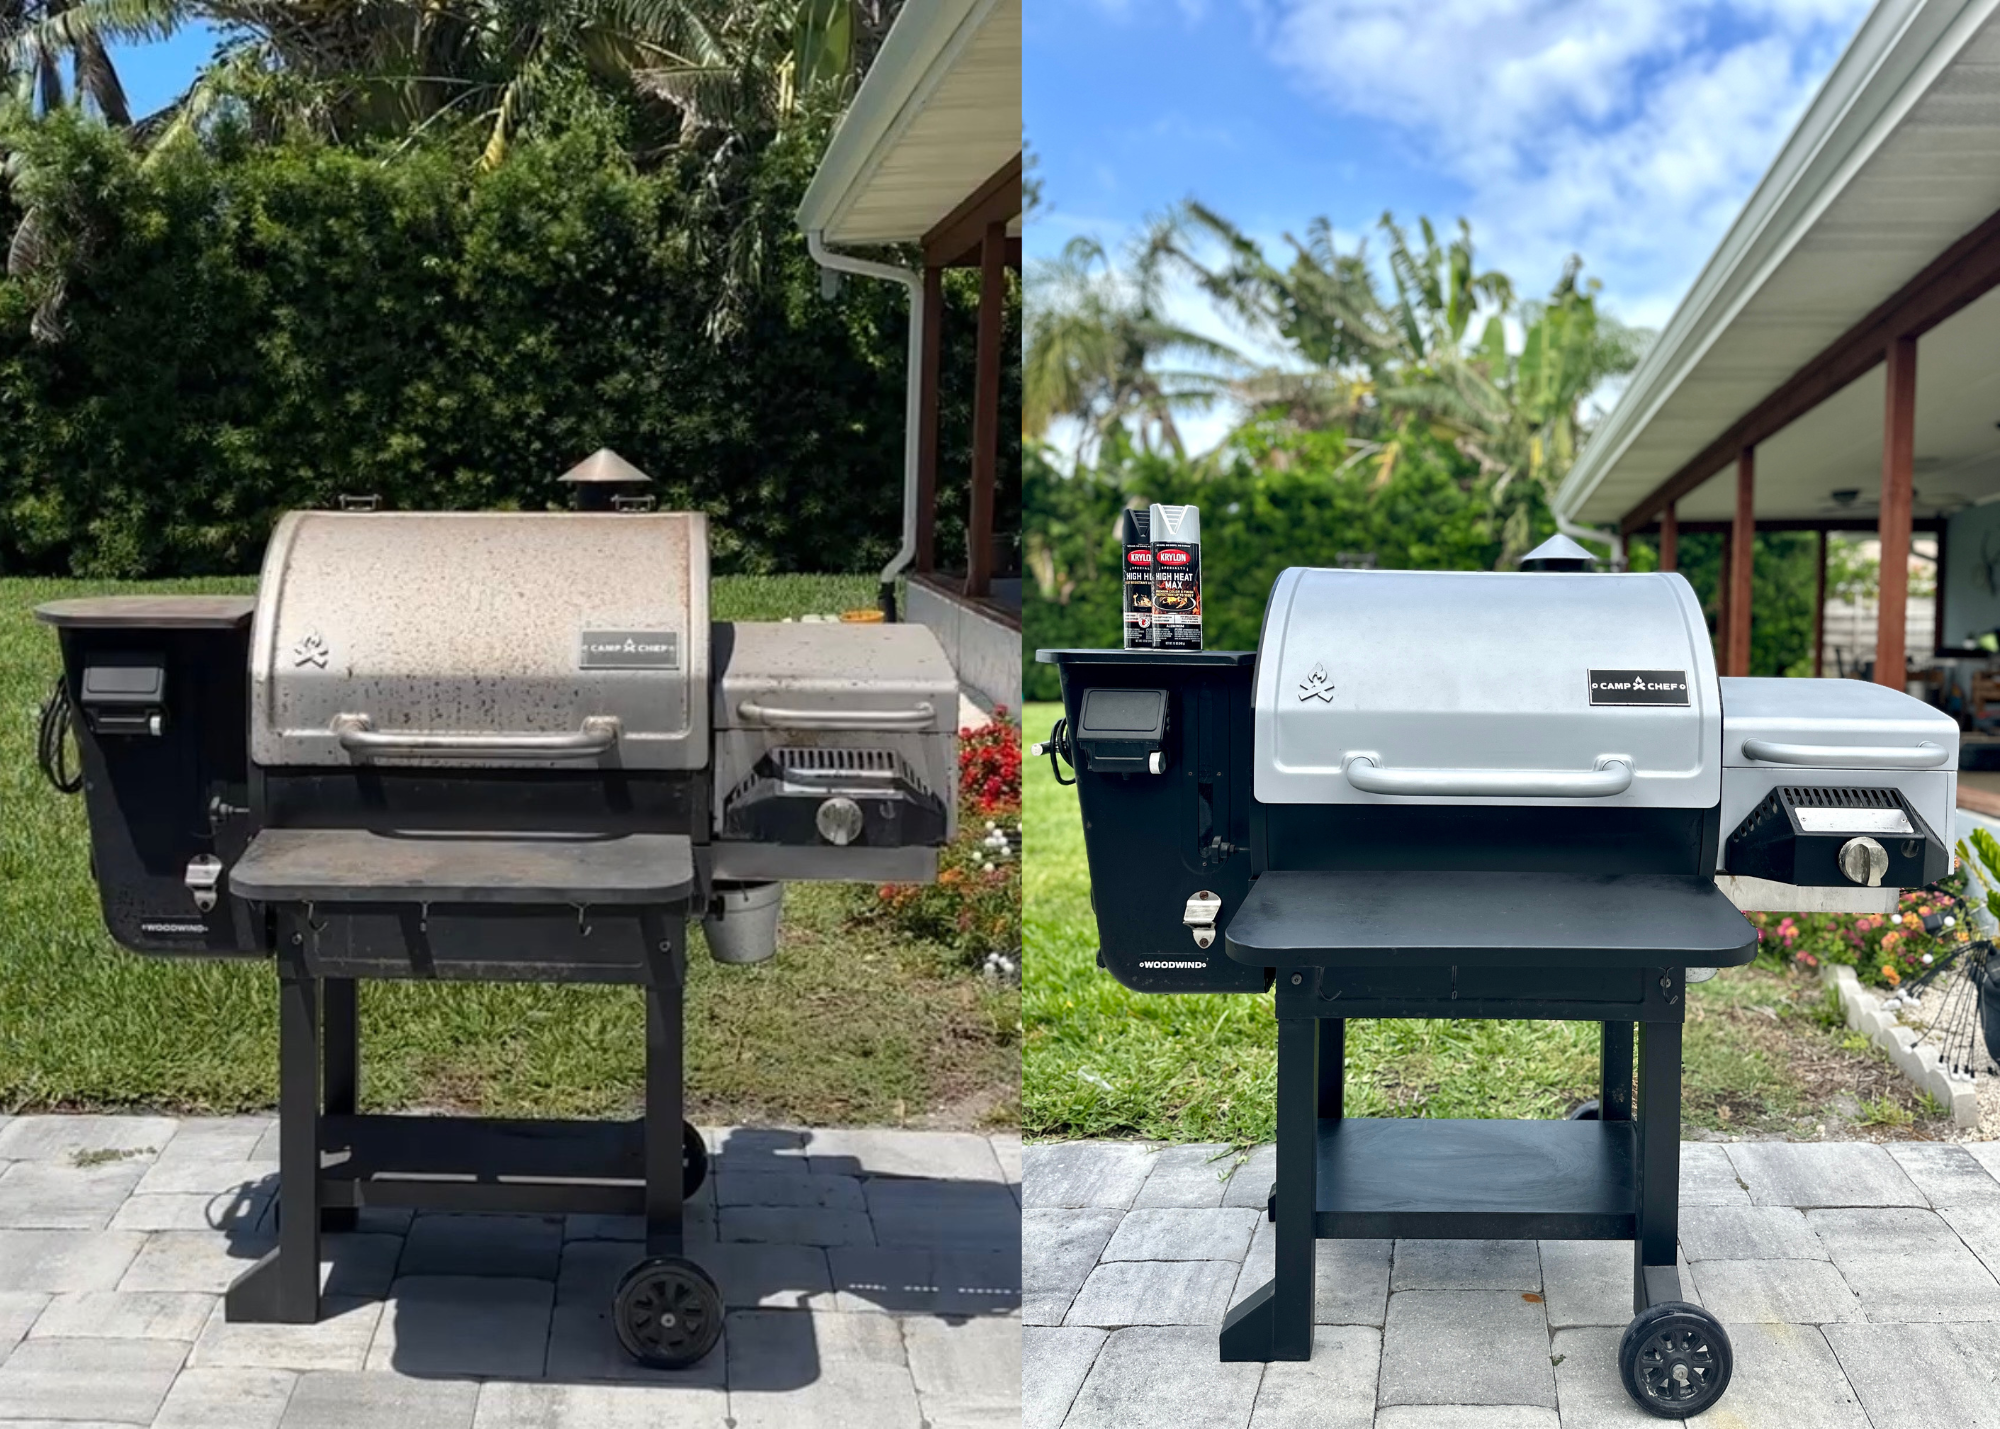
Final Thoughts: A Fresh Look for Your Outdoor Space
I was honestly blown away at how great our grill looked after giving it a fresh coat of paint. This project took only one day and was a very easy weekend DIY project. With proper prep, high-heat resistant paint, and a couple hours, our grill went from looking like trash to looking brand new again! So if you are wondering if it's worth spray painting your BBQ grill or smoker, my answer is YES!