Chandelier Makeover
Thanks to Krylon for sponsoring this post. I received compensation but all opinions stated here are my own.
When we bought our home in March 2021, there was an outdated chandelier hanging in the dining area off of the kitchen. I really hated it and knew we would replace it at some point. When I started shopping online for a replacement light I kept seeing similarities between the outdated light and the new ones. This gave me the idea to keep the old chandelier and try to transform it into something new. If you follow me on Instagram then you know that I am a pretty frugal shopper when it comes to my home and I love finding ways to transform thrifted items or create dupes for pricey home decor.
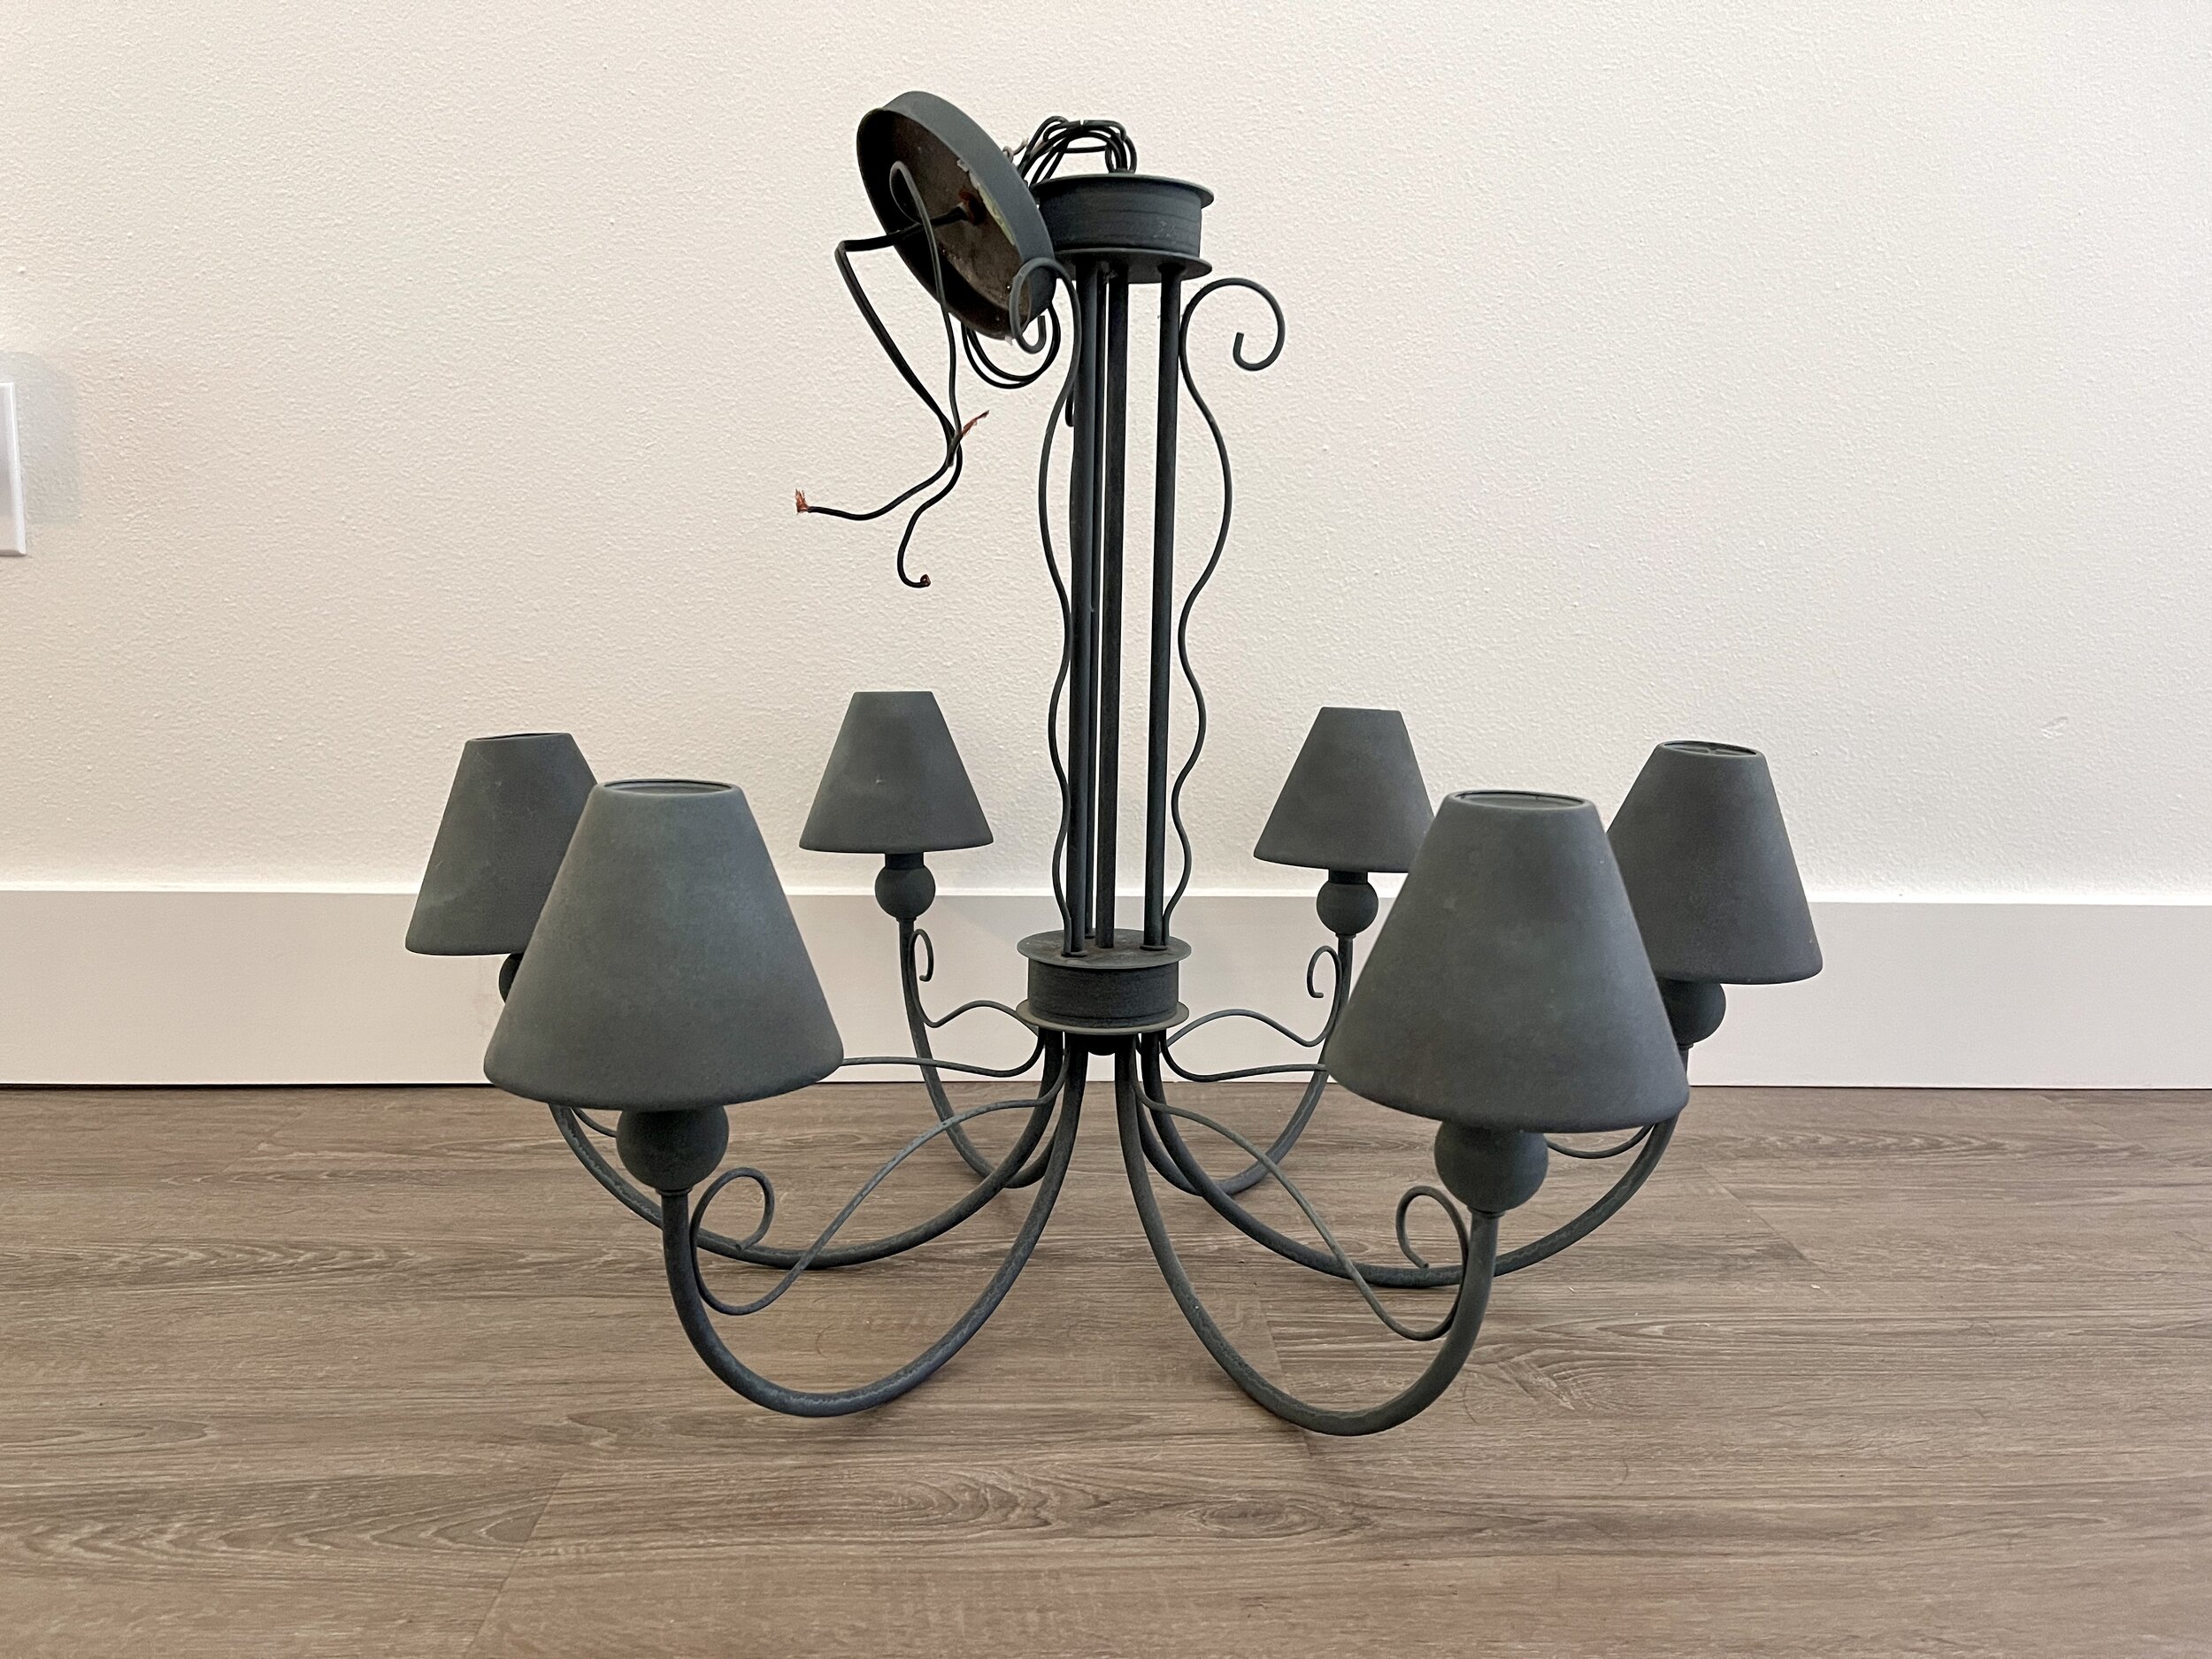
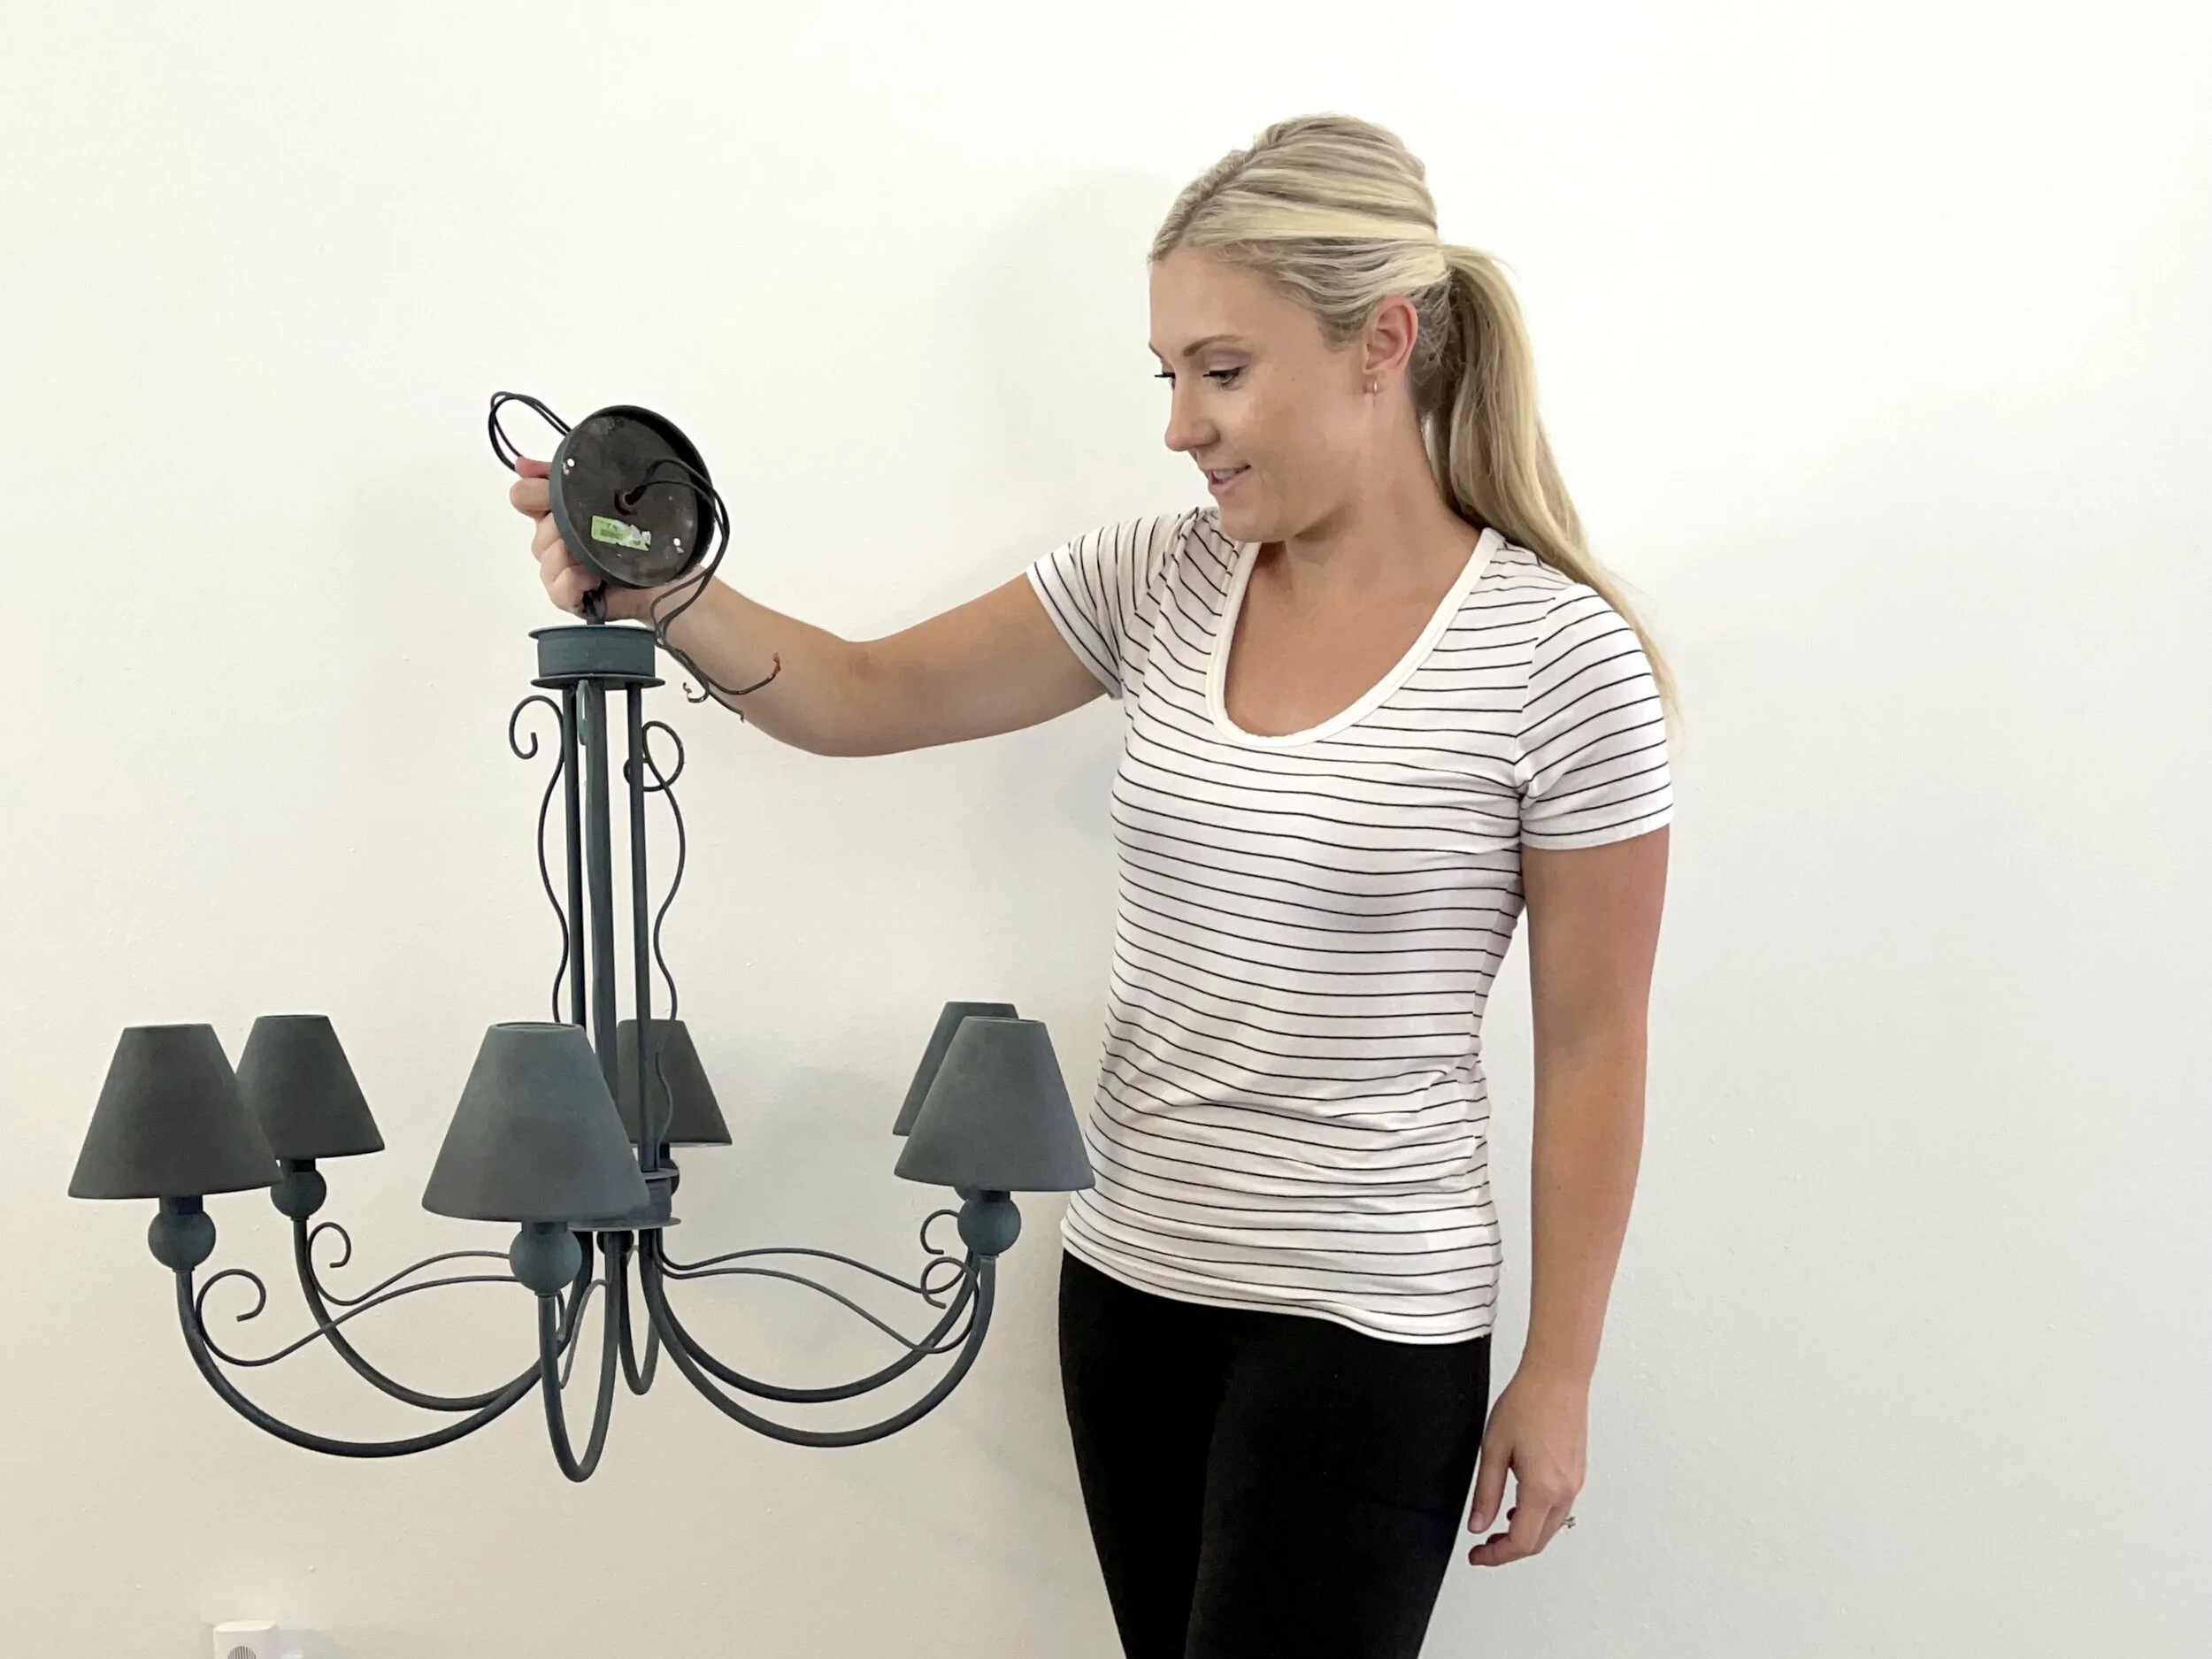
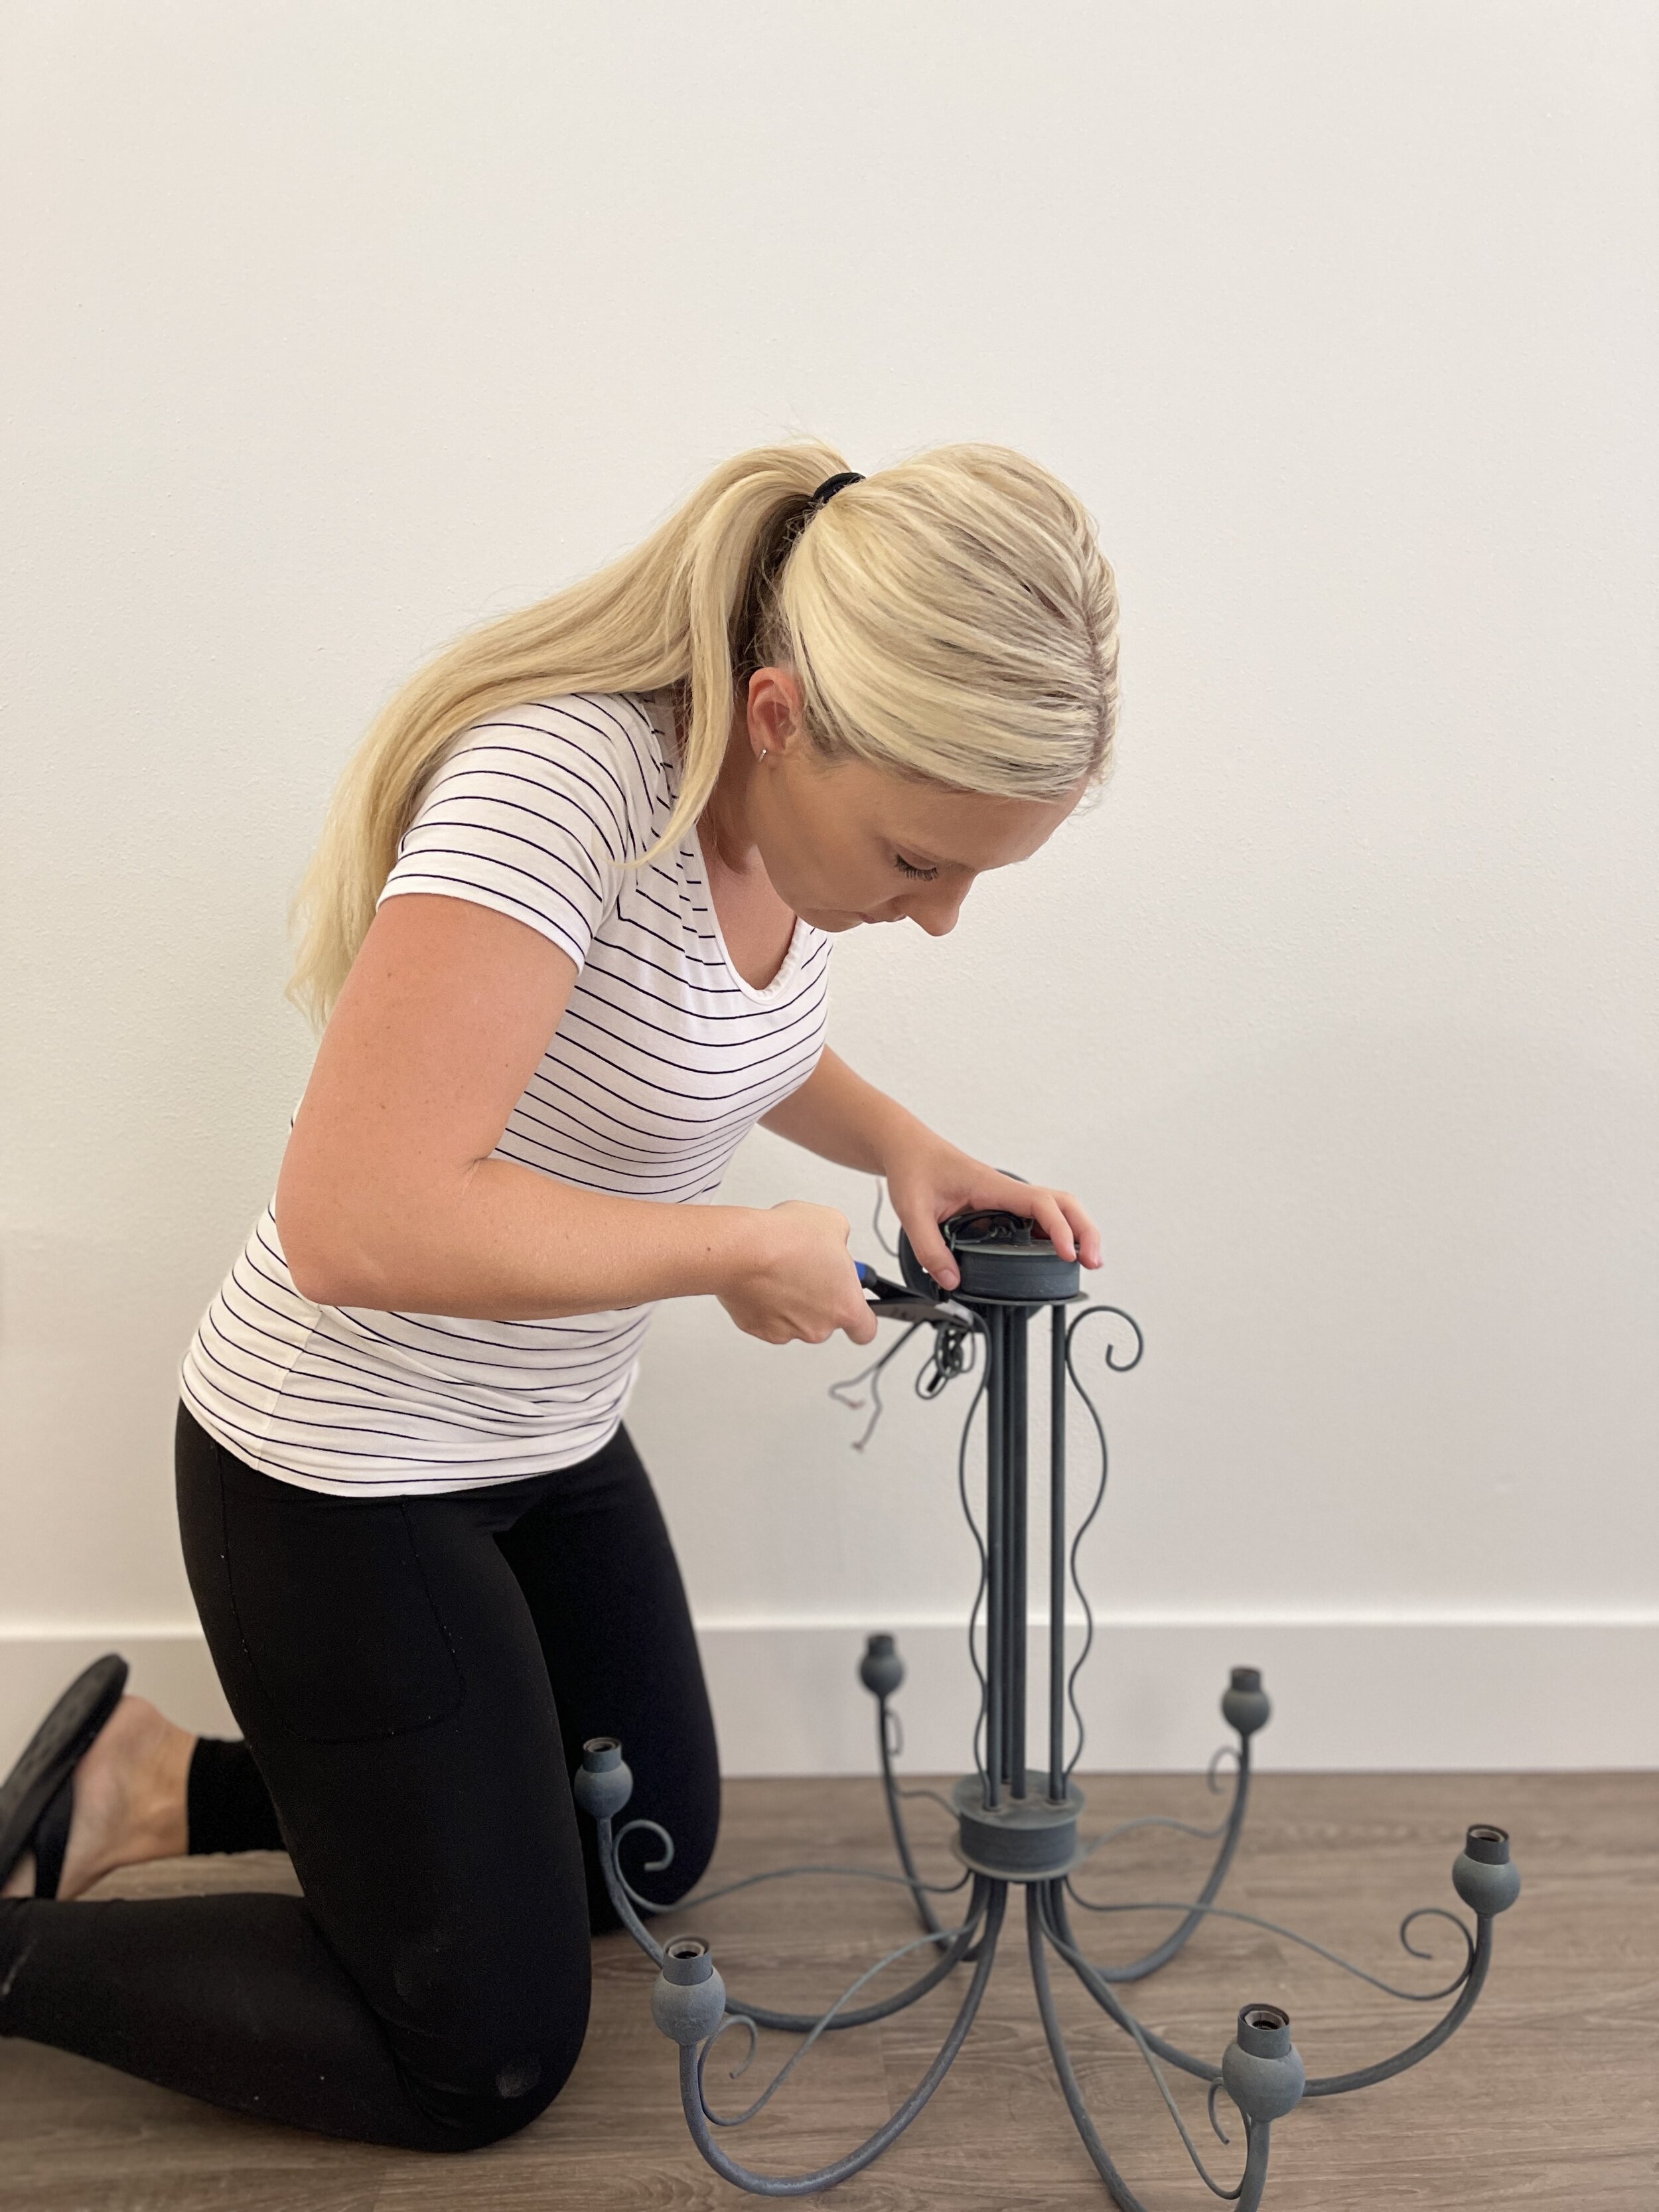
Looking at the outdated chandelier I decided that I would need to remove the swirly pieces, paint it a new color, and replace the shades. The swirly details actually popped right off when I started bending them with a pair of pliers. Once they were removed, I needed to prep the chandelier for paint. I cleaned the entire light with an all purpose cleaner and then removed the chain and the part of the light that screws into the ceiling.
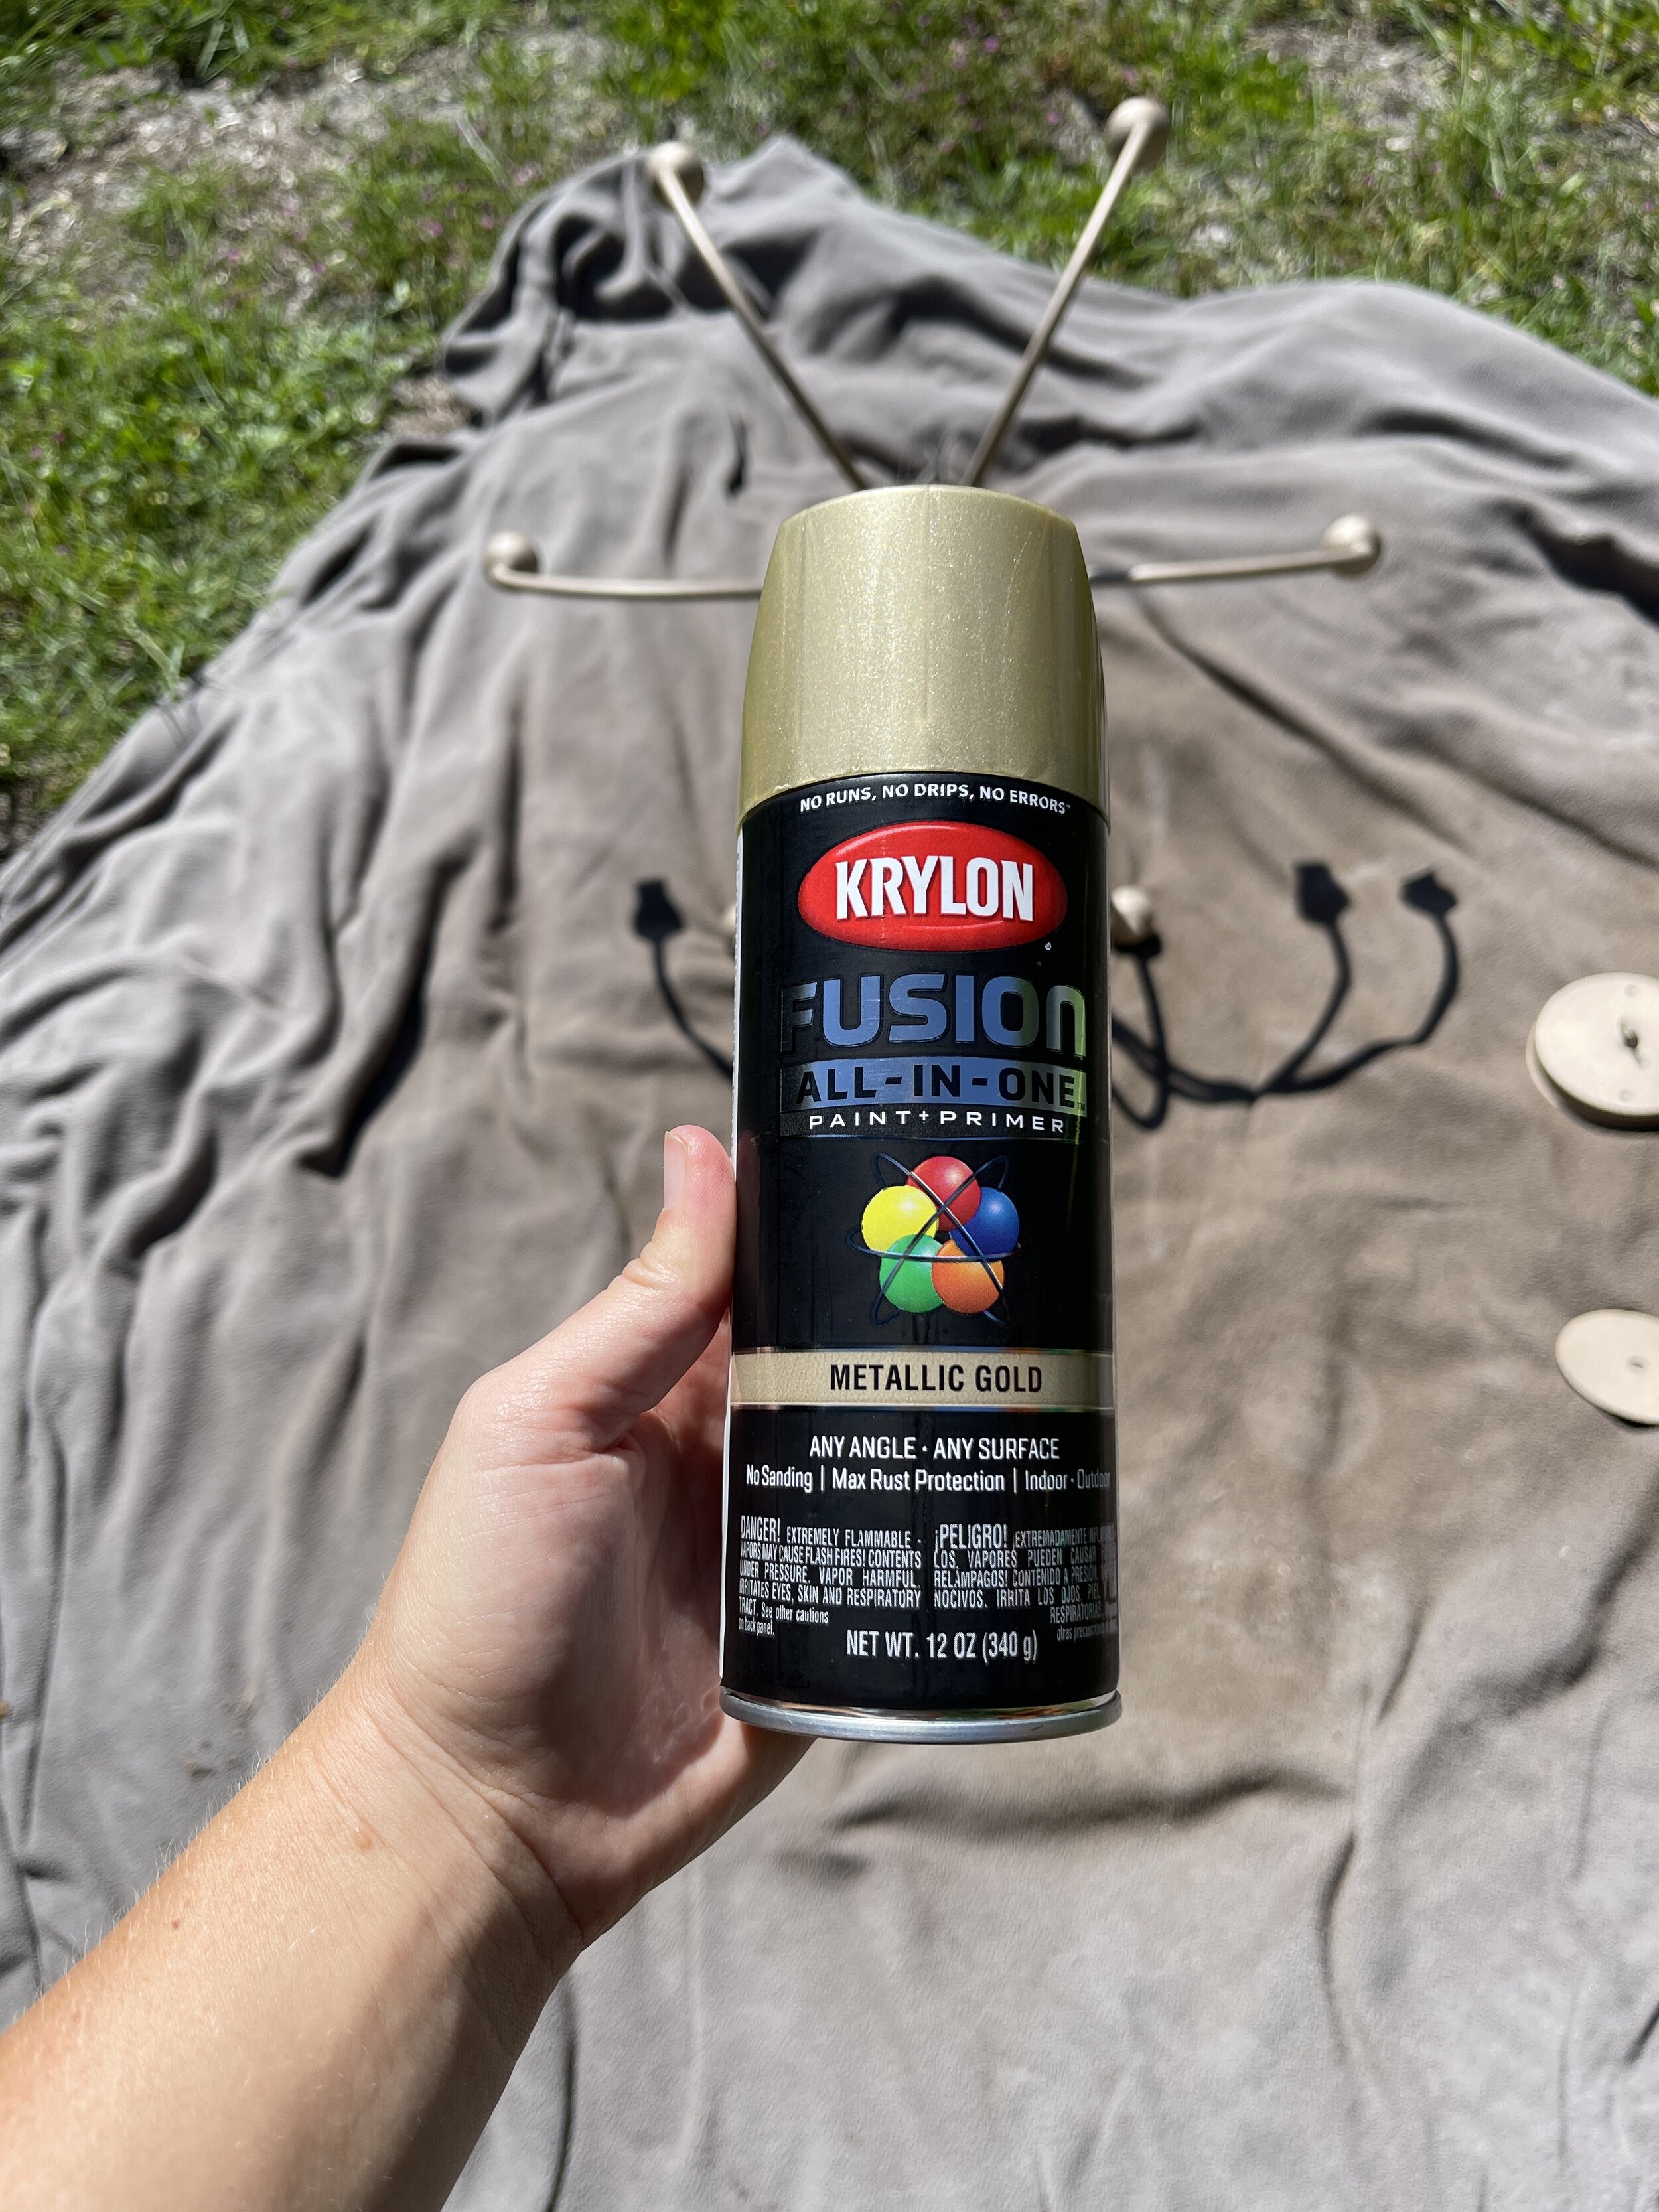
My go-to spray paint for all my DIY projects has always been Krylon brand. They have everything from paint+primer, chalky paint, metallic paint, dry-erase paint, high heat paint, frosted glass paint and more. I like their spray paints because they are very easy to apply, they adhere to many surfaces, dry very fast, go on smooth without any runs or drips, and leave you with a durable long-lasting finish. For this project I went with their Fusion All-In-One spray paint in Metallic Gold.
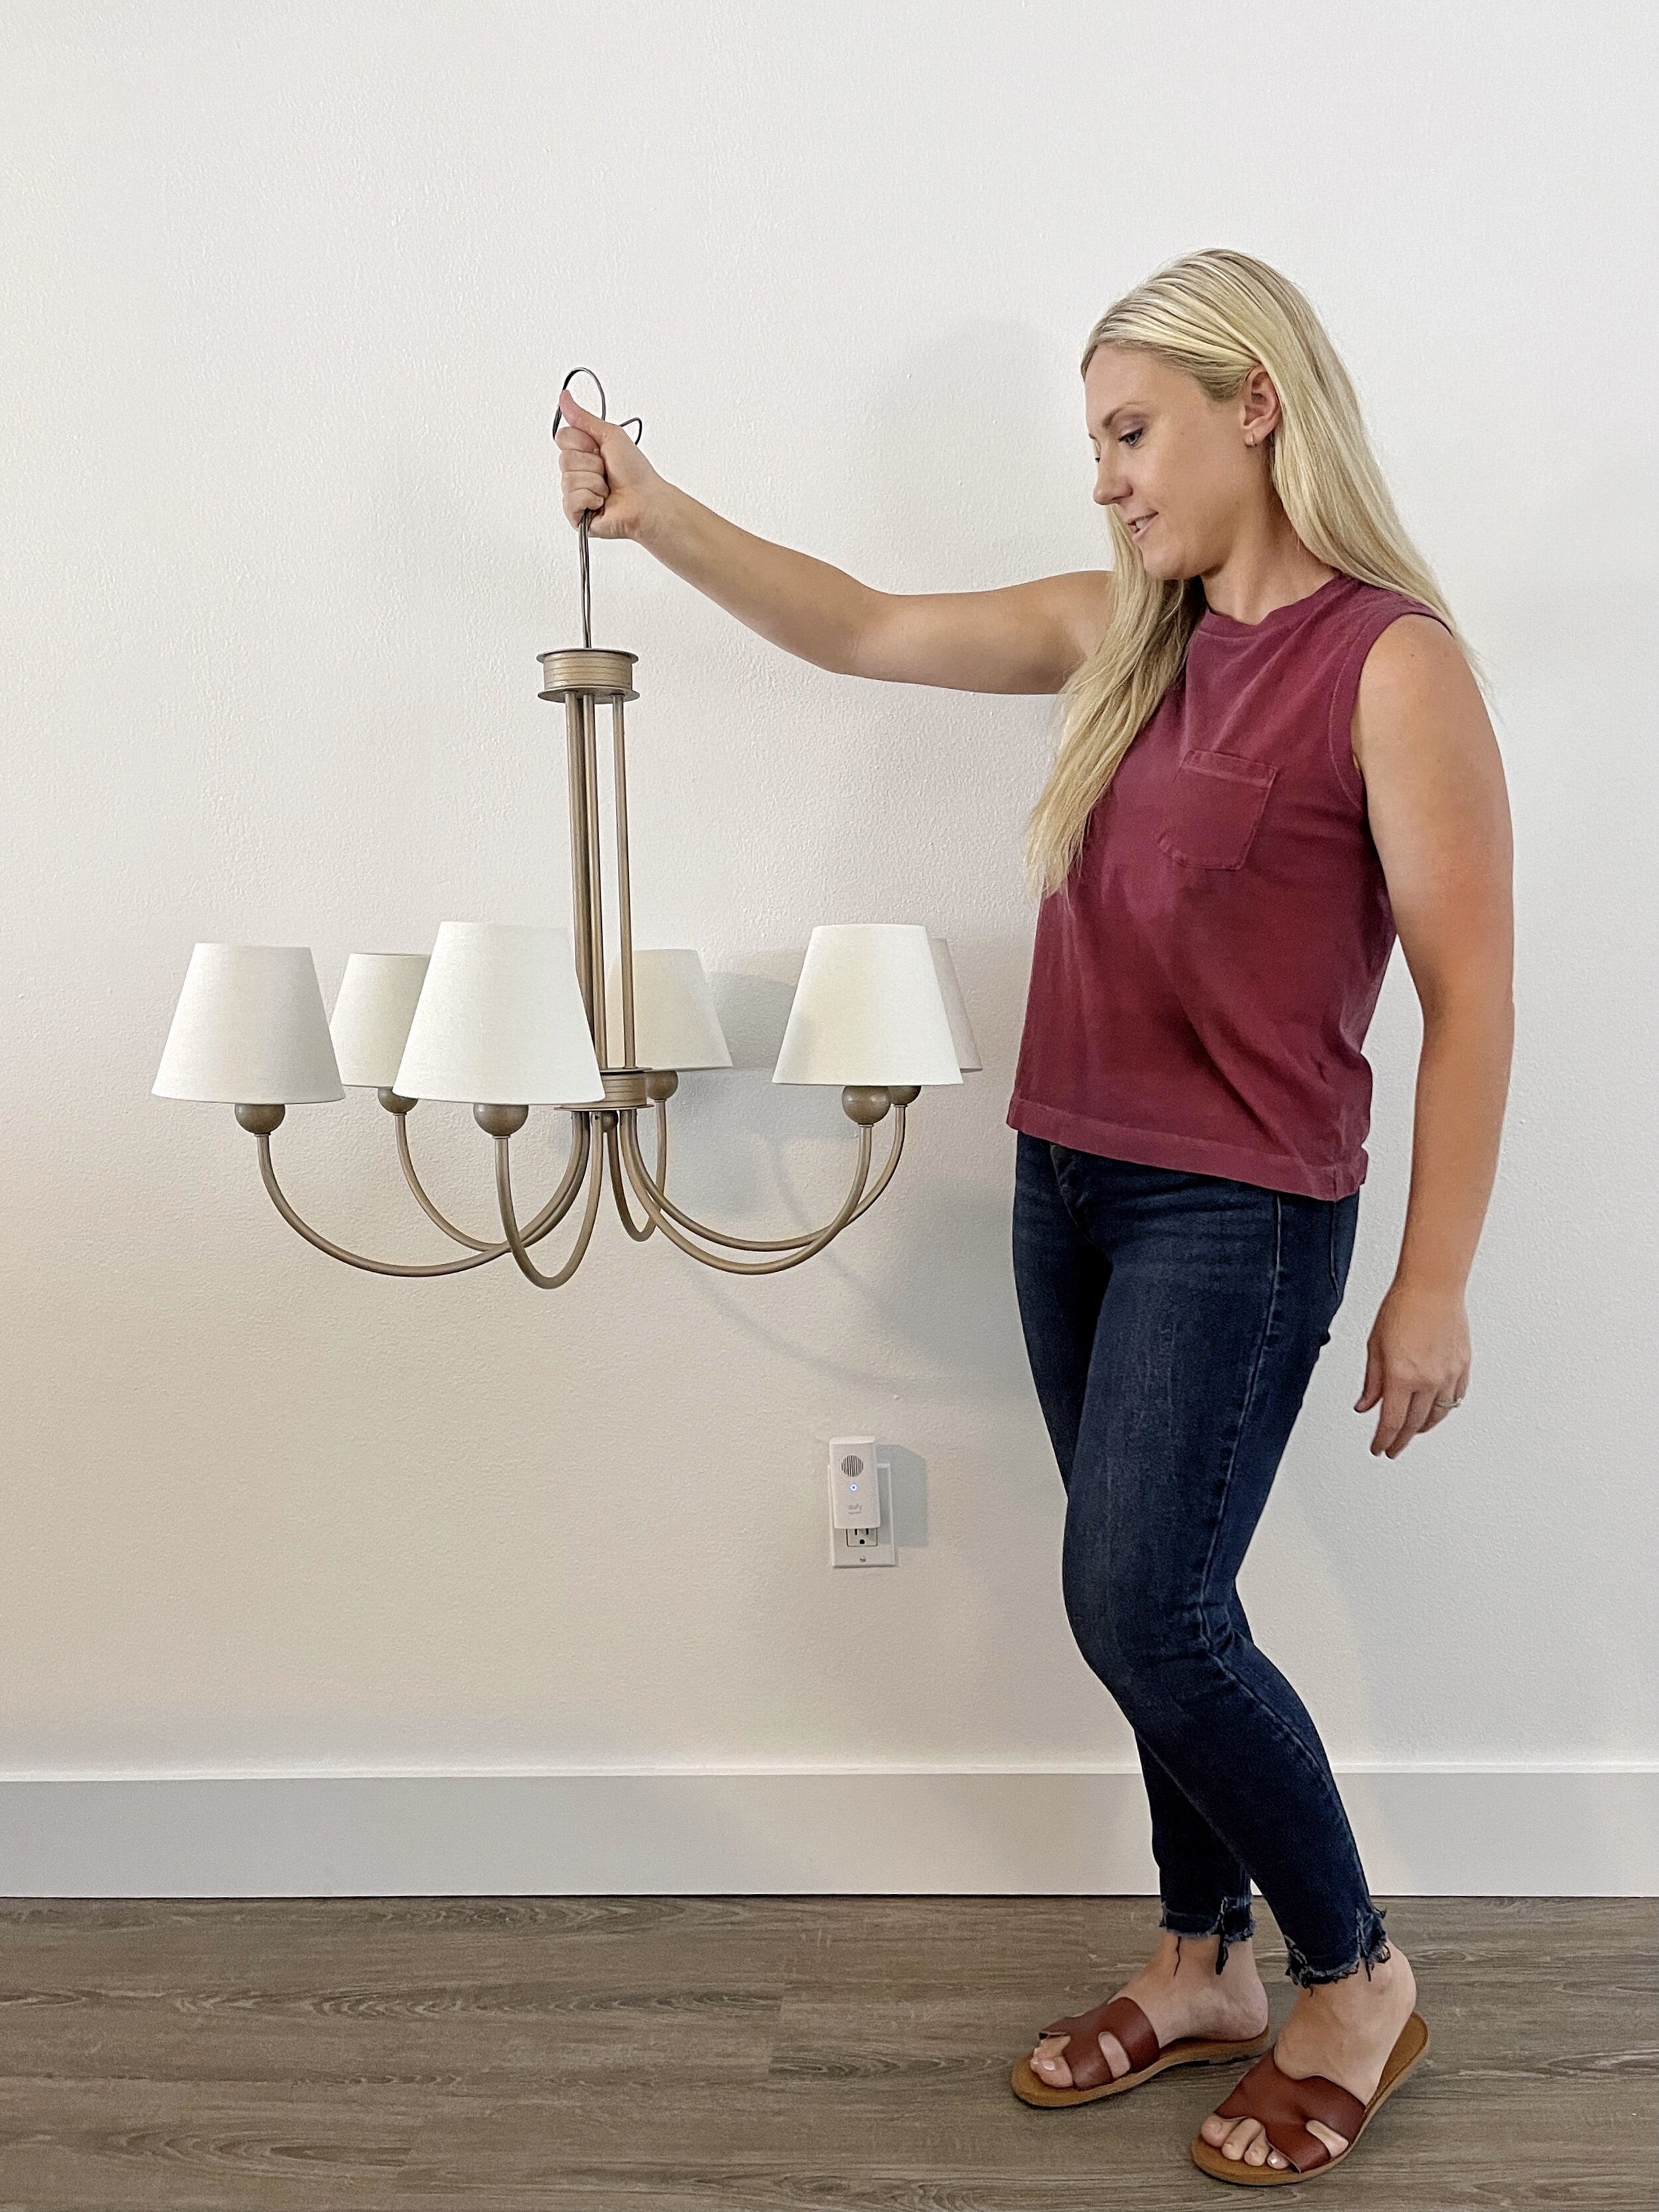
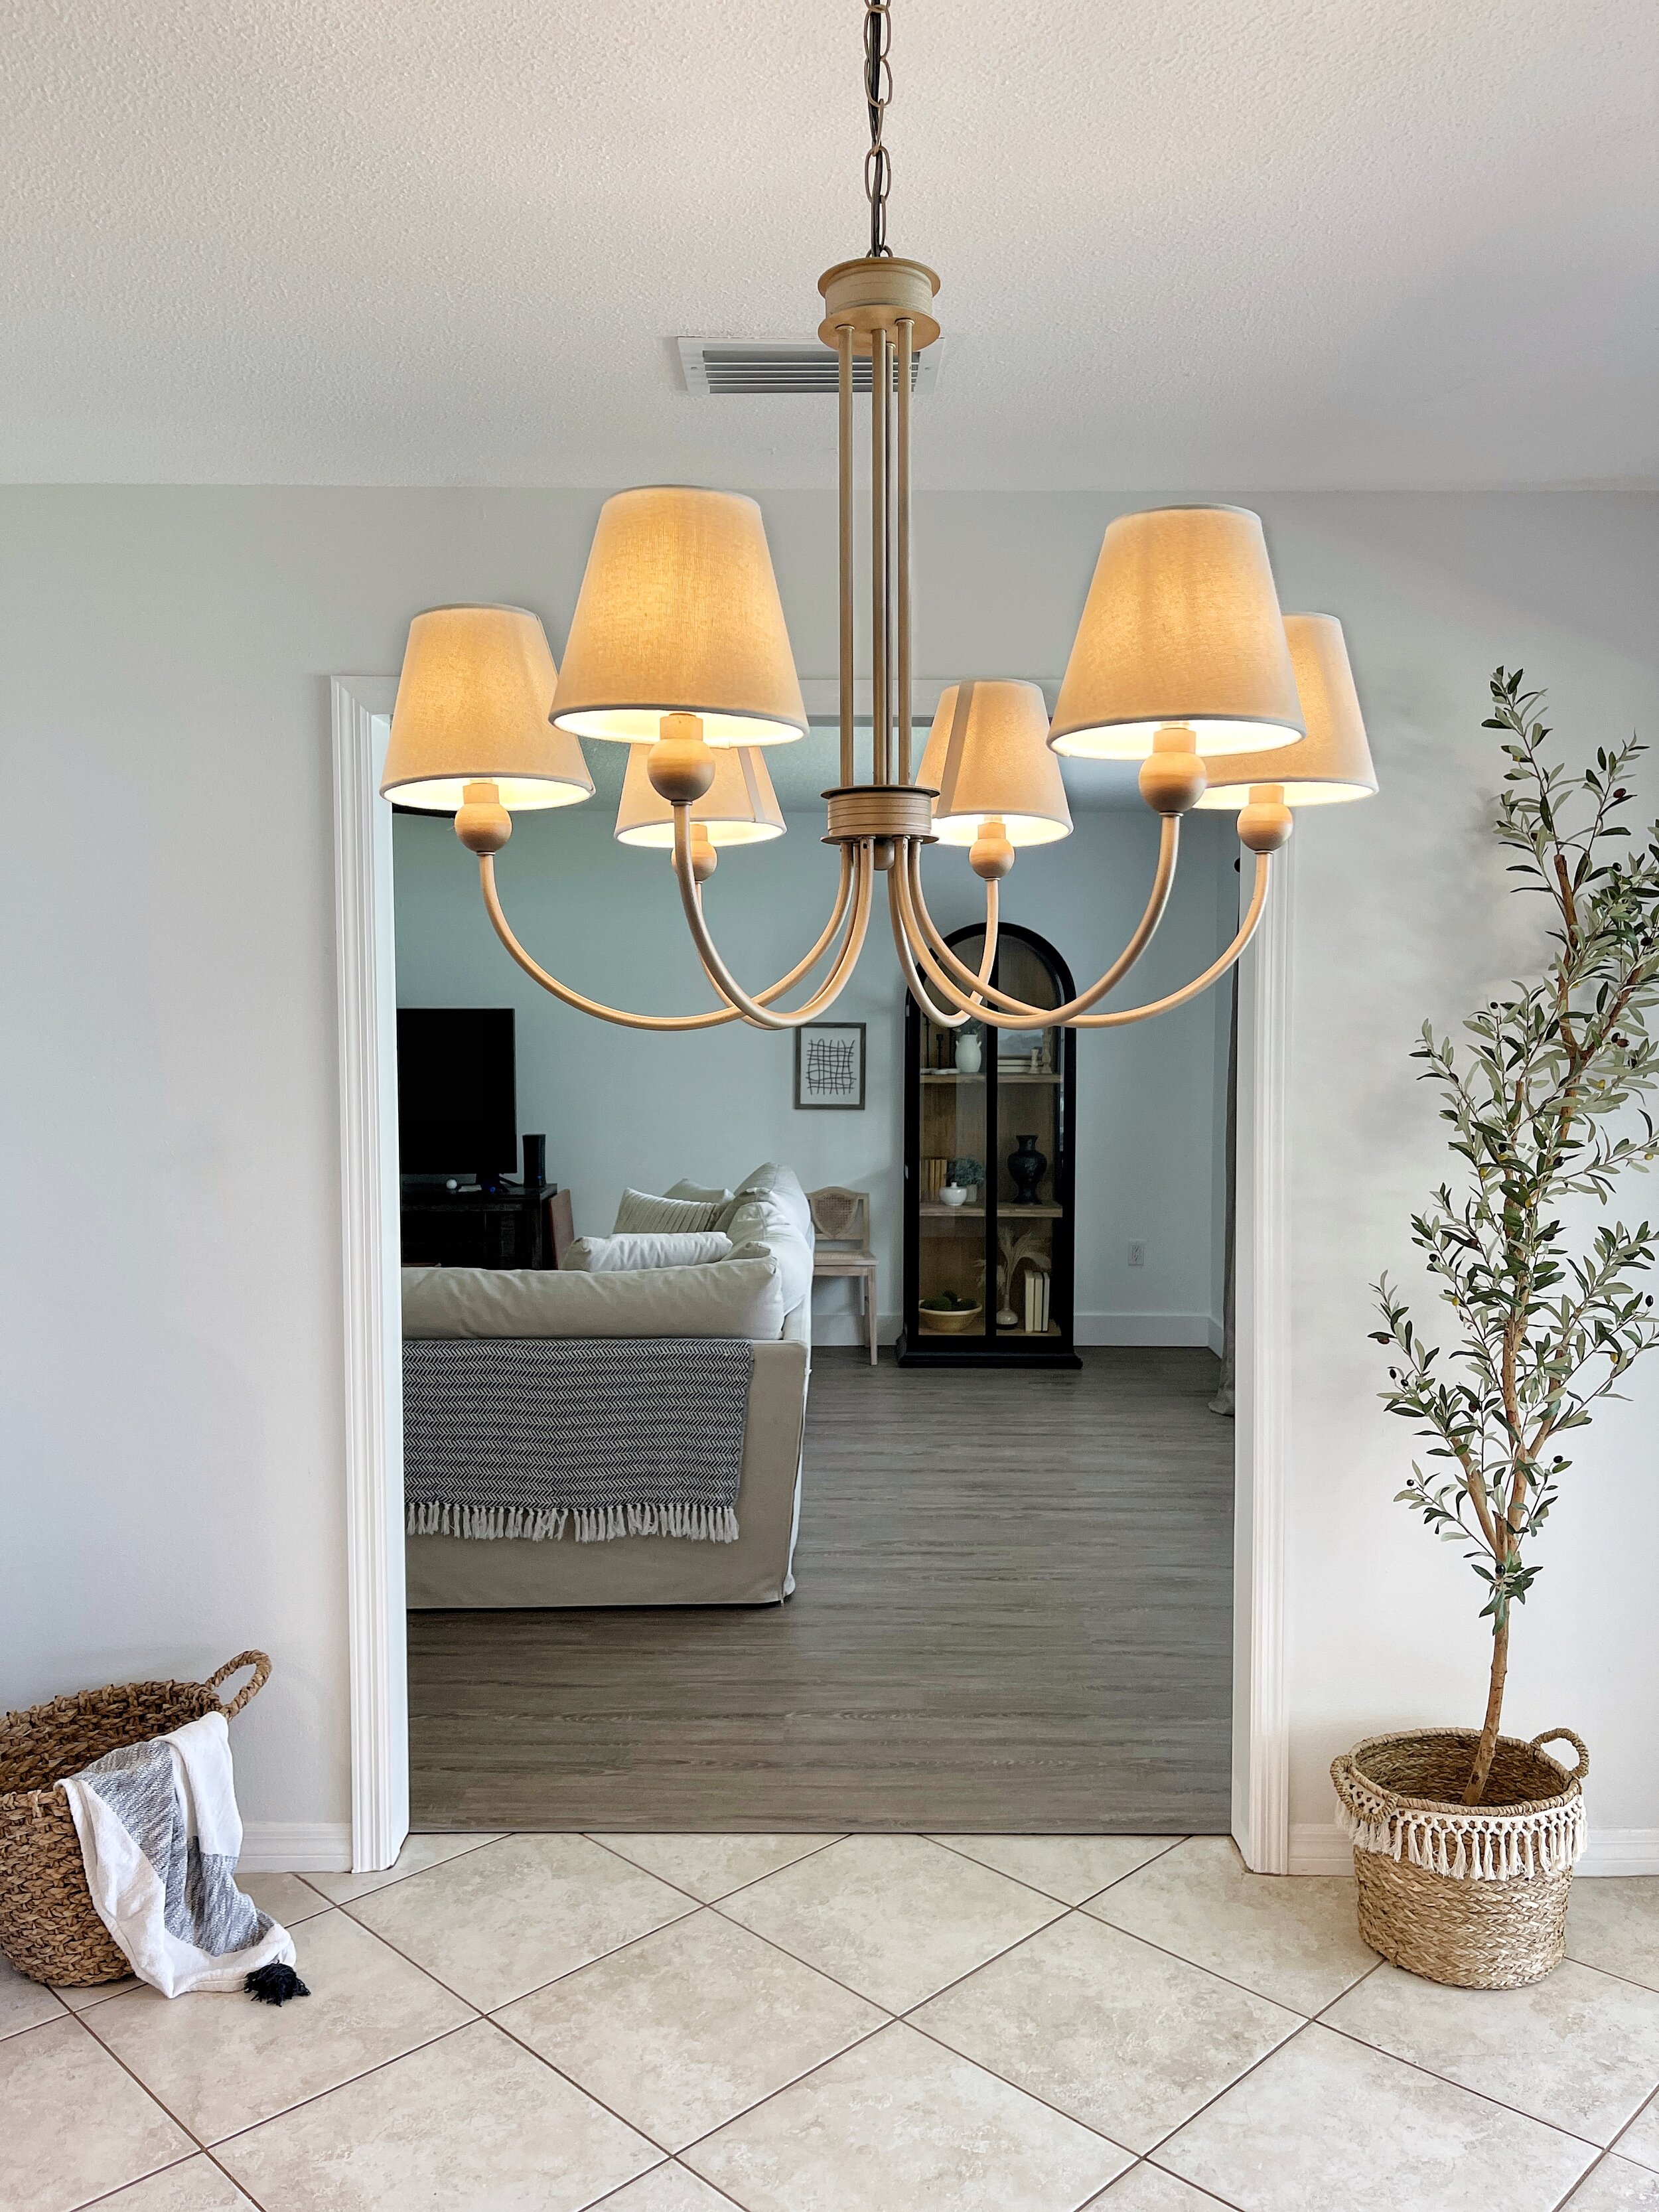
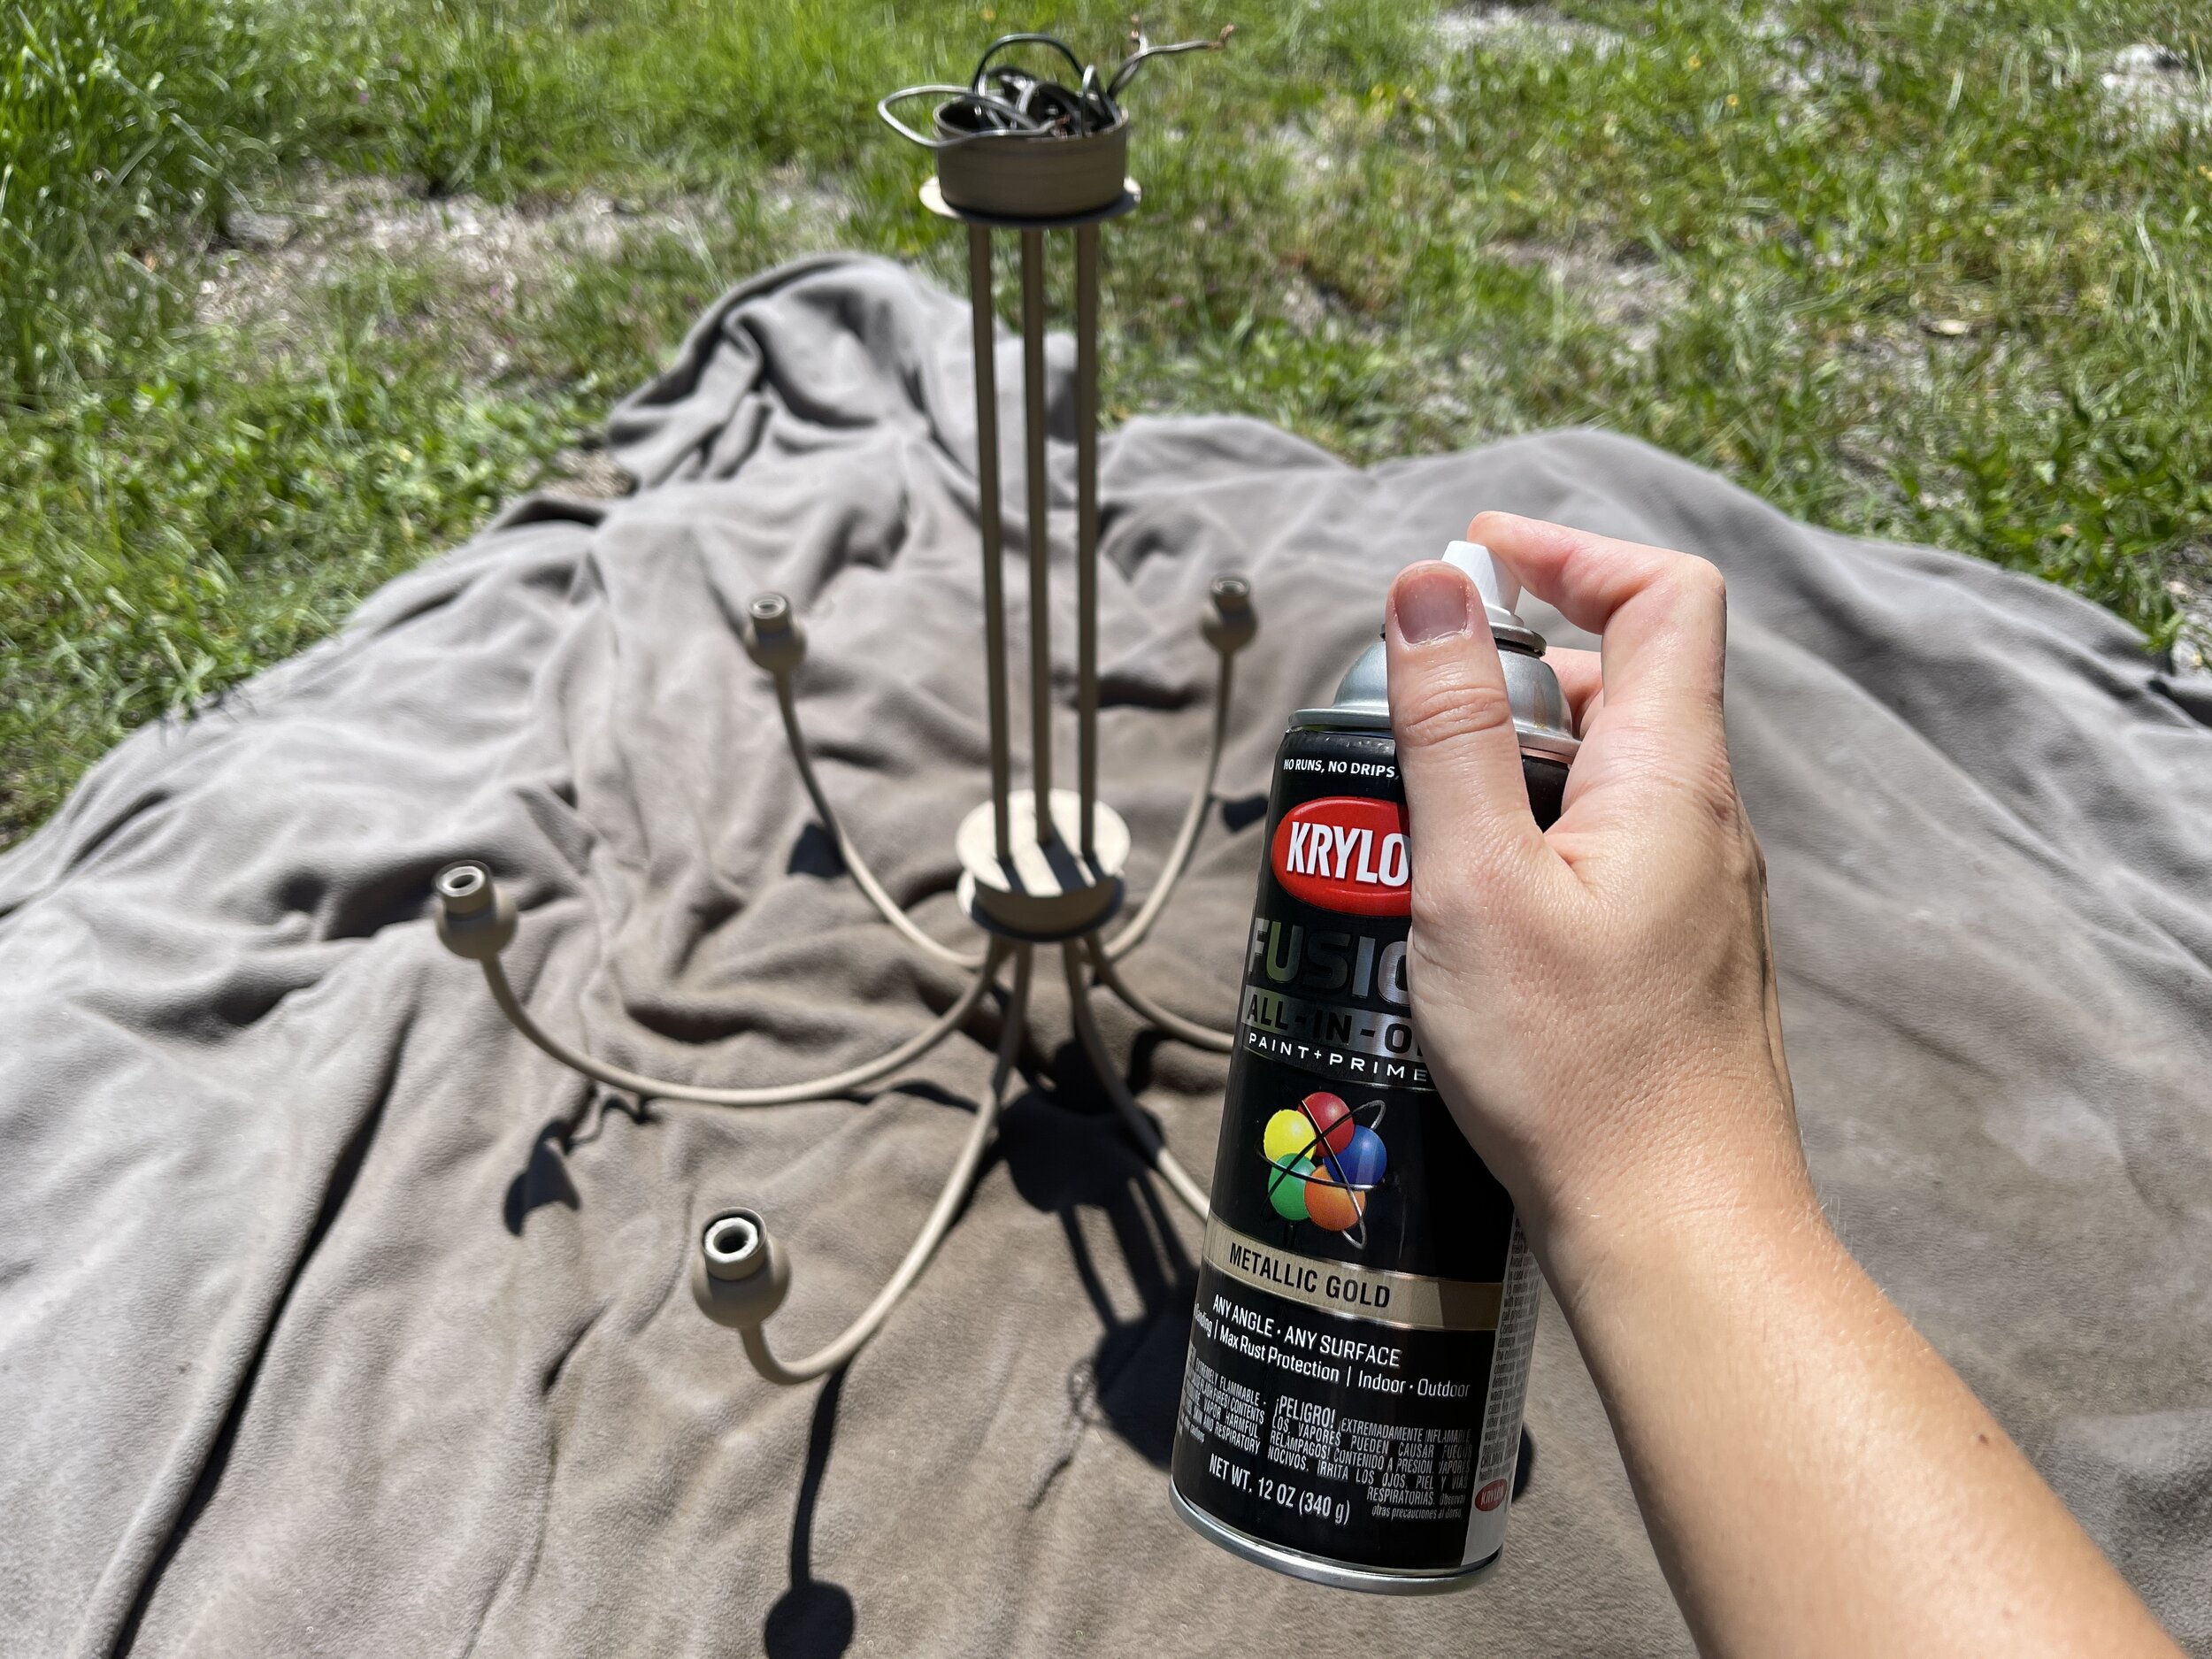
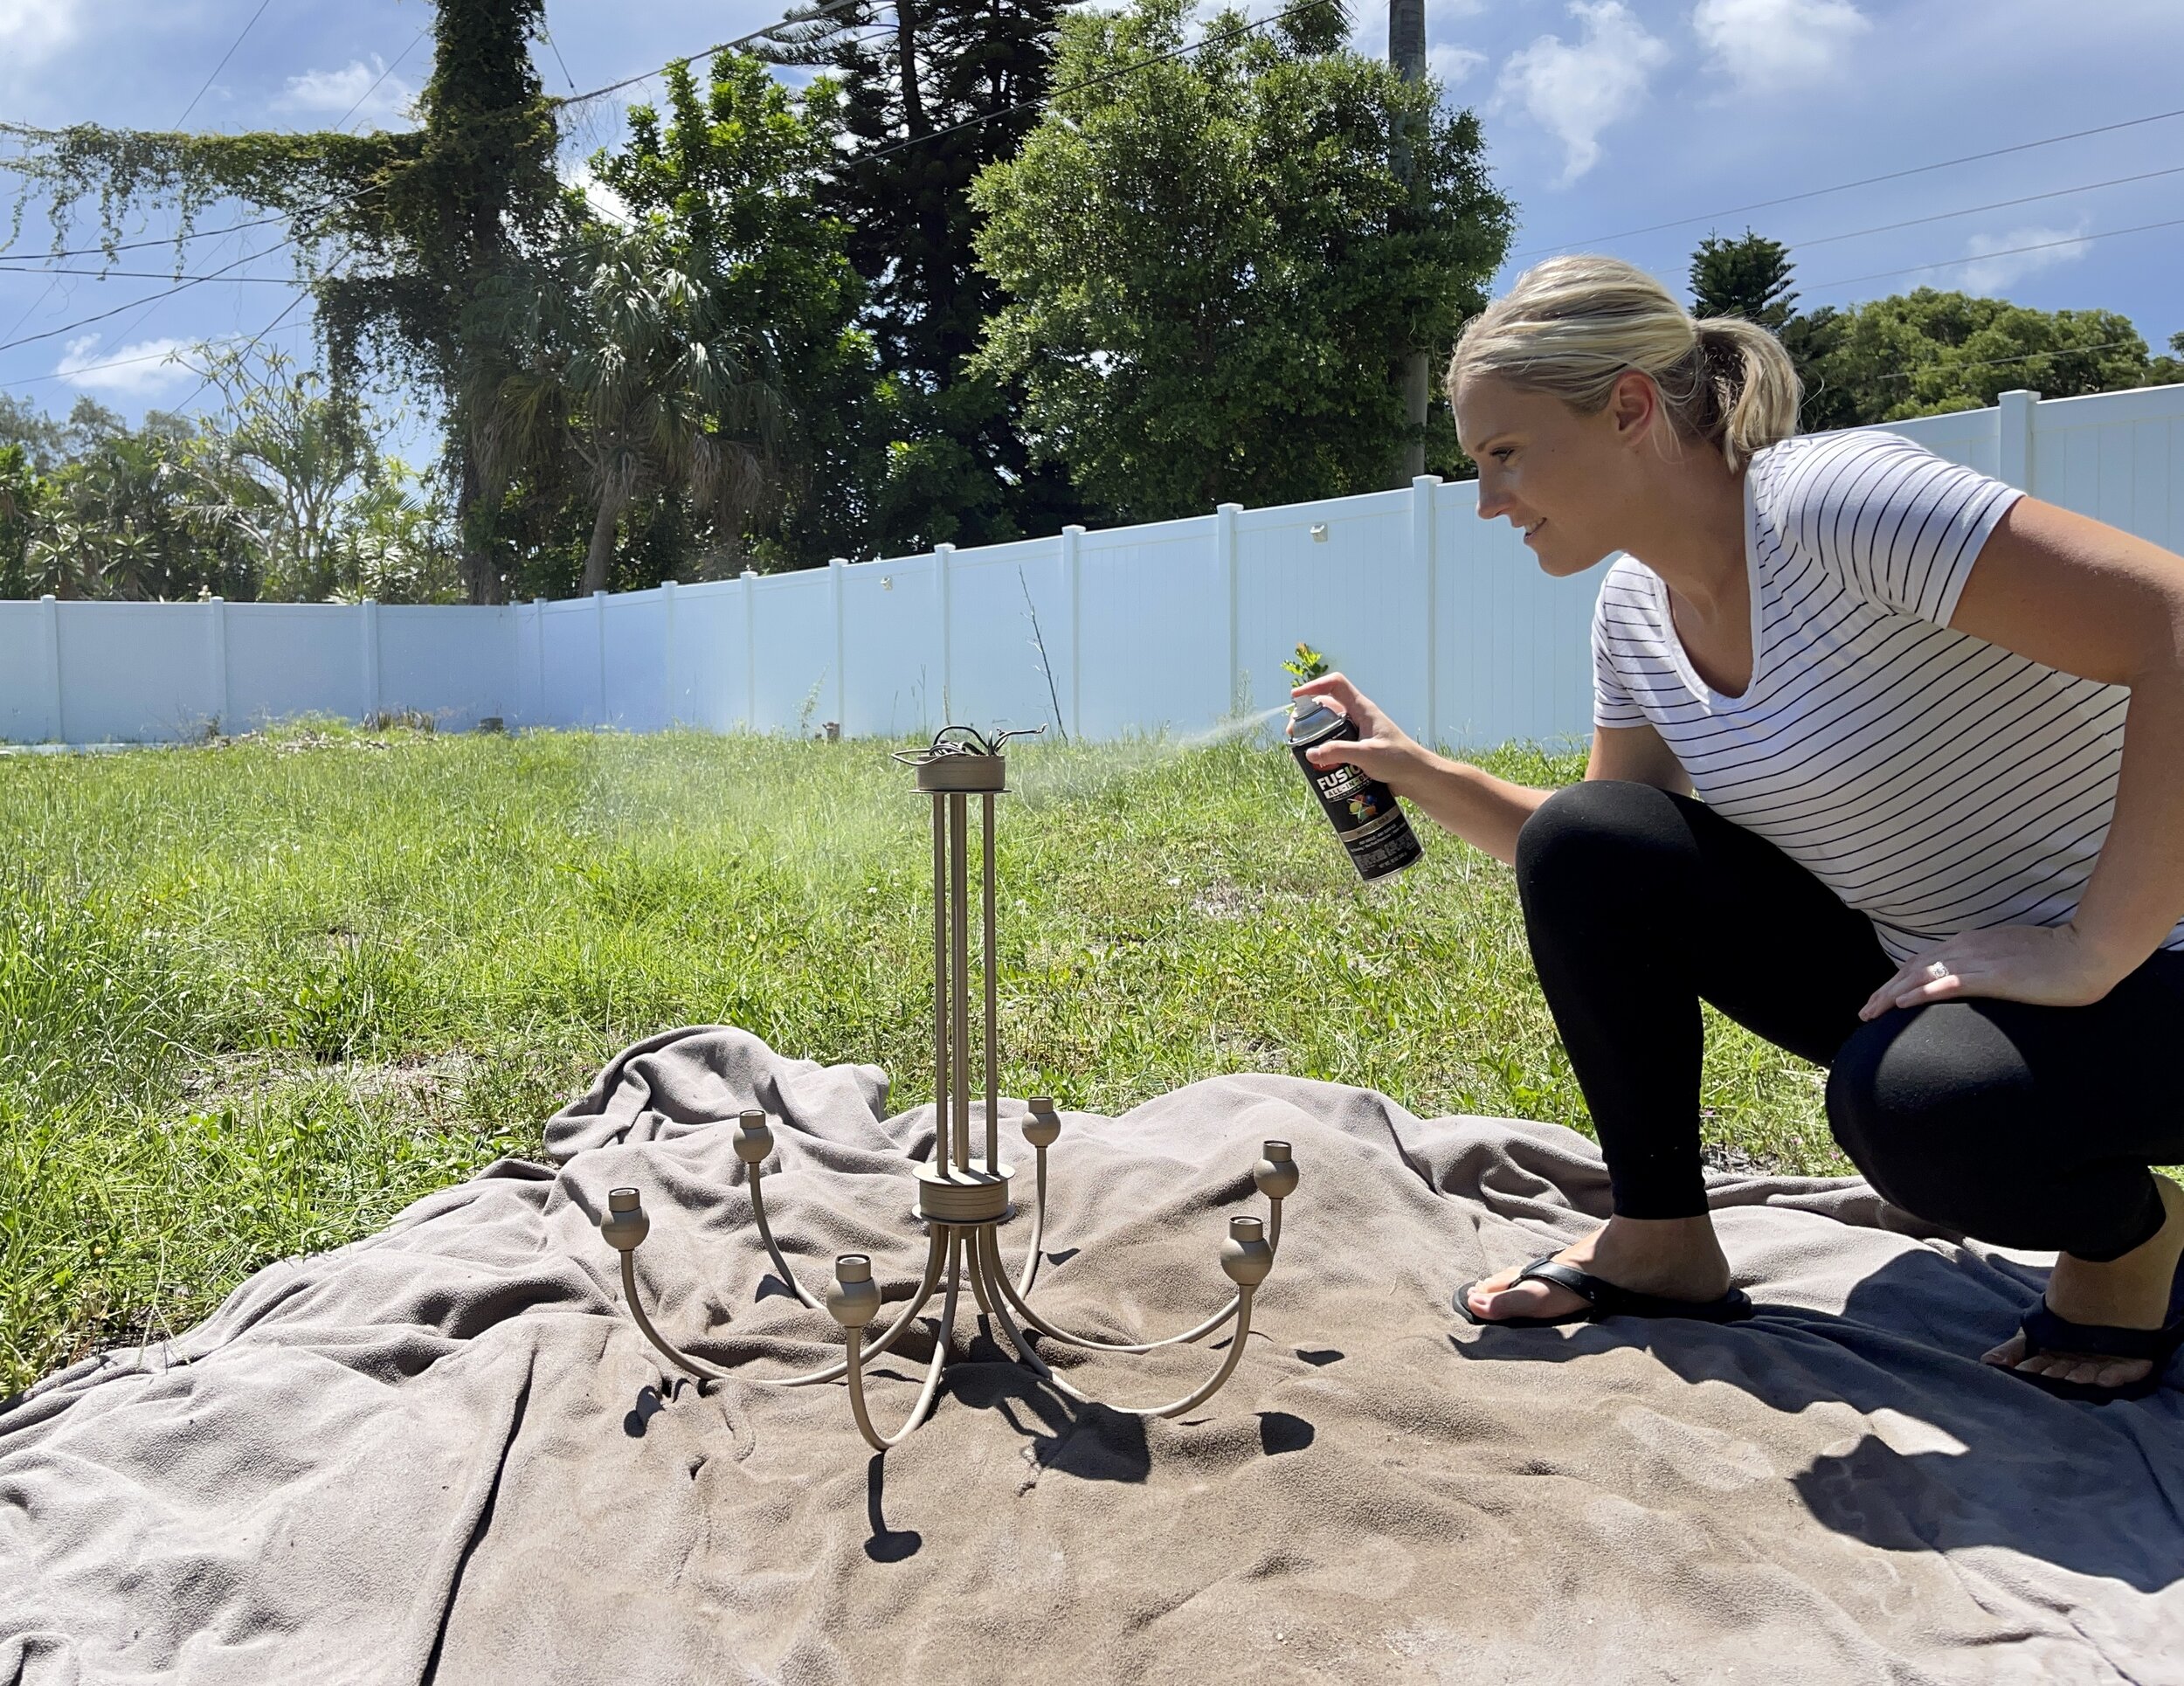
With the light laid out on an old blanket in the backyard I got started on the new paint job. It’s important to shake your can for 1-2 minutes before beginning to spray. Once shaken up, I stayed 10-12” away from the light and sprayed in a sweeping motion back and forth. This technique ensures that the spray paint goes on smooth and even. One of my favorite features of this Krylon spray paint is that it dries very quickly. So every 15-20 minutes I would rotate the chandelier around and start spraying again, ensuring that I got every nook and cranny on the chandelier. Once it was completely covered in paint, I waited the full 2 hours that it recommends before handling it. Then we installed the light back in the dining room, put in new bulbs and added the new lamp shades.
I have done a lot of transformations in the past few years but I have to say that this one is definitely one of my favorites! Even my husband said he was surprised at how great it turned out and that it looked like a new store-bought chandelier! If you aren’t currently using Krylon brand spray paint, I highly encourage you to give them a try on your next project! Between the fast dry time, smooth even coverage, and long lasting durability, you will fall in love.