
How to Clean Grout - The Easiest Low Effort Way
I recently discovered the best way to clean grout that takes minimum effort and actually gets the tile grout super clean! My guest bathroom floor was so nasty and I was desperate to find a way to refresh the white grout.
I had tried tons of methods over the years that included homemade remedies, steam cleaners, bleach and lots of scrubbing but this new cleaner I discovered is a complete game changer.
Here’s a step-by-step guide on how to make your dirty grout look brand new again!

Materials You’ll Need:
Scrub brush or an old toothbrush
Warm water
Old towel(s)
Protective floor covering or painter's tape (optional to protect surrounding areas)
Step-by-Step Cleaning Process:
Step 1: Prepare the Area
Clear the space: Remove any rugs, furniture, or objects that might be in the way.
Clean debris: Sweep or vacuum the area to remove any lose dirty or debris before cleaning the grout.
Protect cabinets: Consider taping off cabinets and vanities to protect them. I just kept an old towel near me and would wipe off any excess cleaner that got on my cabinet and baseboards.
Prepare supplies: Fill your bucket with clean water, grab your cleaning supplies, and put on your gloves and face mask.
Test cleaning solution: I *highly* recommend testing this grout cleaner in a small corner or disguised area of your tile floors first to ensure it does not damage your tile in any way or alter the original color of your grout.
Step 2: Apply the Cleaning Solution
Start in a back corner of your space. You will want to work backwards out of the room so you don't end up cornering yourself when you are done.
Apply the grout cleaner directly to the grout lines in a 2ft x 2ft section. Do not apply this to the entire floor. Instead work in small sections.
Use the end of your scrub brush or your fingers to push the liquid into the grout.
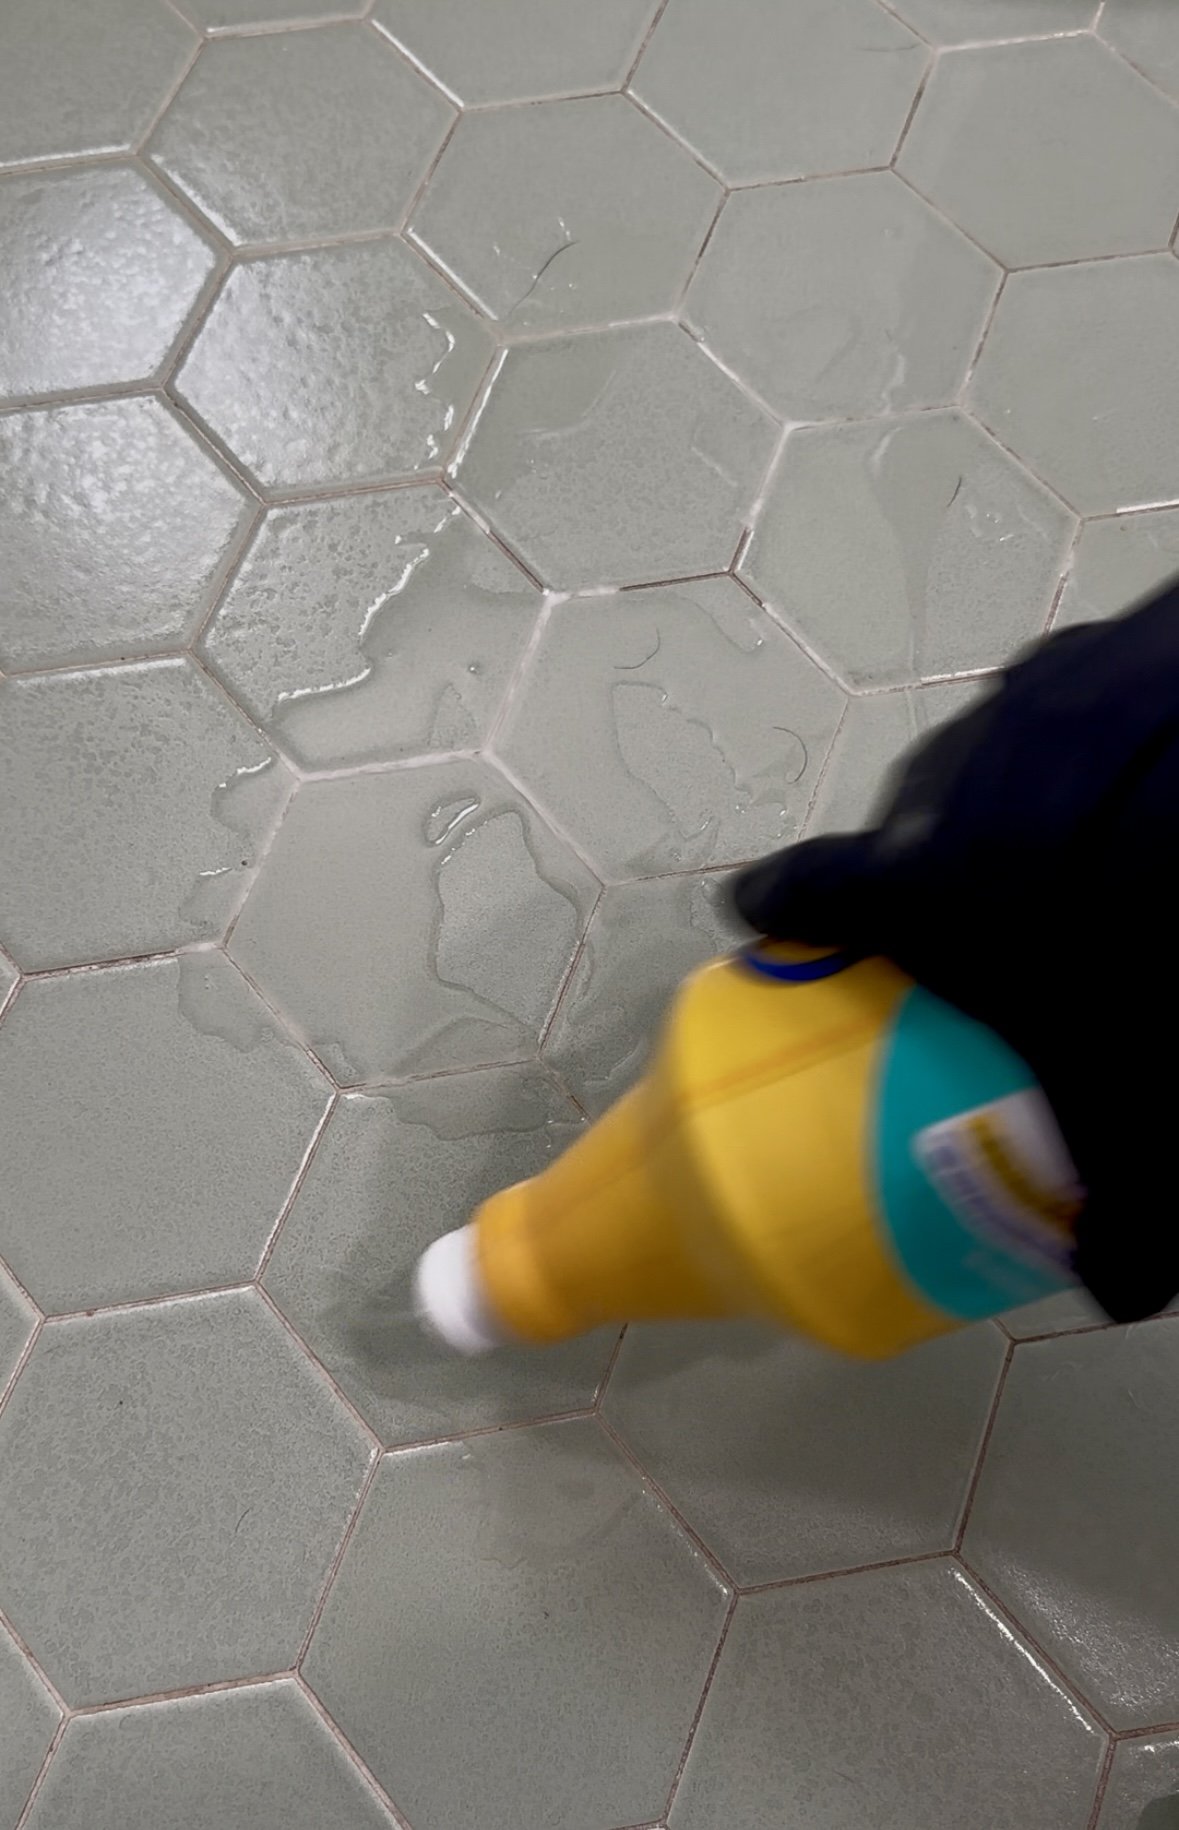

Step 3: Scrub the Grout
Start scrubbing right away. You do not need to let this product sit on the grout before scrubbing.
Use a grout brush (or an old toothbrush) to scrub the grout lines. I preferred using an electric scrub brush for this.
You should not have to put a lot of elbow grease in since this cleaner is so effective. Light scrubbing should do the trick.


Step 4: Rinse and Wipe Down
Rinse with warm water by dipping your large sponge into the clean warm water bucket, ring most of the water out of the sponge and wipe the grout cleaner off the tile and grout lines. I recommend doing this at least two times.
Mop floors with water as the last step to ensure all the grout cleaner has been wiped away. I used my spin mop with clean warm water and mopped the tile.
Dry the tiles and grout with a clean towel or microfiber cloth to prevent water from soaking into the grout.


Step 5: Repeat if Necessary
For particularly stubborn stains or built-up grime, you may need to repeat the process. In my experience, this grout cleaner does the trick with just one application.
Step 6: Seal the Grout (Optional)
After cleaning and drying the grout, you might want to apply a grout sealant. This is totally optional and will help protect the grout from future dirt and stains. I recommend waiting 24hrs after cleaning before applying the grout sealer.
Apply a thin coat of grout sealer using a small applicator or paintbrush.
Allow it to dry for 24 hours before using the floor again.

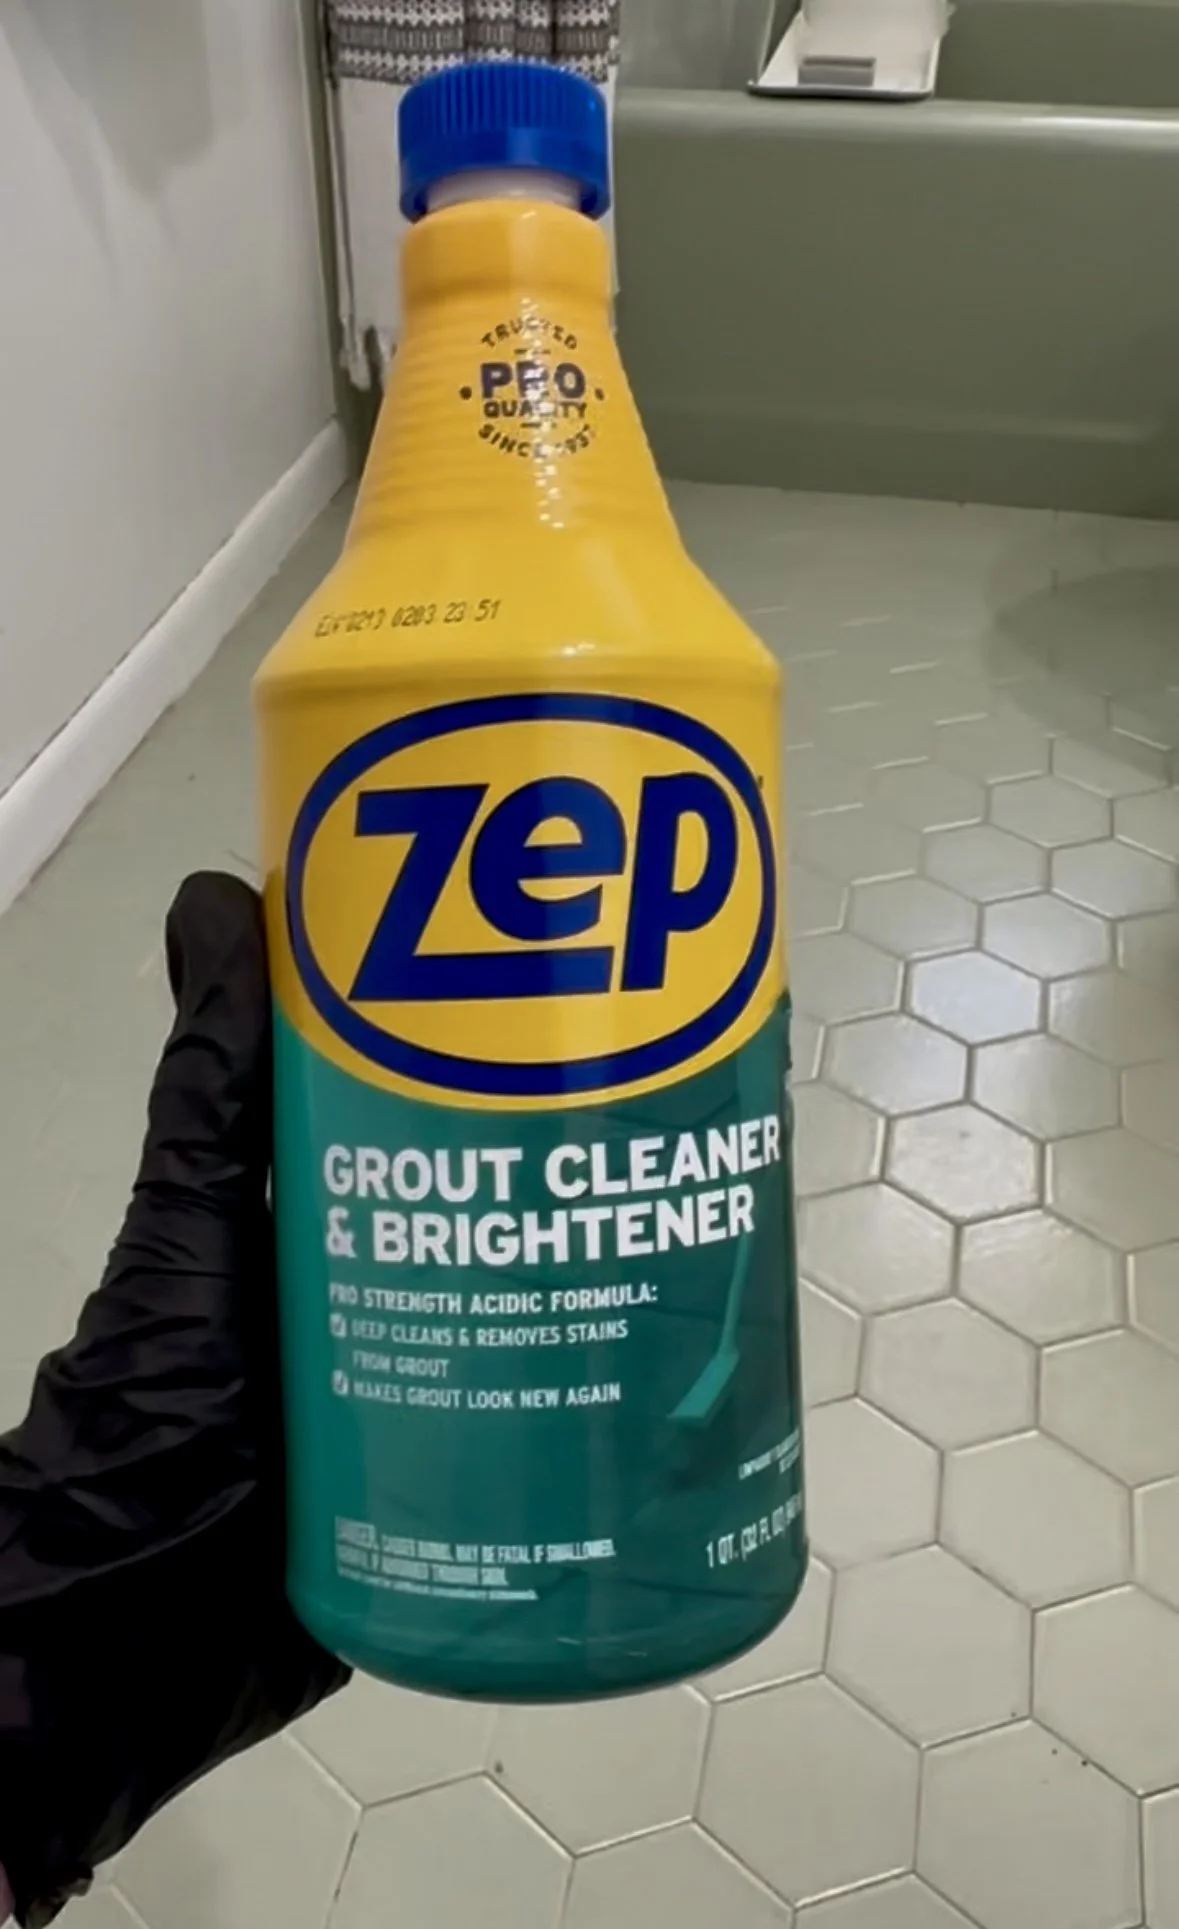
The Zep Grout Cleaner is the most effective way to clean your dirty tile grout. It works so quickly with minimal effort and can make old tile grout look brand new again.
My 1970's bathroom tile went from looking like it needed to be replaced to looking like we just installed it! So whether you are looking to refresh your kitchen floor, shower walls, entryway or mudroom tile, this cleaner will give you the best results!
By following these easy steps, your tile grout should be looking fresh and clean again in no time! Let me know how it goes, or if you have any questions along the way.


HEY THERE, I’M ASHLEY!
Here to inspire beginner DIYers!