
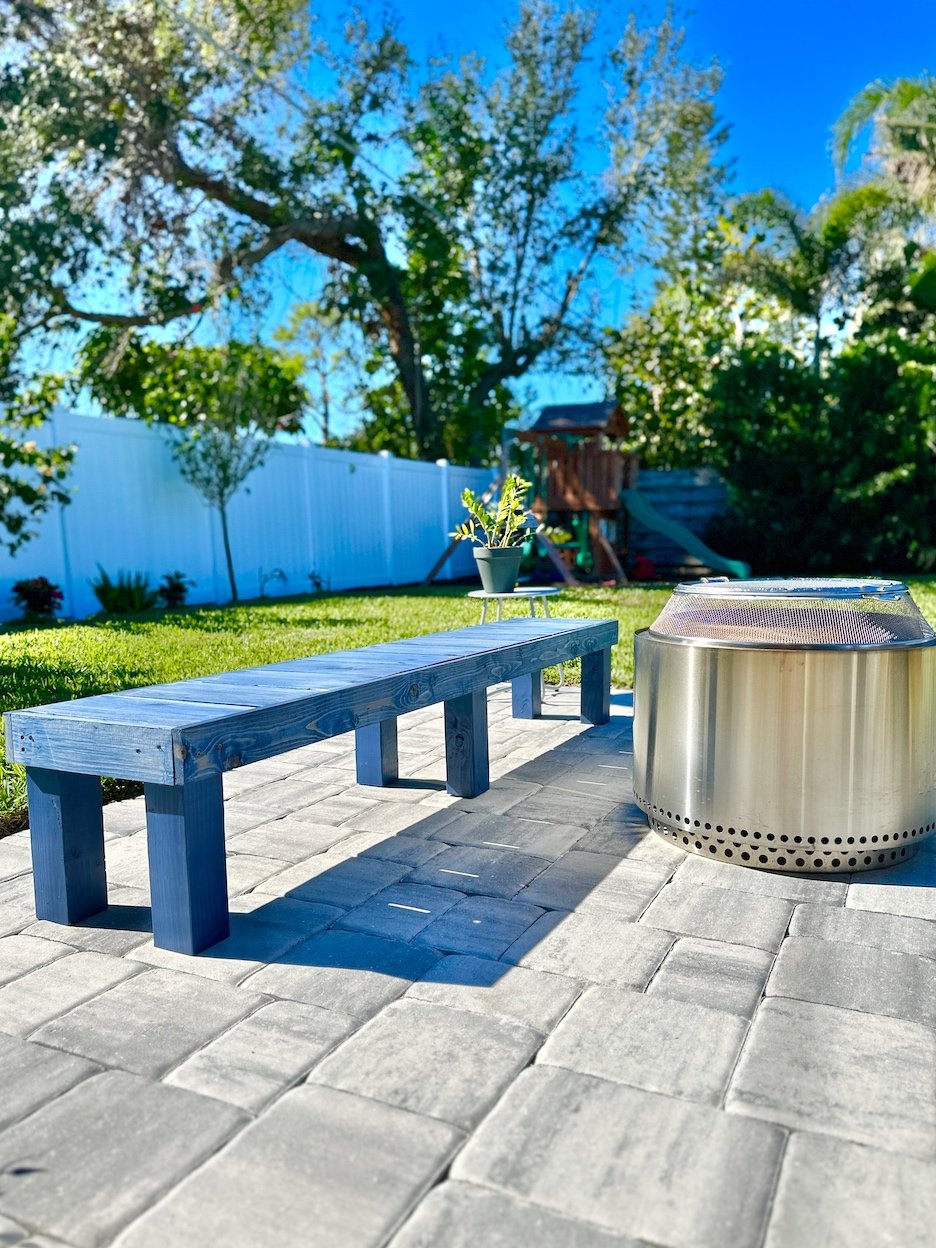
DIY Wood Outdoor Bench
We were in need of some extra seating on our backyard paver patio and so I decided to build a long wood bench. In this blog post I am sharing how to build an outdoor DIY wood bench.
Materials:
(1) 4”x4”x8’ select pine board (2”x4”x8’ would also work)
(2) 1”x4”x8’ select pine board
(2) 1”x8”x8’ select pine board
(2) 1”x3”x8’ select pine board
Tools:
**If you are new to DIY and using power tools, be sure to checkout my short YouTube videos that teach beginners how to use power tools.
Step 1 - Cut All Boards to Size
First, I cut all of my boards down to size except for the 1”x8” boards. I used my miter saw to make all my cuts which I have included below. Do not cut your 1”x8” seat pieces yet. We will do that in a future step.
(4) Legs - 4”x4” - cut down to 14” each
(2) Outside Frame - 1”x4” - cut down to 85.5”
(2) Outside Ends - 1”x4” - cut down to 14.5”
(2) Inside Frame - 1”x3” - cut down to 84”

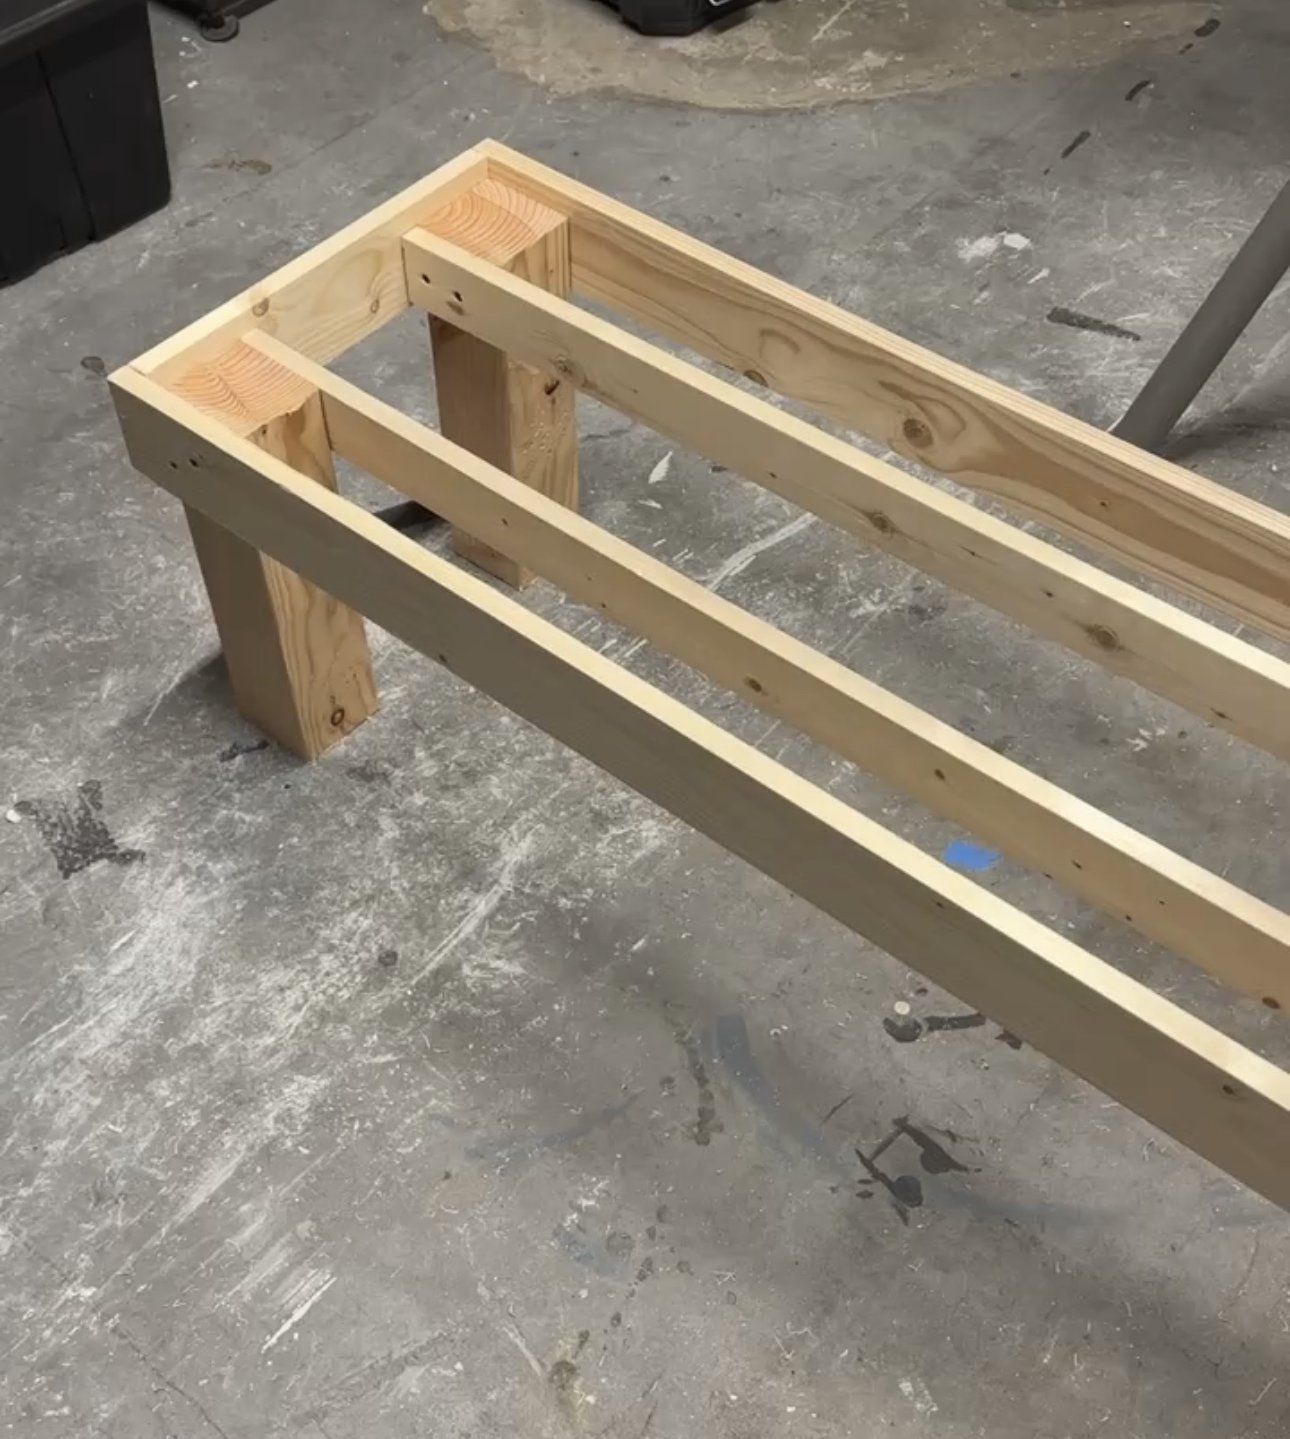
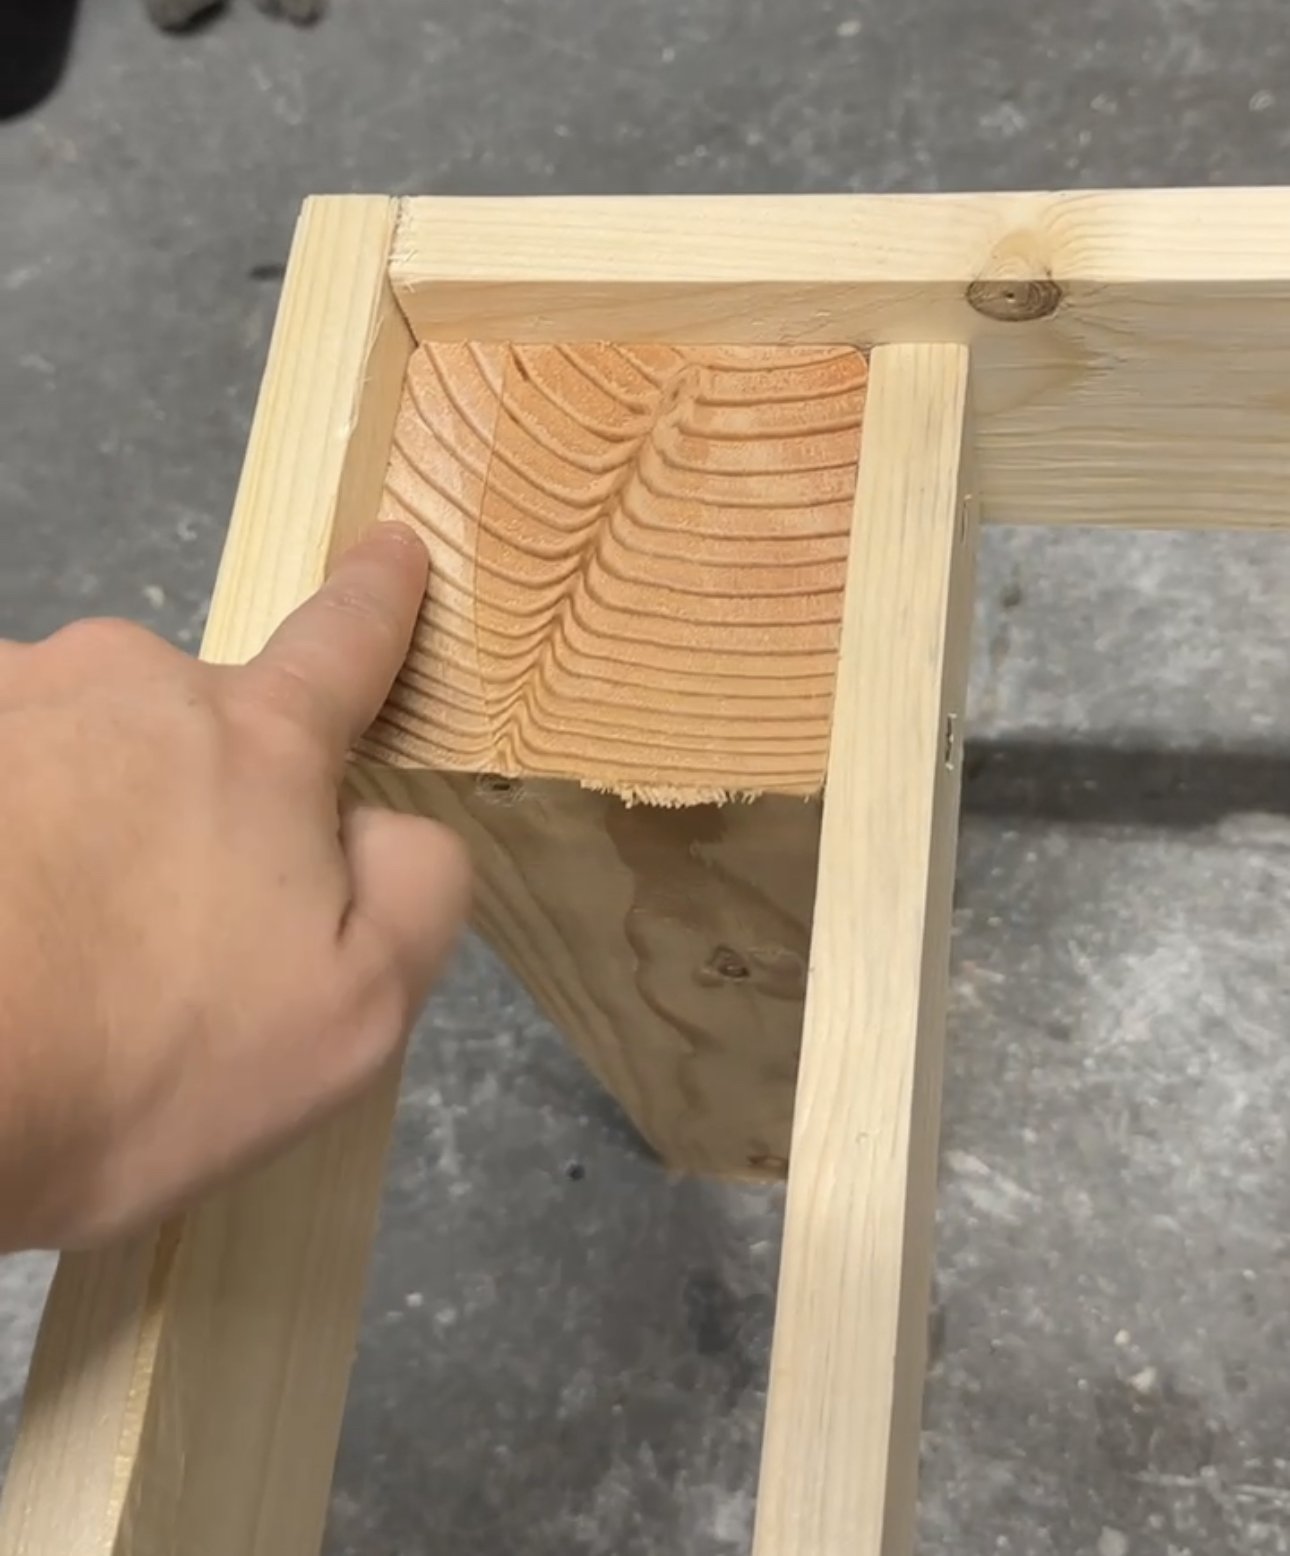
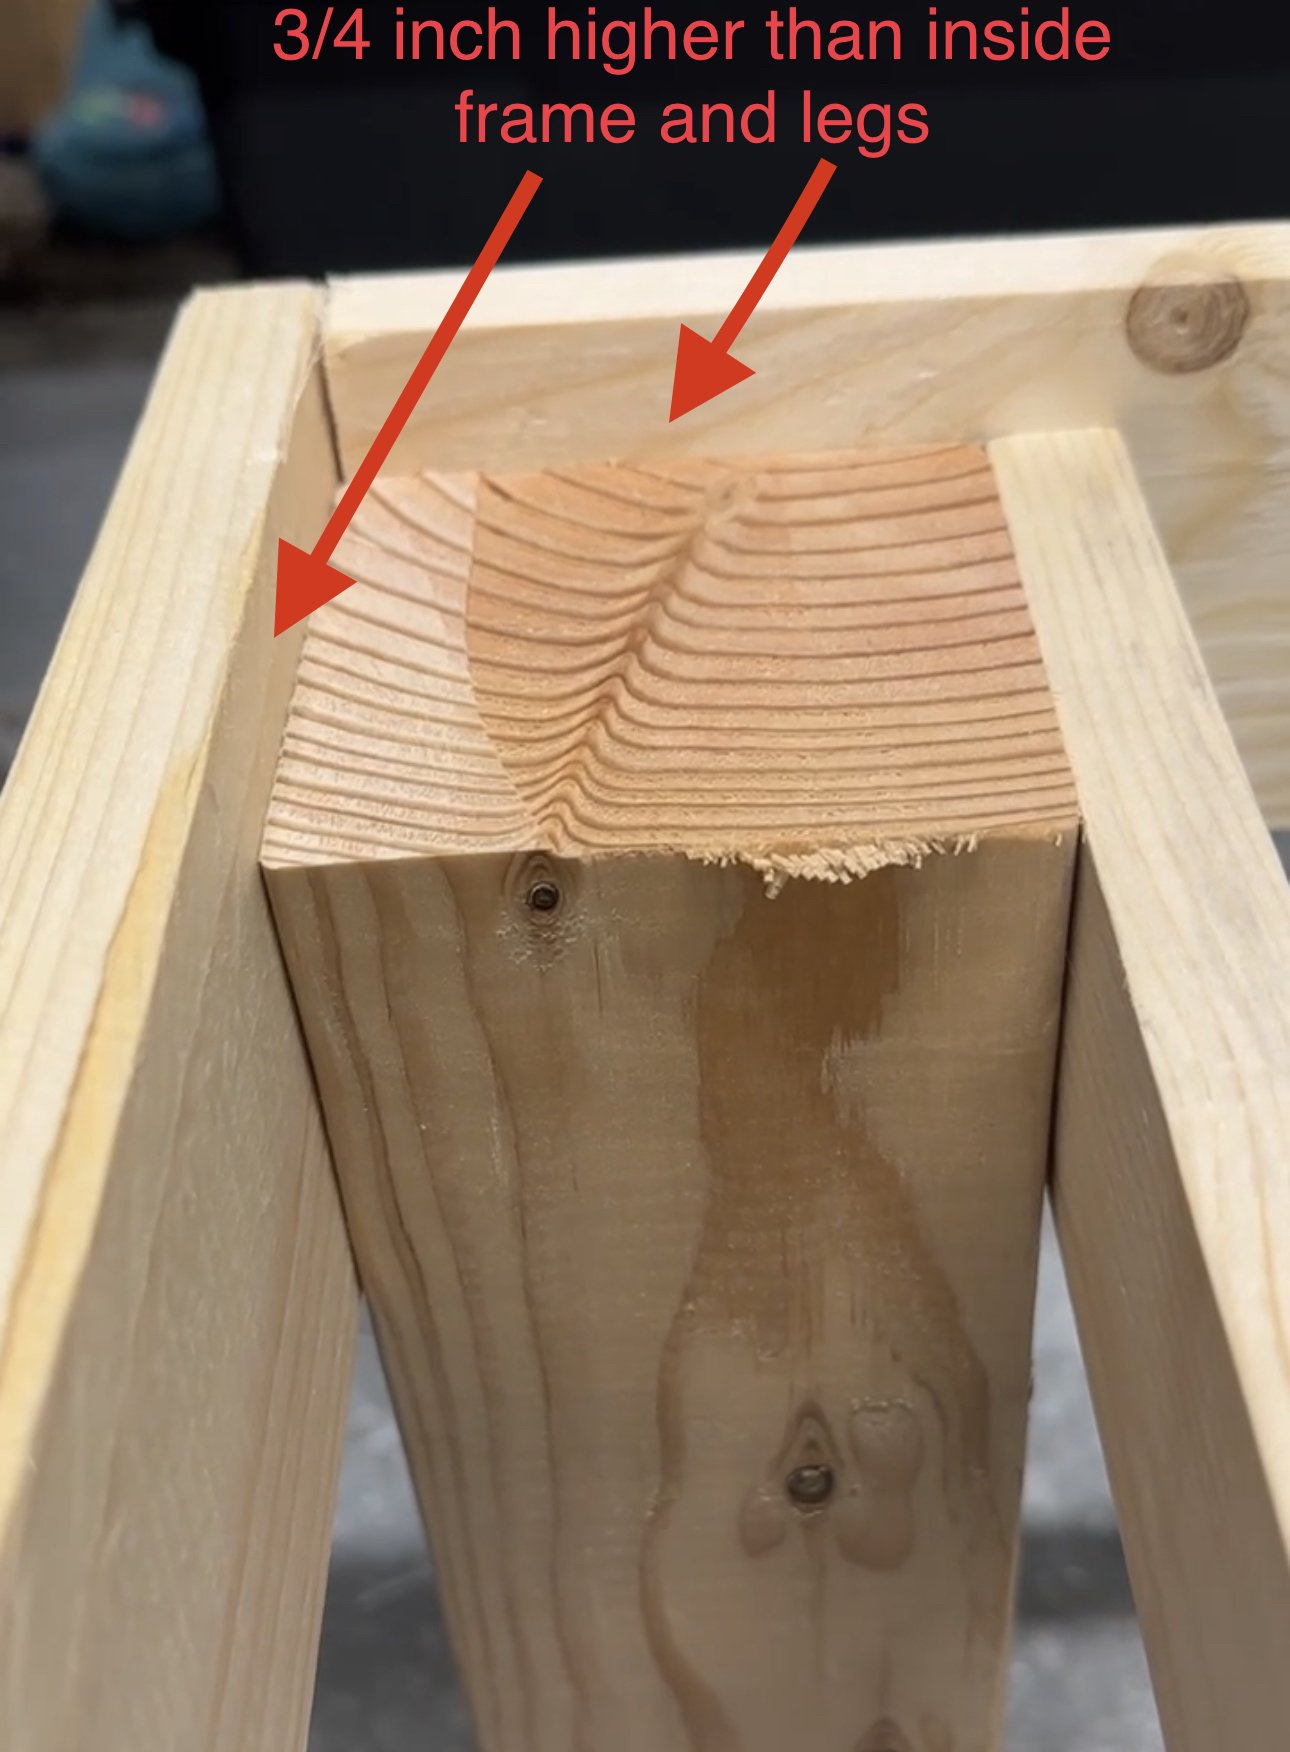
Step 2 - Build the Bench Frame
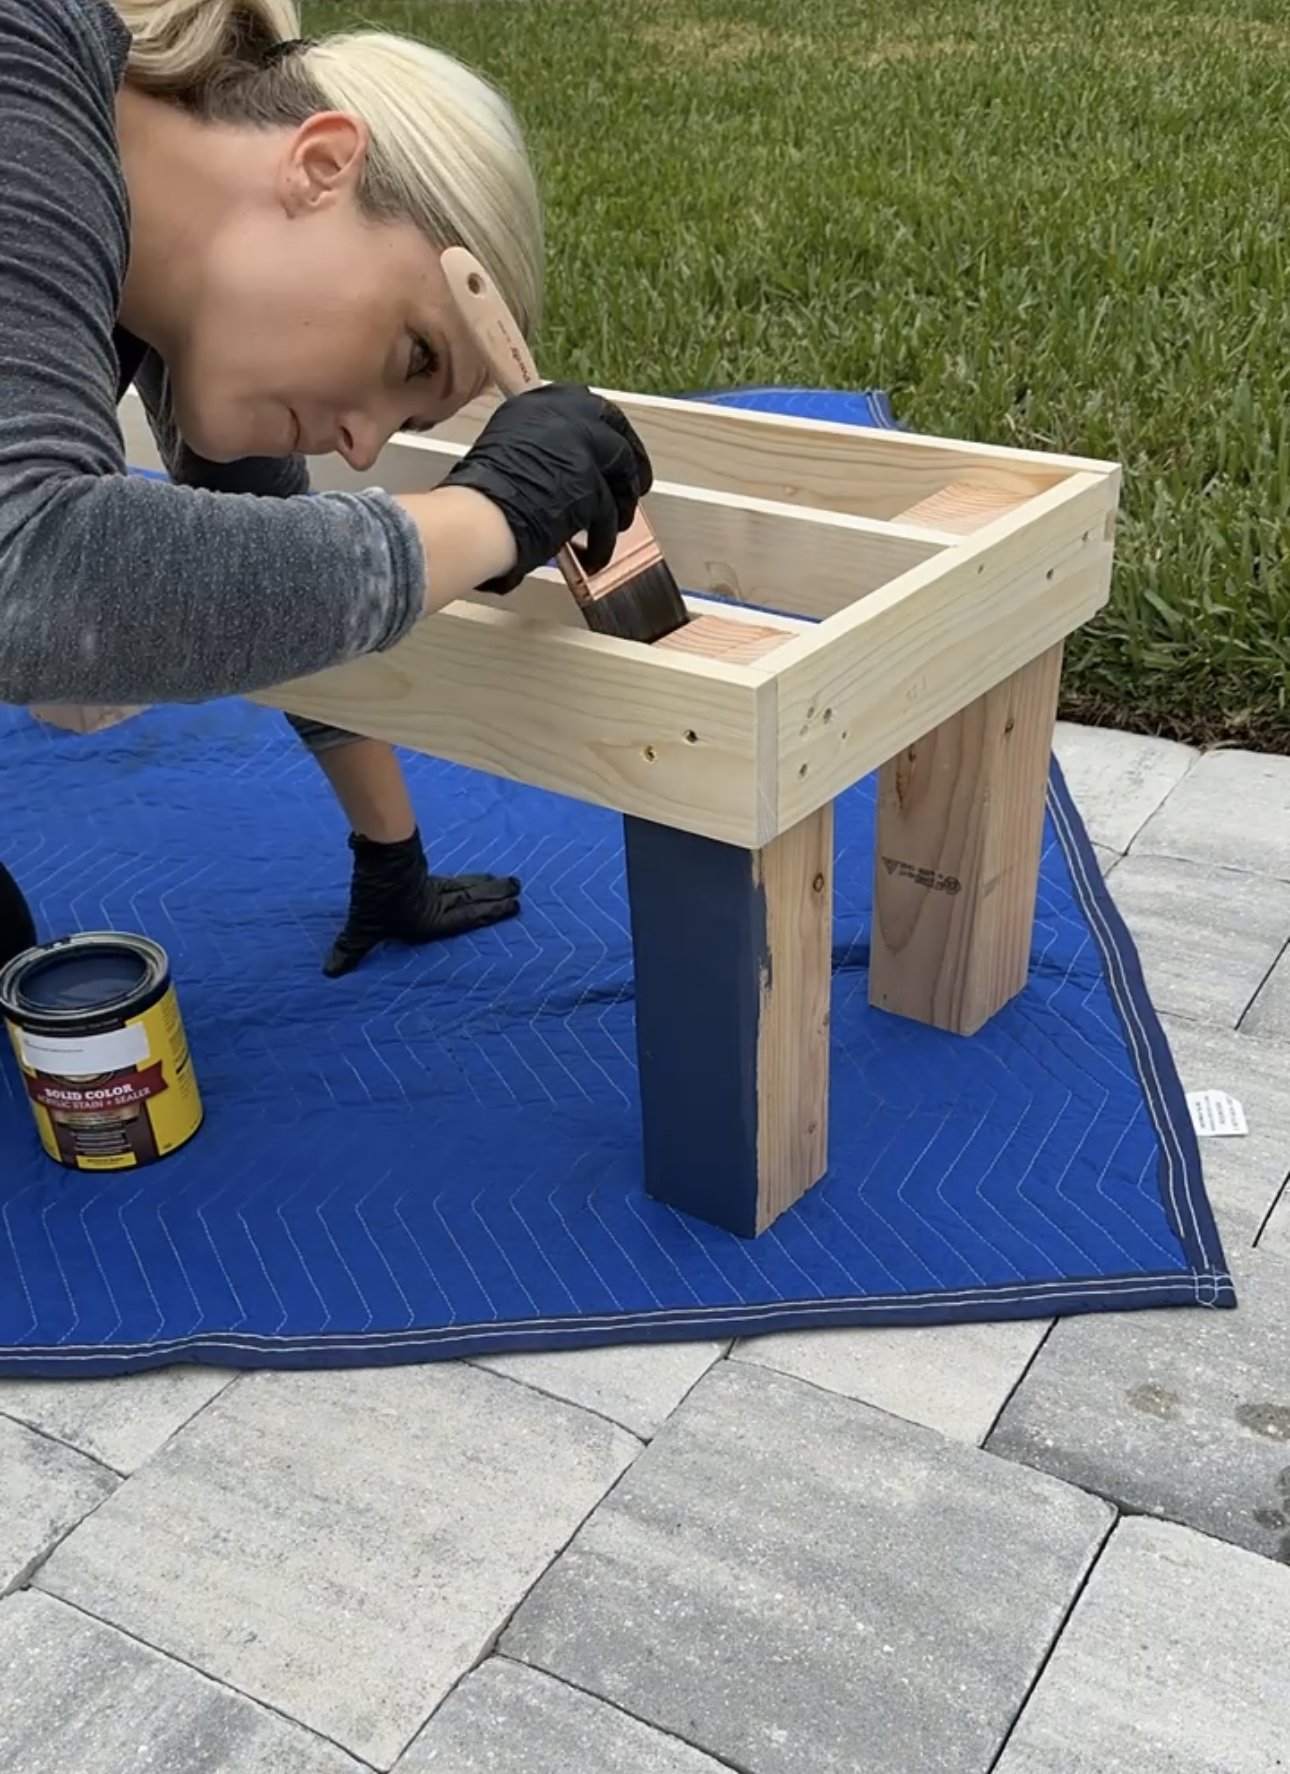
I grabbed one of the inside frame pieces and laid it on the ground. Then I attached the legs at the two ends and middle using wood screws. Next, I attached the outside frame boards. Its important to note that these outside frame boards are longer than the inside frame boards and you should have 3/4 inch of board sticking out on either end of your bench. In addition, this outside board should be installed so that 3/4 inch of the board is sticking up higher than your legs and inside frame. See the build plans and pictures below.


Step 3 - Stain or Seal Bench
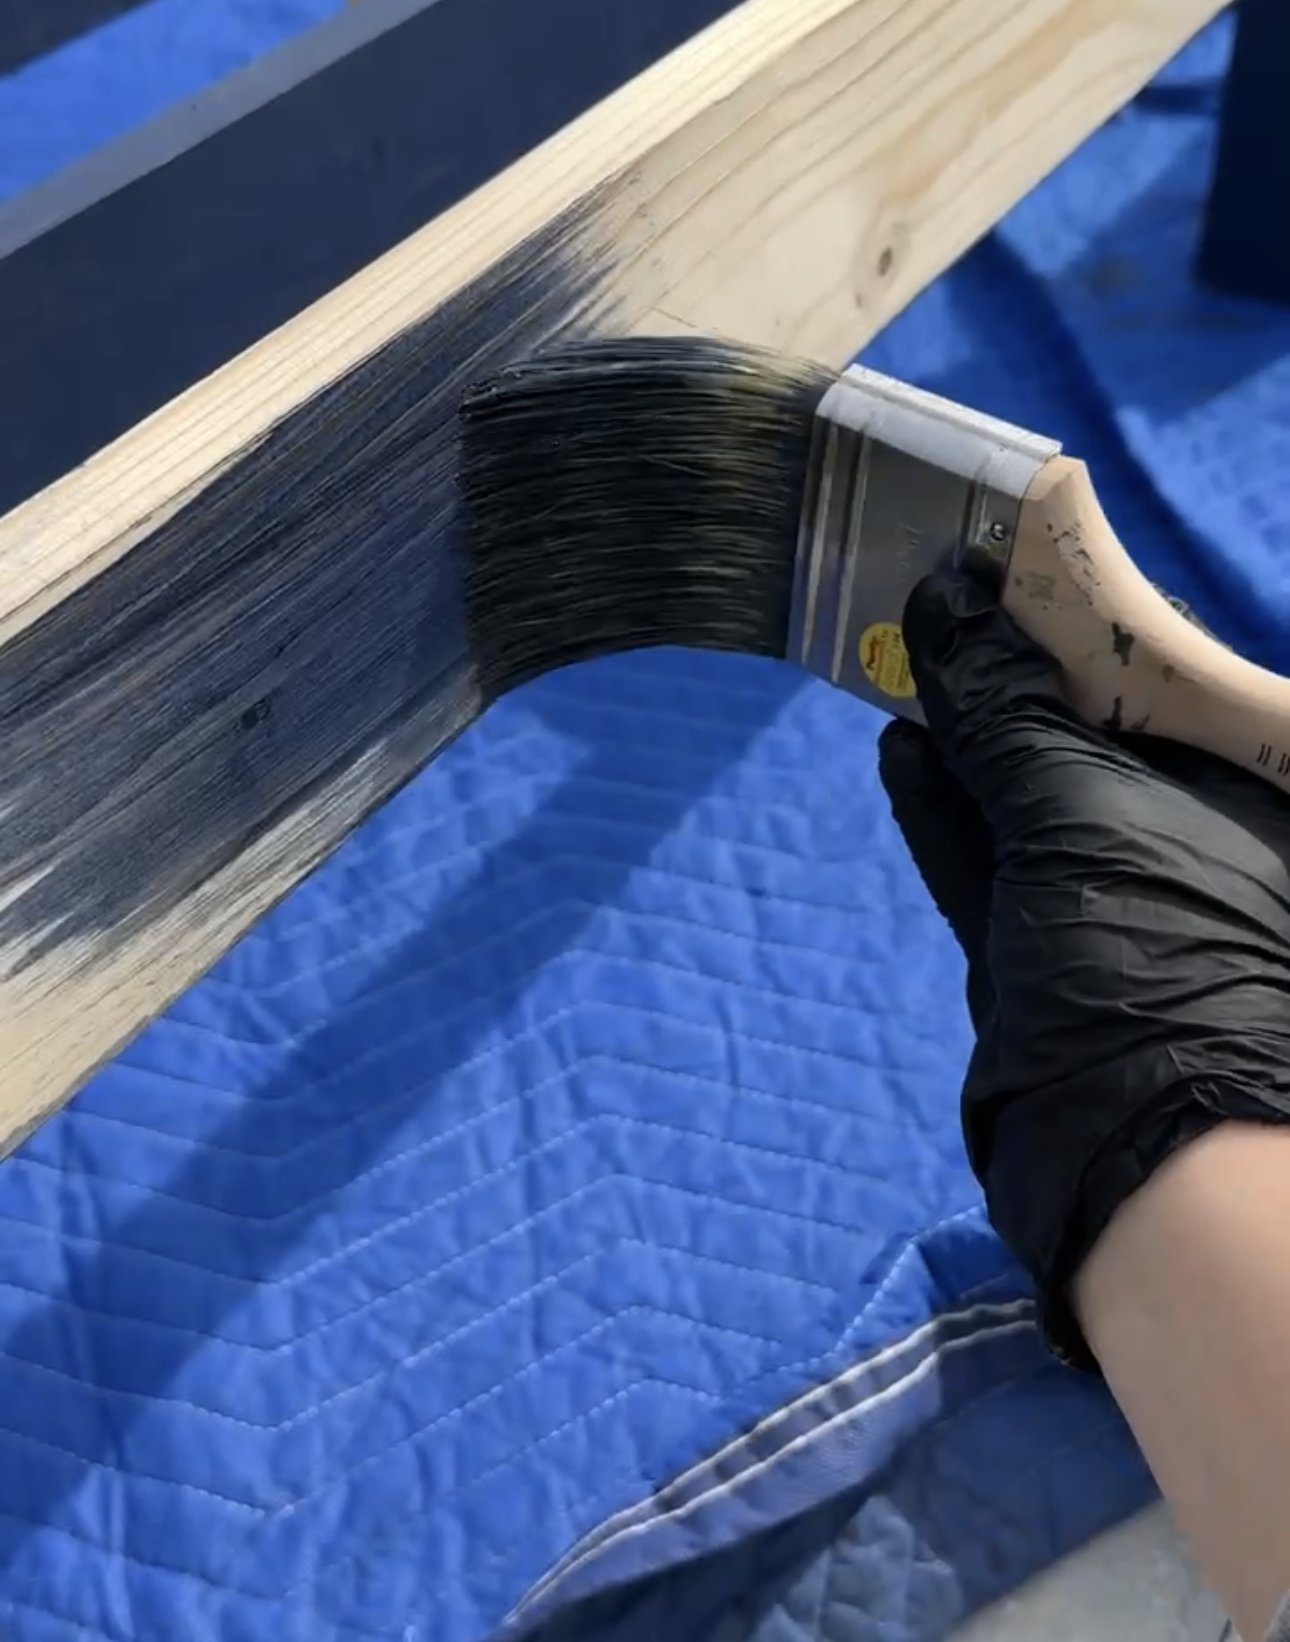
At this point in the bench build I decided to stain and seal my bench before installing the seat boards. I opted for regular wood (non-pressure treated) for this project so it was important that I was able to reach every nook and cranny in order to stain and seal the bench. I figured it would be easier to stain the frame pieces without the seat boards being attached.
You could also stain and seal your wood pieces in the beginning prior to assembling the bench all together. The only reason I didn’t stain them before assembling is because I wanted to go with a two-toned stain and I hadn’t decided yet which pieces I wanted to be the dark stain and which pieces I wanted to be the transparent stain. I highly recommend using Cabot Stain and Sealer. It is designed for exterior wood, is a stain and sealer in one, and will protect the wood from rain, snow, sun fading and more. I stained the seat boards at this point as well prior to installing them to the bench.
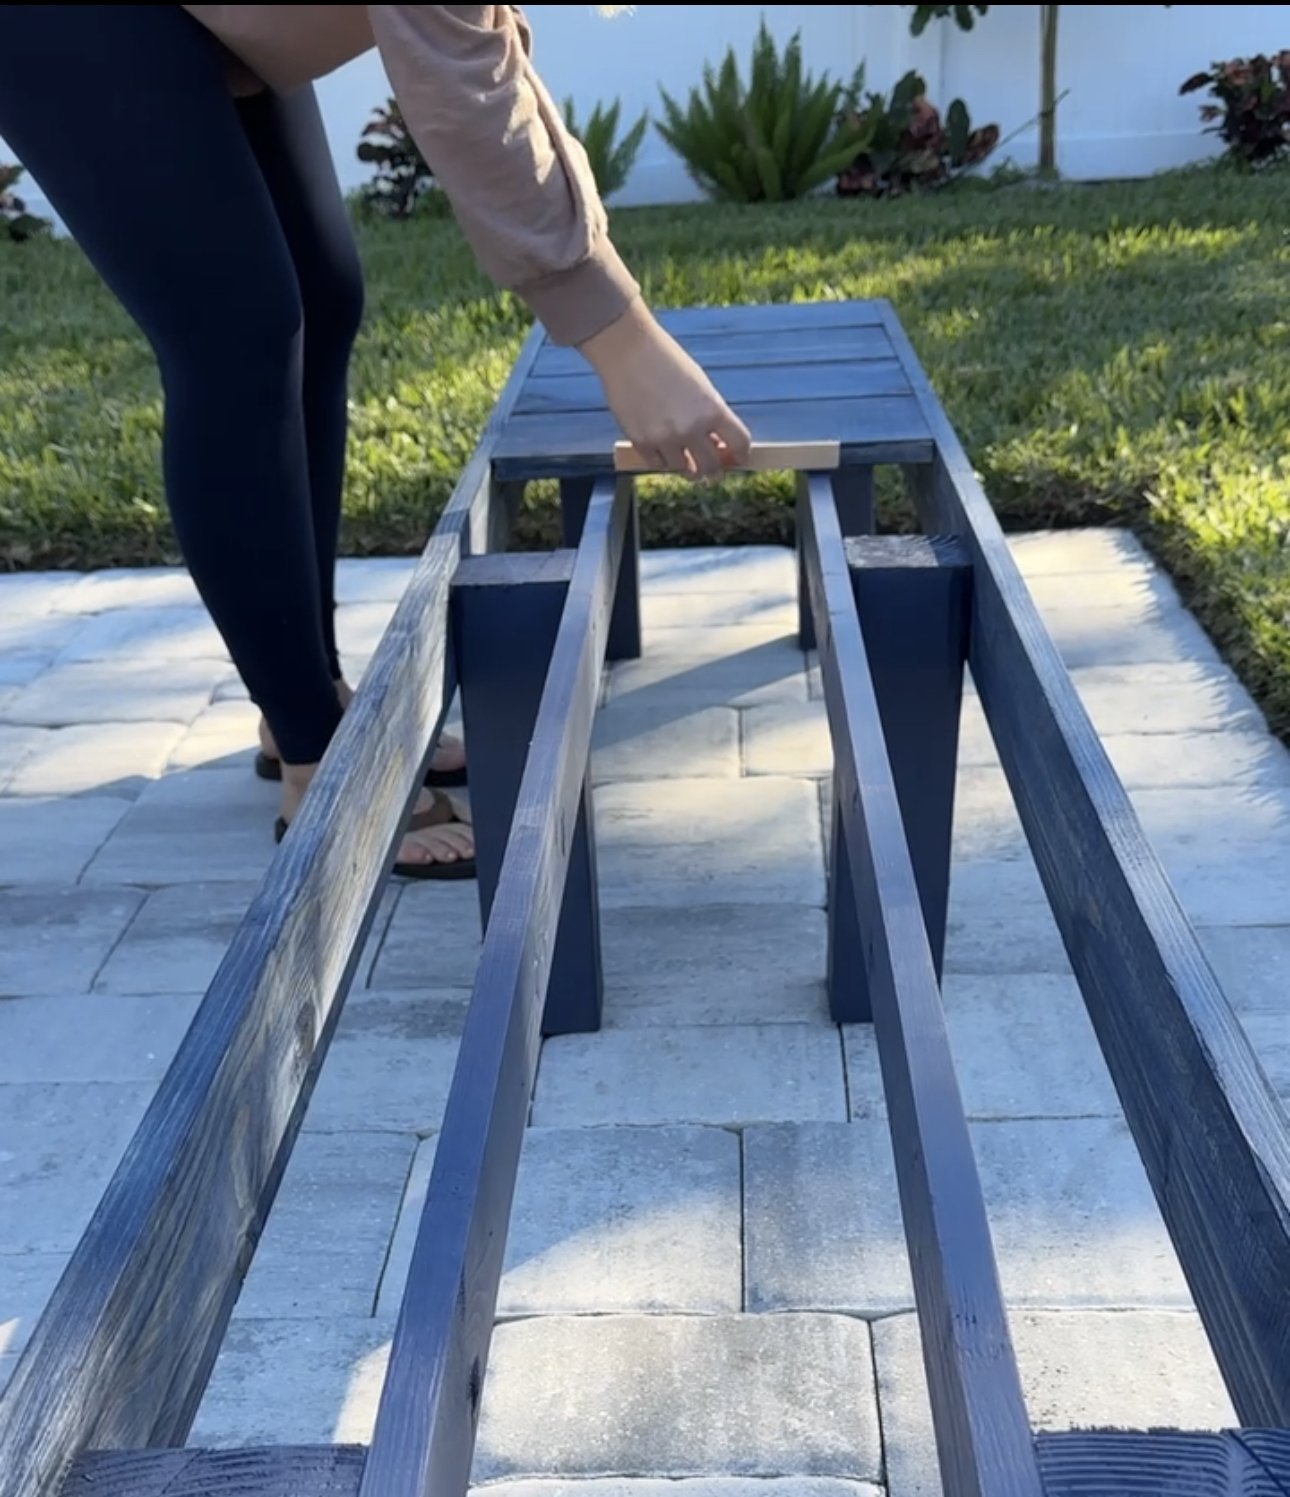
Step 4 - Cut and Attach Seat Boards
Once your stain and/or sealer is dry, it’s time to cut and attach the 1”x8” seat pieces. The seat boards should be cut to 14.5 inches in length each but I recommend measuring the space between your outside frame pieces on your bench and ensure that your measurement does in fact equal 14.5 inches. If your spacing ends up being a bit smaller or larger, then cut your seat boards to match your spacing.
The first thing I did after cutting down and staining the boards was place all the seat boards into the bench and play around with the spacing between boards to determine the proper spacing. Based on these build plans, the spacing between each board should equal 7/16 inch.
Next, I dug through my scrap wood to find a piece of wood that had a width of 7/16 inch that I could use as a spacer board. I would use this spacer to place between each board as I installed them to ensure I kept consistent spacing between each board. I will note that you can also use a spacing of 1/2 inch between boards - you will just want to add a small gap before the first board and after the last board.

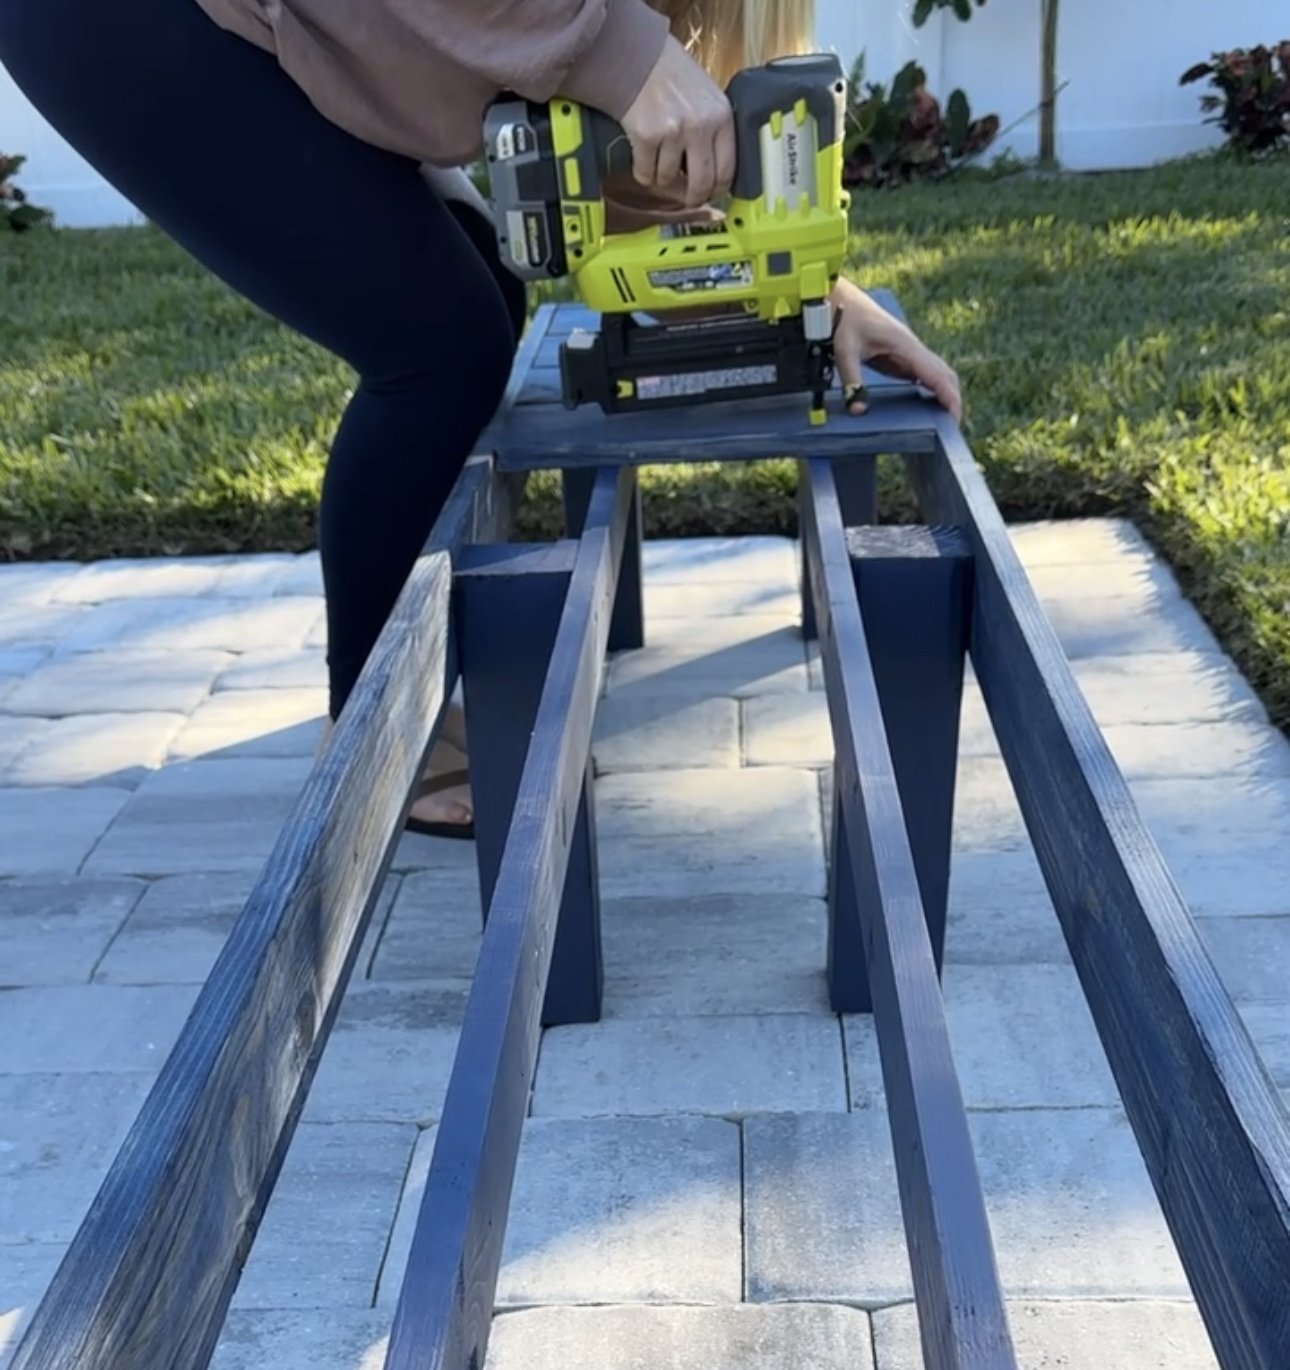
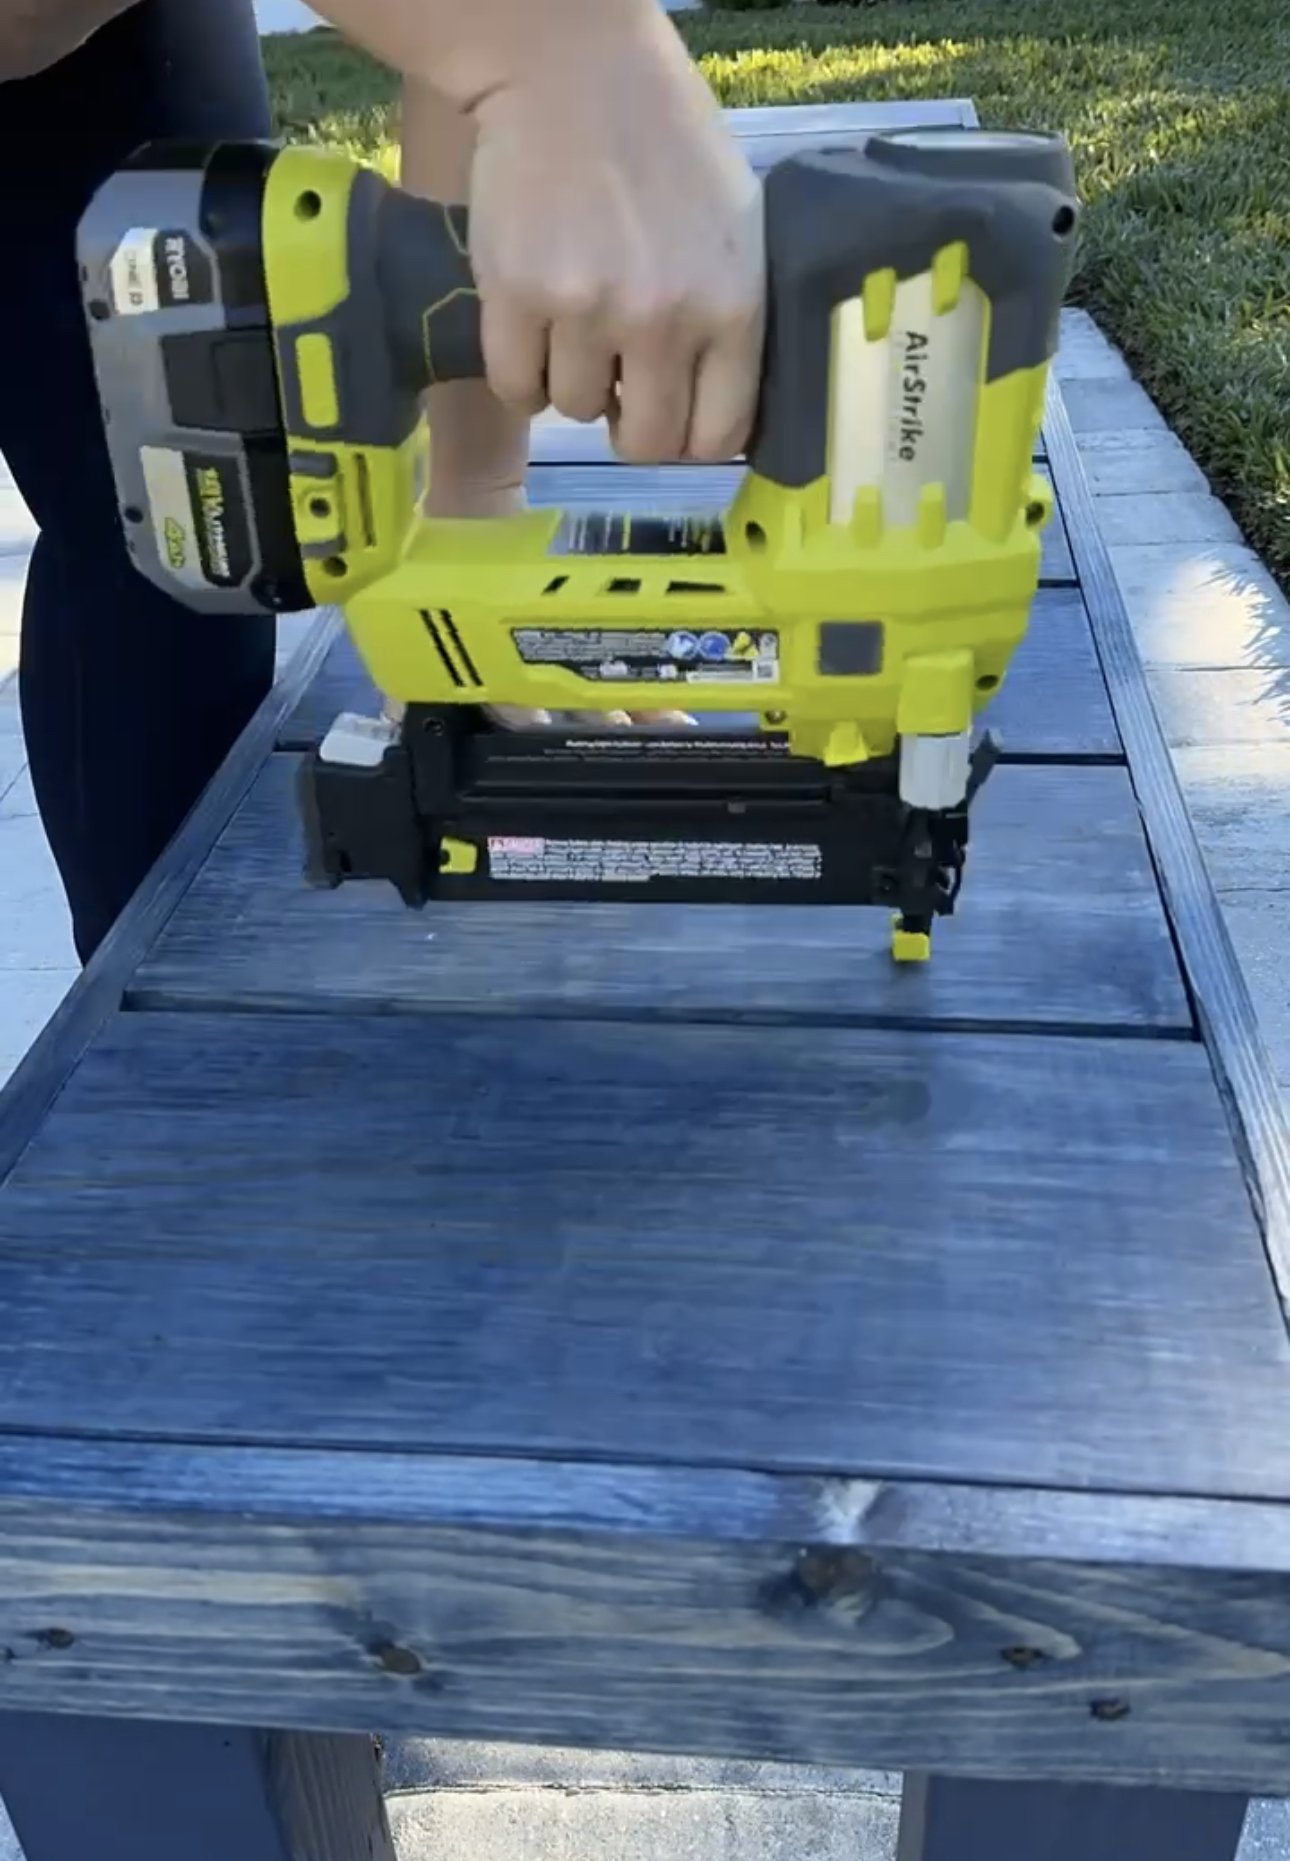
To attach the boards, I used my nail gun and 1.5” Brad nails and drove the nails into the inside frame boards. When I was finished, I laid under the bench to inspect if any nails missed the inside frame and if so, I added additional nails to those boards.

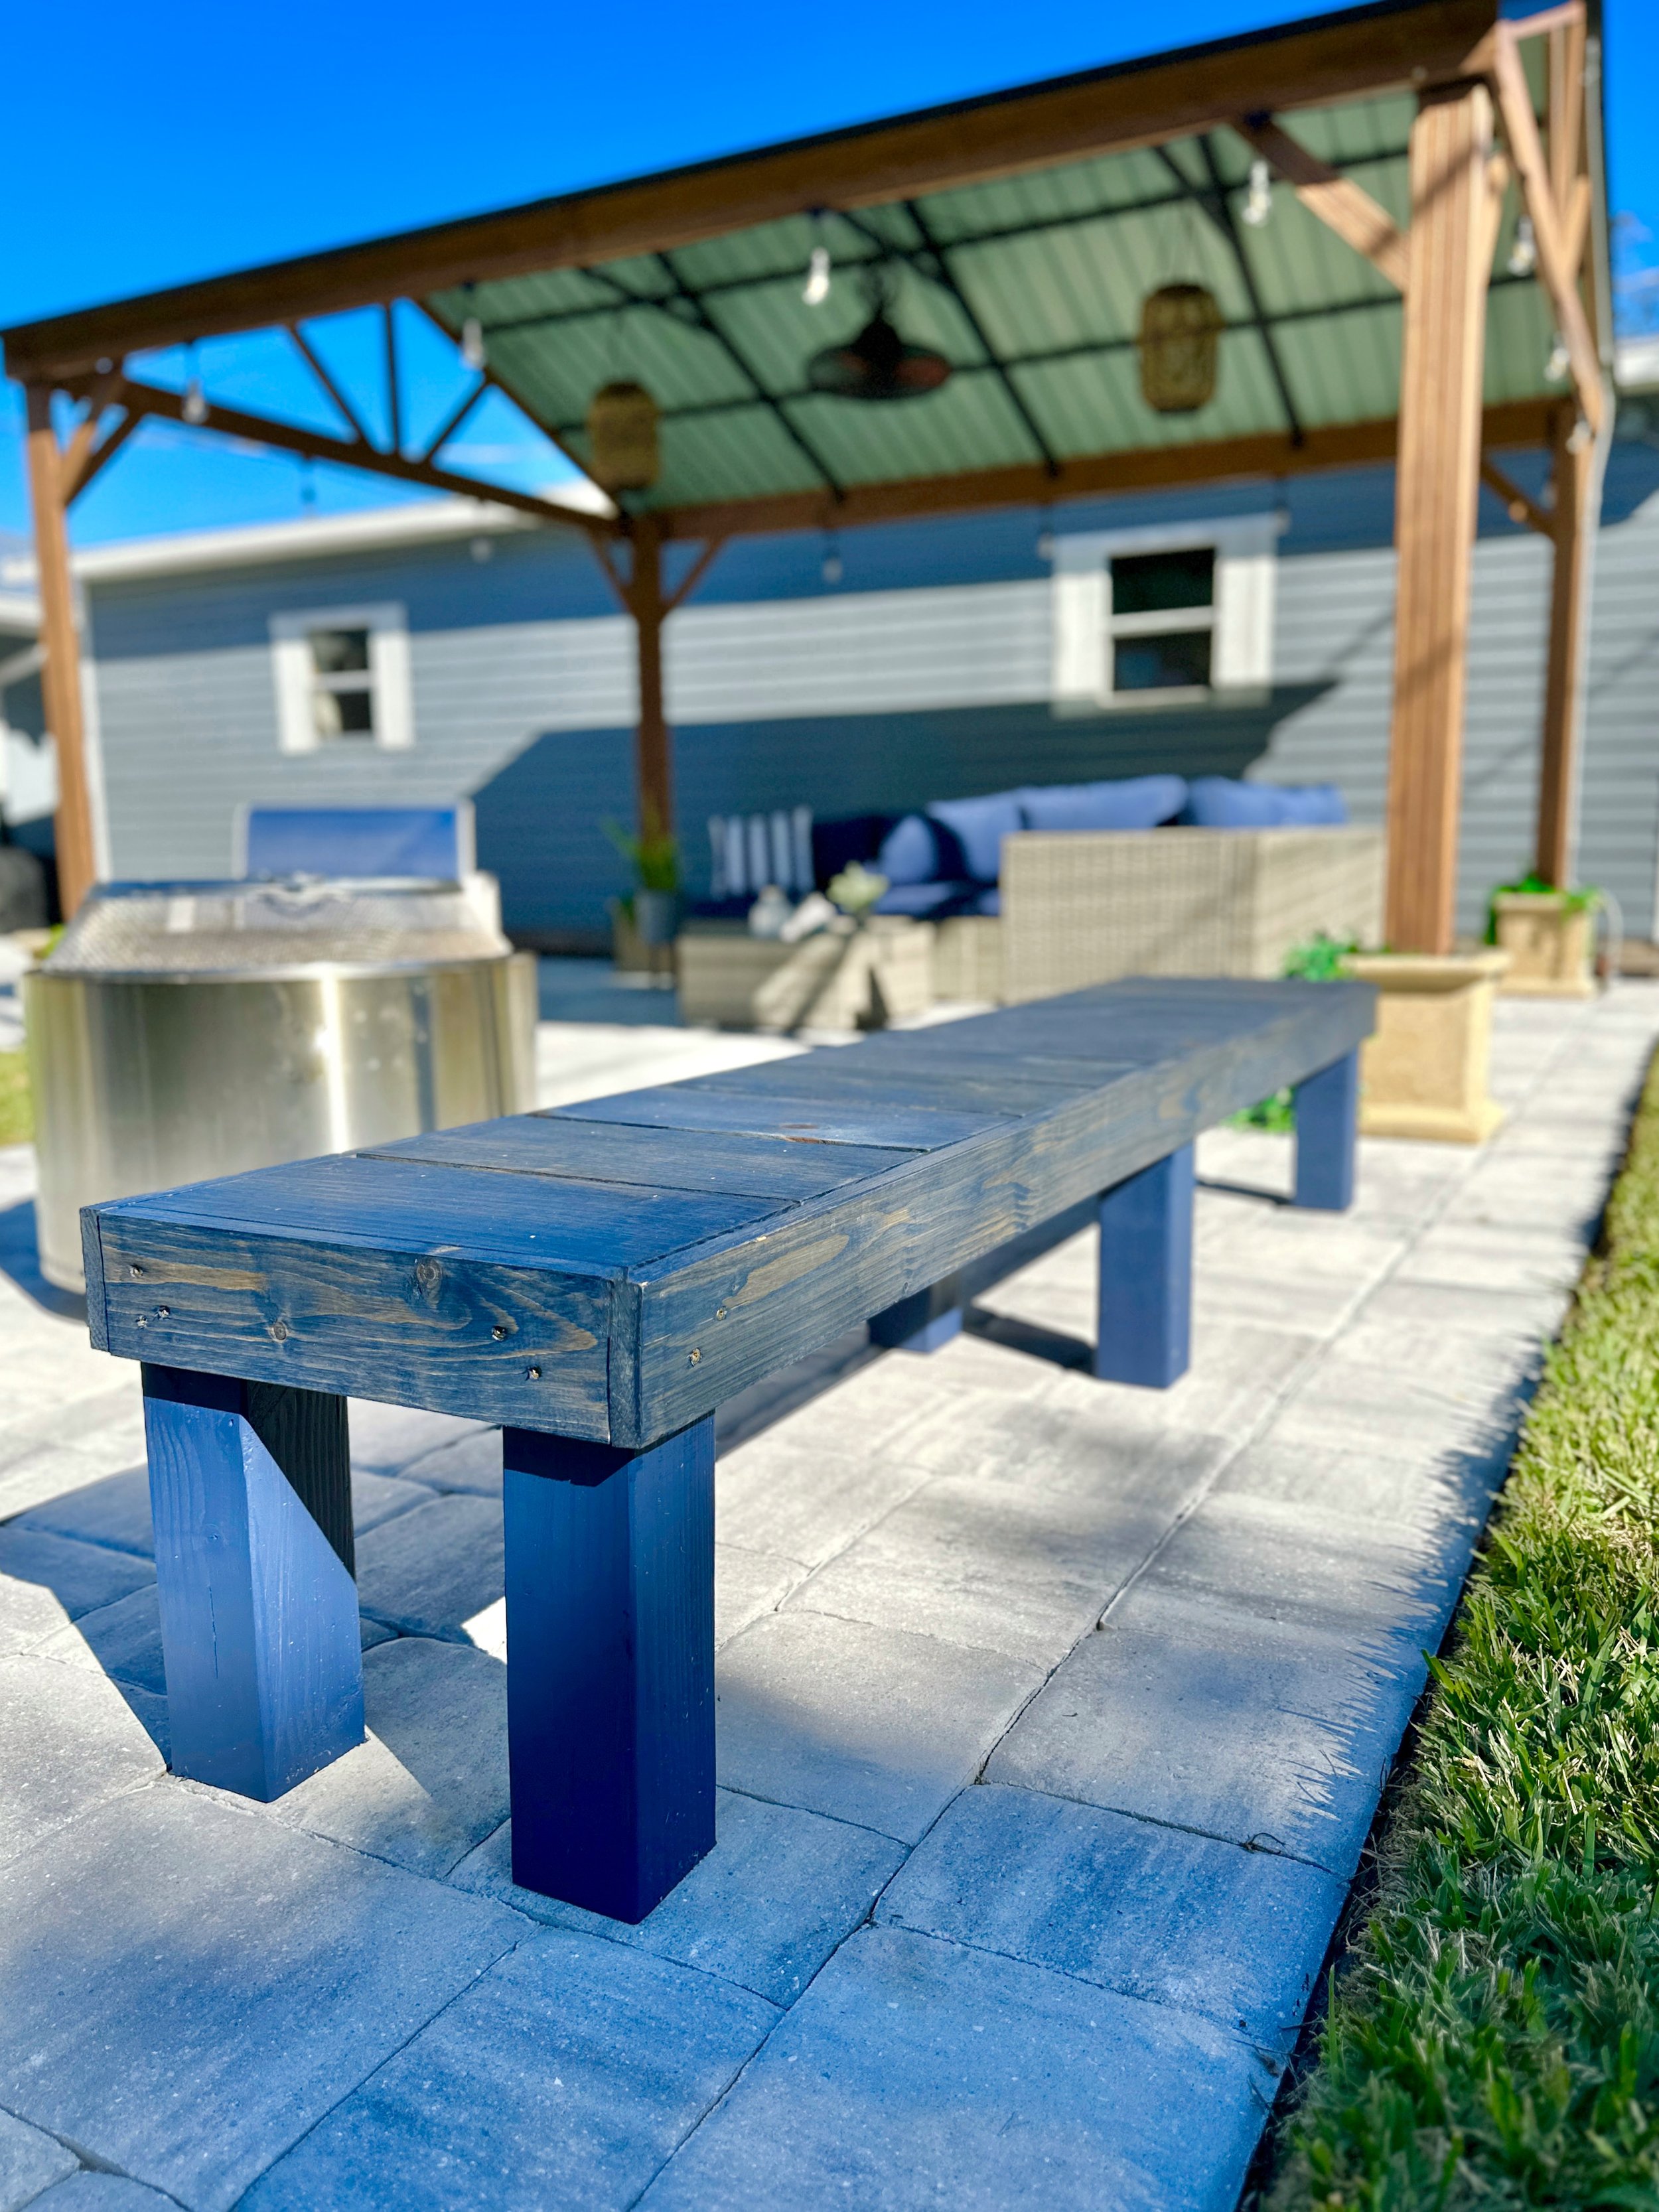
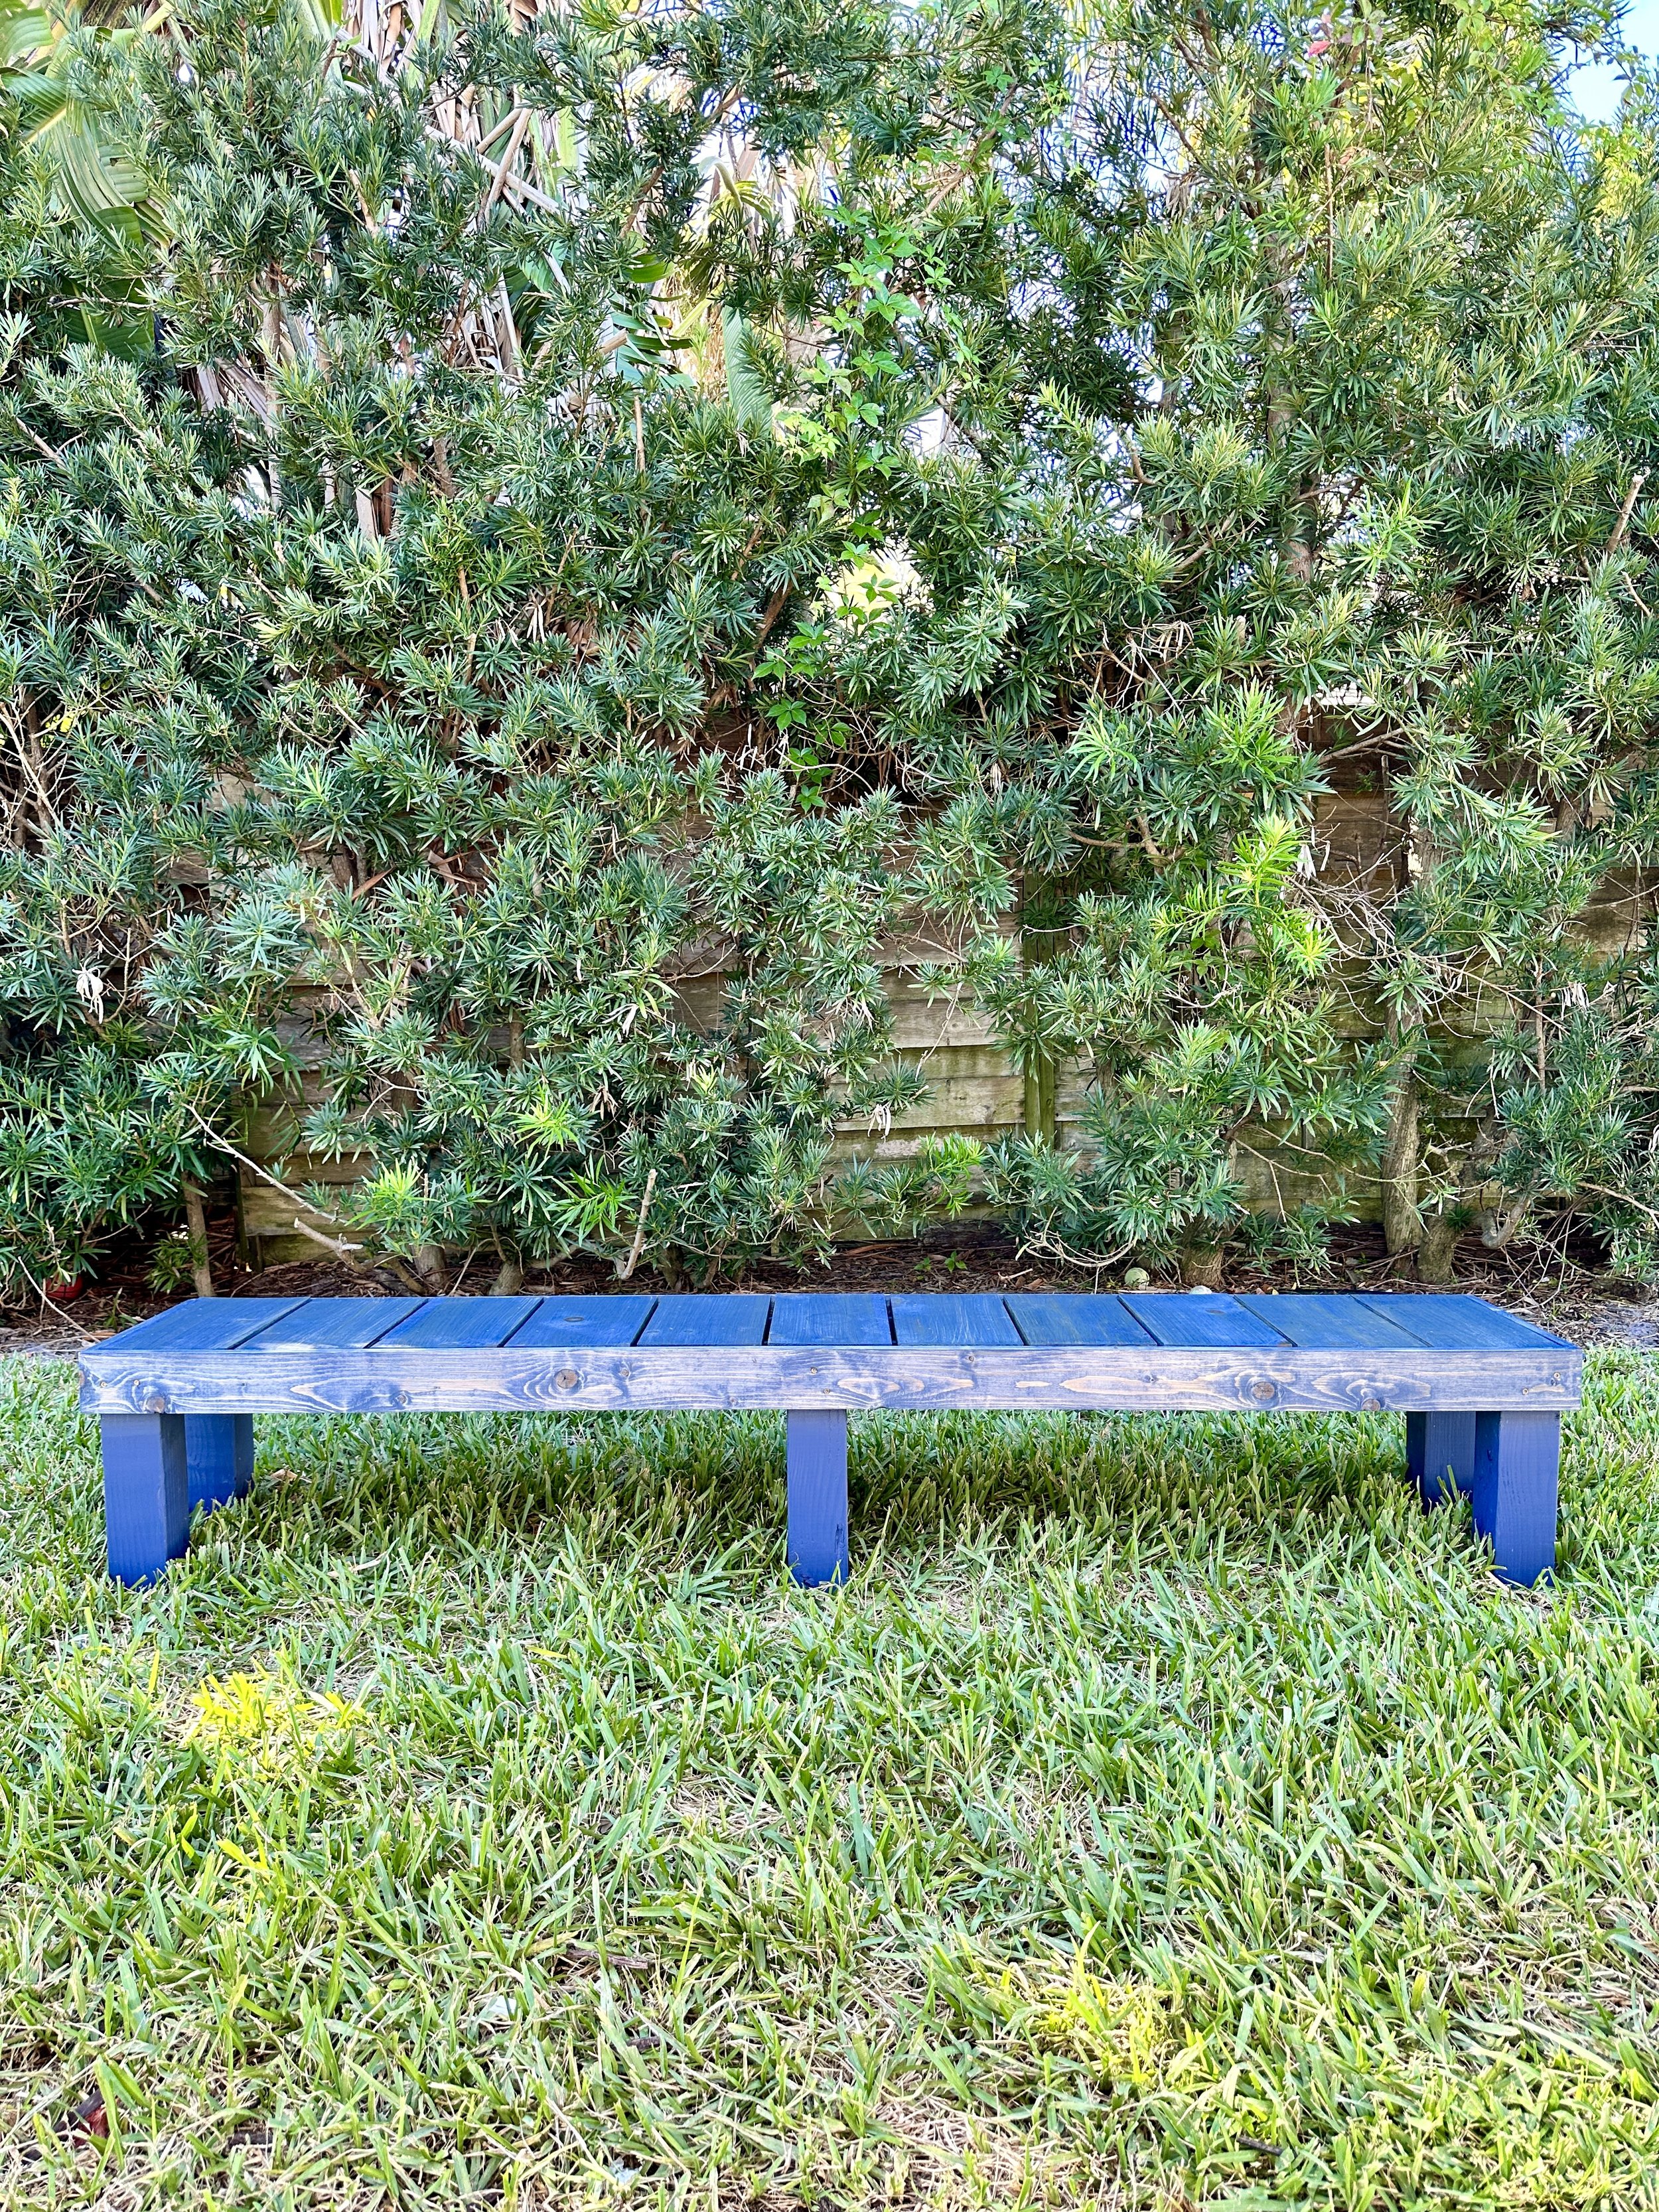
Your bench is done! This bench would work for both an interior bench or an exterior bench. It’s a great beginner DIY and perfect for a Spring or Summer outdoor DIY project. For mine, I went with the color Newburyport Blue by Cabot because the color matched perfectly with our other navy blue patio furniture.


HEY THERE, I’M ASHLEY!
Here to inspire beginner DIYers!