
Rustoleum Tile Paint
If you follow me on Instagram, then you know that I have been intimidated and nervous to paint my slate tile floors in my foyer for quite some time. They are badly chipped and scratched and in need of some TLC. We had them polished a year ago and it did not help. I finally decided to take the plunge to paint them and the entire process was much easier than I anticipated. I am sharing all the details of the process here along with my own personal tips.


After looking into a few different products, I ultimately decided to go with the Rustoleum Home Floor Paint. I found a few people on Instagram and through Pinterest who had used this product and were extremely happy with it. The Rustoleum Home Floor Paint is sold by the quart, by the gallon, or in a boxed kit that comes with a floor cleaning solution. The boxed kit only comes in the quart size and that is what I used since I was only painting my small foyer.

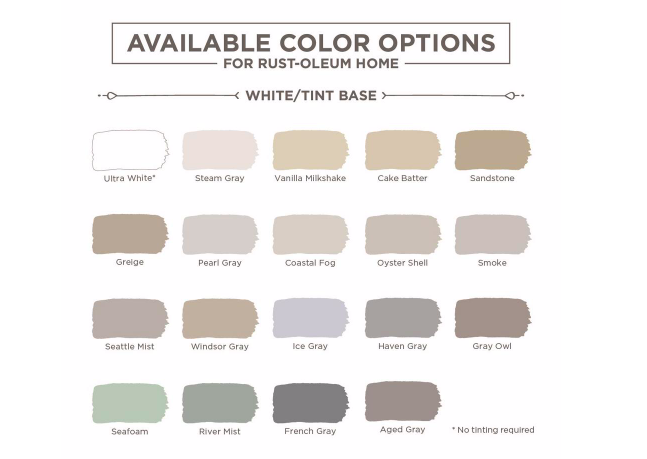
This product comes in 40 different colors, all of which are great colors for flooring. I specifically chose a color that matched as closely as possible to the original slate tile. My goal in painting the slate was to make it look brand new again. I chose ‘Charcoal Gray’.The floor paint is a simple two step process so you have to purchase both the Step 1 and Step 2. The Step 1 is the base coat and that is the one that will be your colored paint. Step 2 is a clear top coat that seals the paint. My Home Depot had a color chart hanging on the shelf where the paint was sold showing the 40 different color options . You just take the can or kit to the paint counter and they will mix the color for you.

Since the full process takes 24-48 hours (depending on the size of your room), you need to make sure you have made arrangements so that the floor will not be touched or disturbed during the paint and drying process. In my case, we came in and out our garage for a few days instead of using our front door and foyer. The very first thing I did to prepare was to tape off my baseboards, door jams, and floors that butted up against the tile I would be painting. This would ensure I didn’t get the tile paint on any unintended surface.
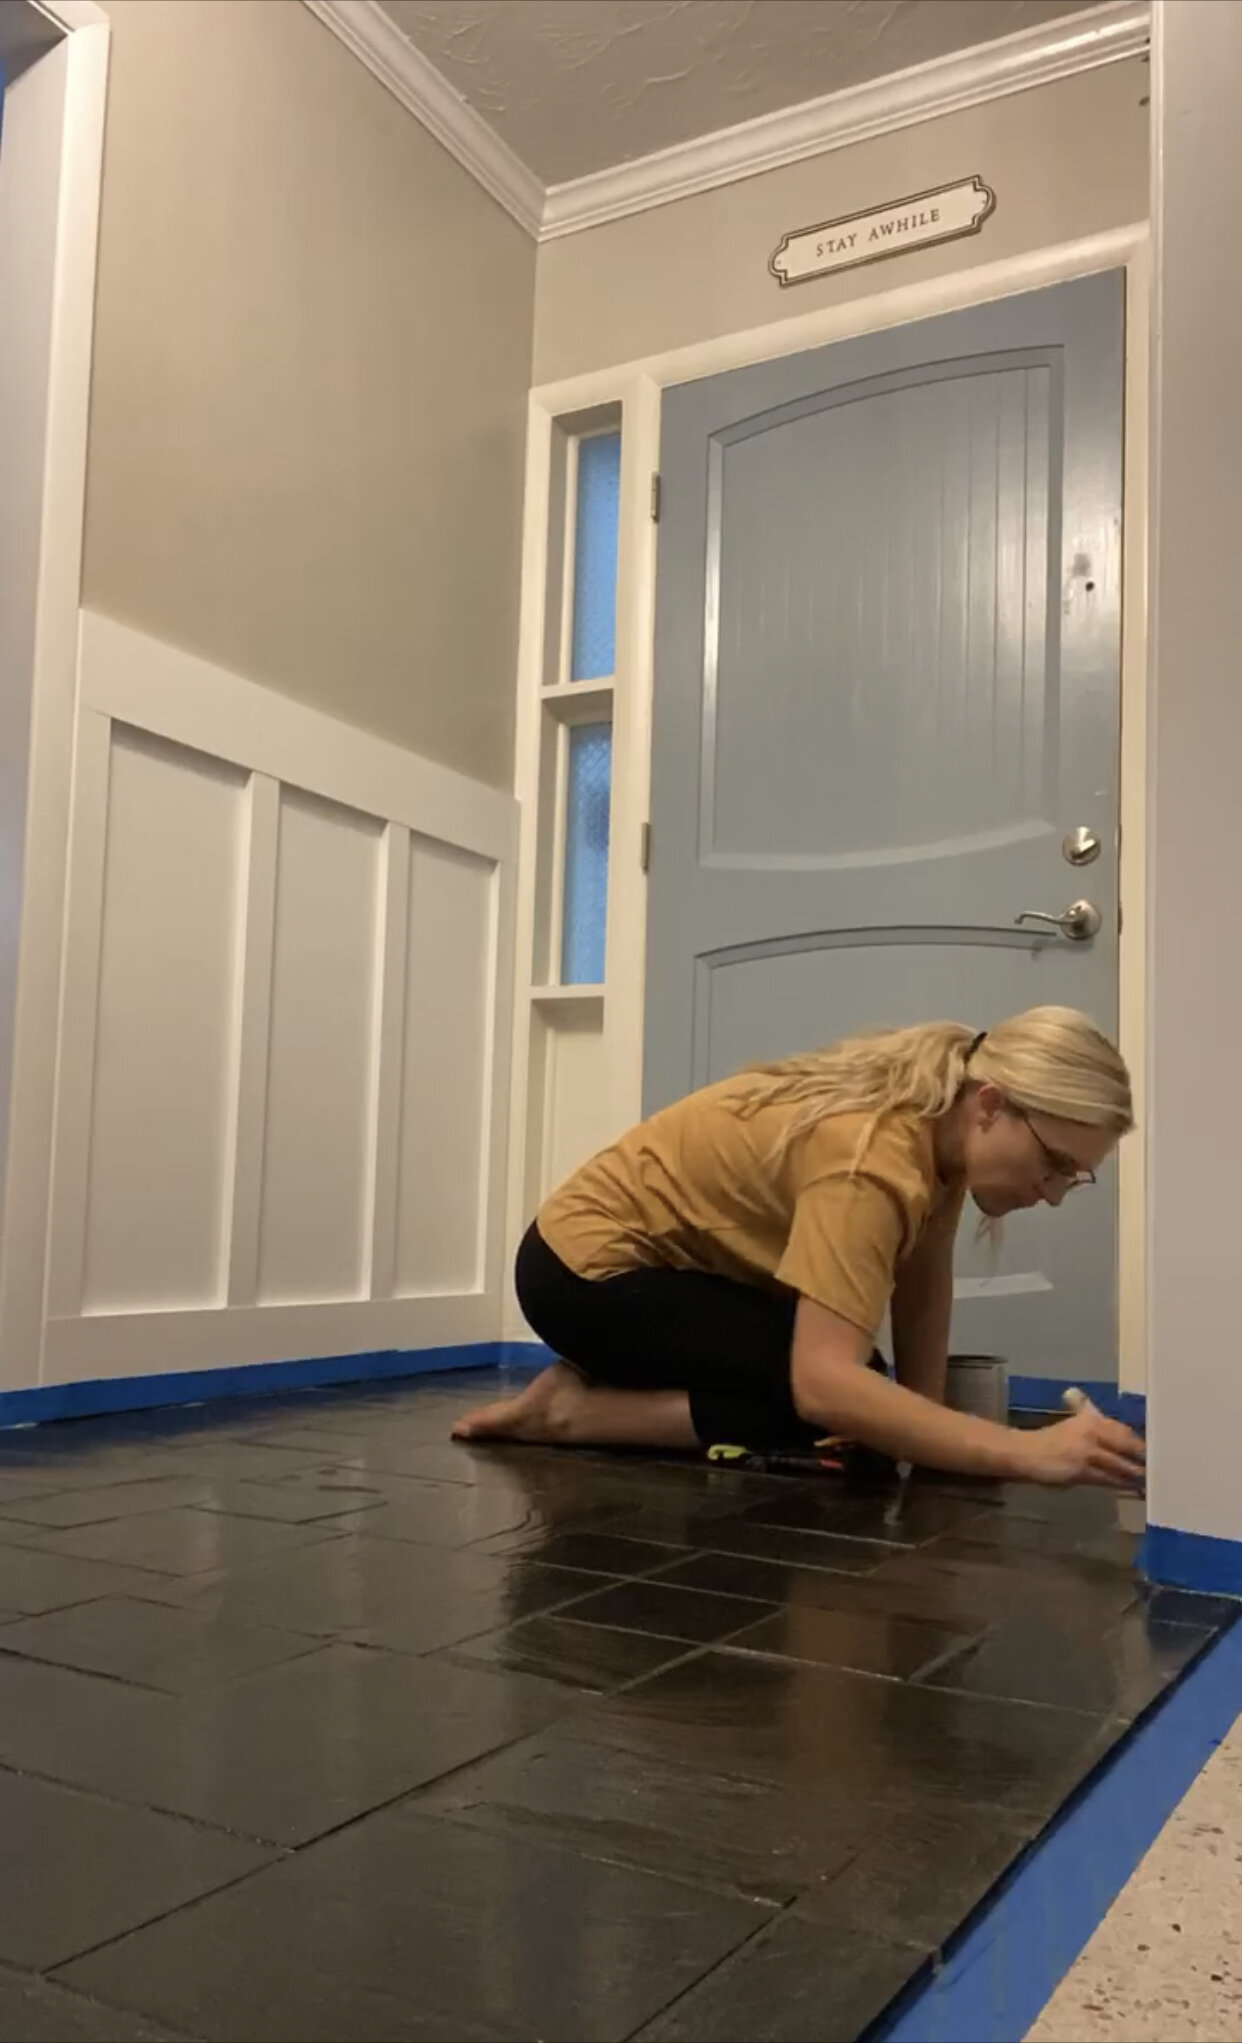
The next step is to make sure the floors are scrubbed clean and free of any particles or hair prior to painting. You will want to do the deep cleaning right before you start painting the base coat. I started by vacuuming my tile very thoroughly. Rustoleum recommends using a product like Krud Kutter and scrubbing the floors to remove any dirt, grime, and build-up. If you purchase the boxed kit like I did, it will come with a deep cleaner. If you purchase it by the single quarts or gallons, you will have to use your own cleaning product. I crawled on my knees and sprinkled the included cleaner directly onto the tiles as I went and scrubbed them using a clean damp rag. I would recommend using knee pads if you have them. A quick tip is to have a clean towel laying to the side of the area you intend on painting that you can wipe your feet on in the event you have to walk away from the tile, through the house and come back to the tile. I also wore clean socks while I was cleaning the tile and then went barefoot while painting the tiles.


I waited about 5-10 minutes to let the tiles dry and then immediately began painting the base coat. It is worth spending a couple extra dollars and getting a high quality roller for this project to ensure you don’t have any loose fuzzies come off your roller and end up in your painted tiles. I still used my little paint roller trick that I have shared on Instagram to remove any loose fuzzies off the roller before starting. You just wrap the roller in painter’s tape and then pull it off. Rustoleum recommends painting the edges with an angled brush and then using a 3/8 nap roller to roll the rest of the space. I did exactly that and it worked perfectly. I was extremely impressed with the coverage of this product. The tiles only needed one single coat and I only used about 75% of the quart. The base coat must dry for 6 hours before applying the top coat.

I painted the base coat at night and painted the final top coat the following night so my base coat got a full 24 hours to dry. This is not necessary however. Rustoleum says the bast coat only needs 6 hours to dry. There was so much time between my base coat and final top coat, I had to gently clean the tiles before applying the top coat to make sure no hair or debris had made its way onto the tiles. I used a hand-held vacuum very lightly and gently over the tiles before I applied the top coat. The top coat comes in two finishes - matte and semi-gloss. We decided to go with semi-gloss since the original slate tiles had a gloss finish to them. Just like the base coat, I started on the edges with an angled brush and then rolled the rest. For the top coat, Rustoleum recommends using a 1/4 nap roller. The top coat is thinner and goes much farther than the base coat. I only used about 25% of the quart of top coat. Once I was done, I put blue tape across our doorways leading into the foyer to remind the family not to accidentally walk into this space. I also put a note on our front door reminding everyone to go through the garage and not to open the door. The top coat says it must dry for 24 hours and takes a full 7 days to fully cure.
After 12 hours of the top coat being painted applied, the tile did not feel tacky or wet at all. We still waited the full 24 hours as directed before walking on it. During the 7 day curing time, we did not wear shoes on the tile, did not let the dogs on the tile, did not put any furniture or decor on it, and did not place anything (like Amazon boxes) on the tile. We did walk across it with bare feet or with socks on. The 7 days went by quickly and I did not feel like we were inconvenienced in any way.


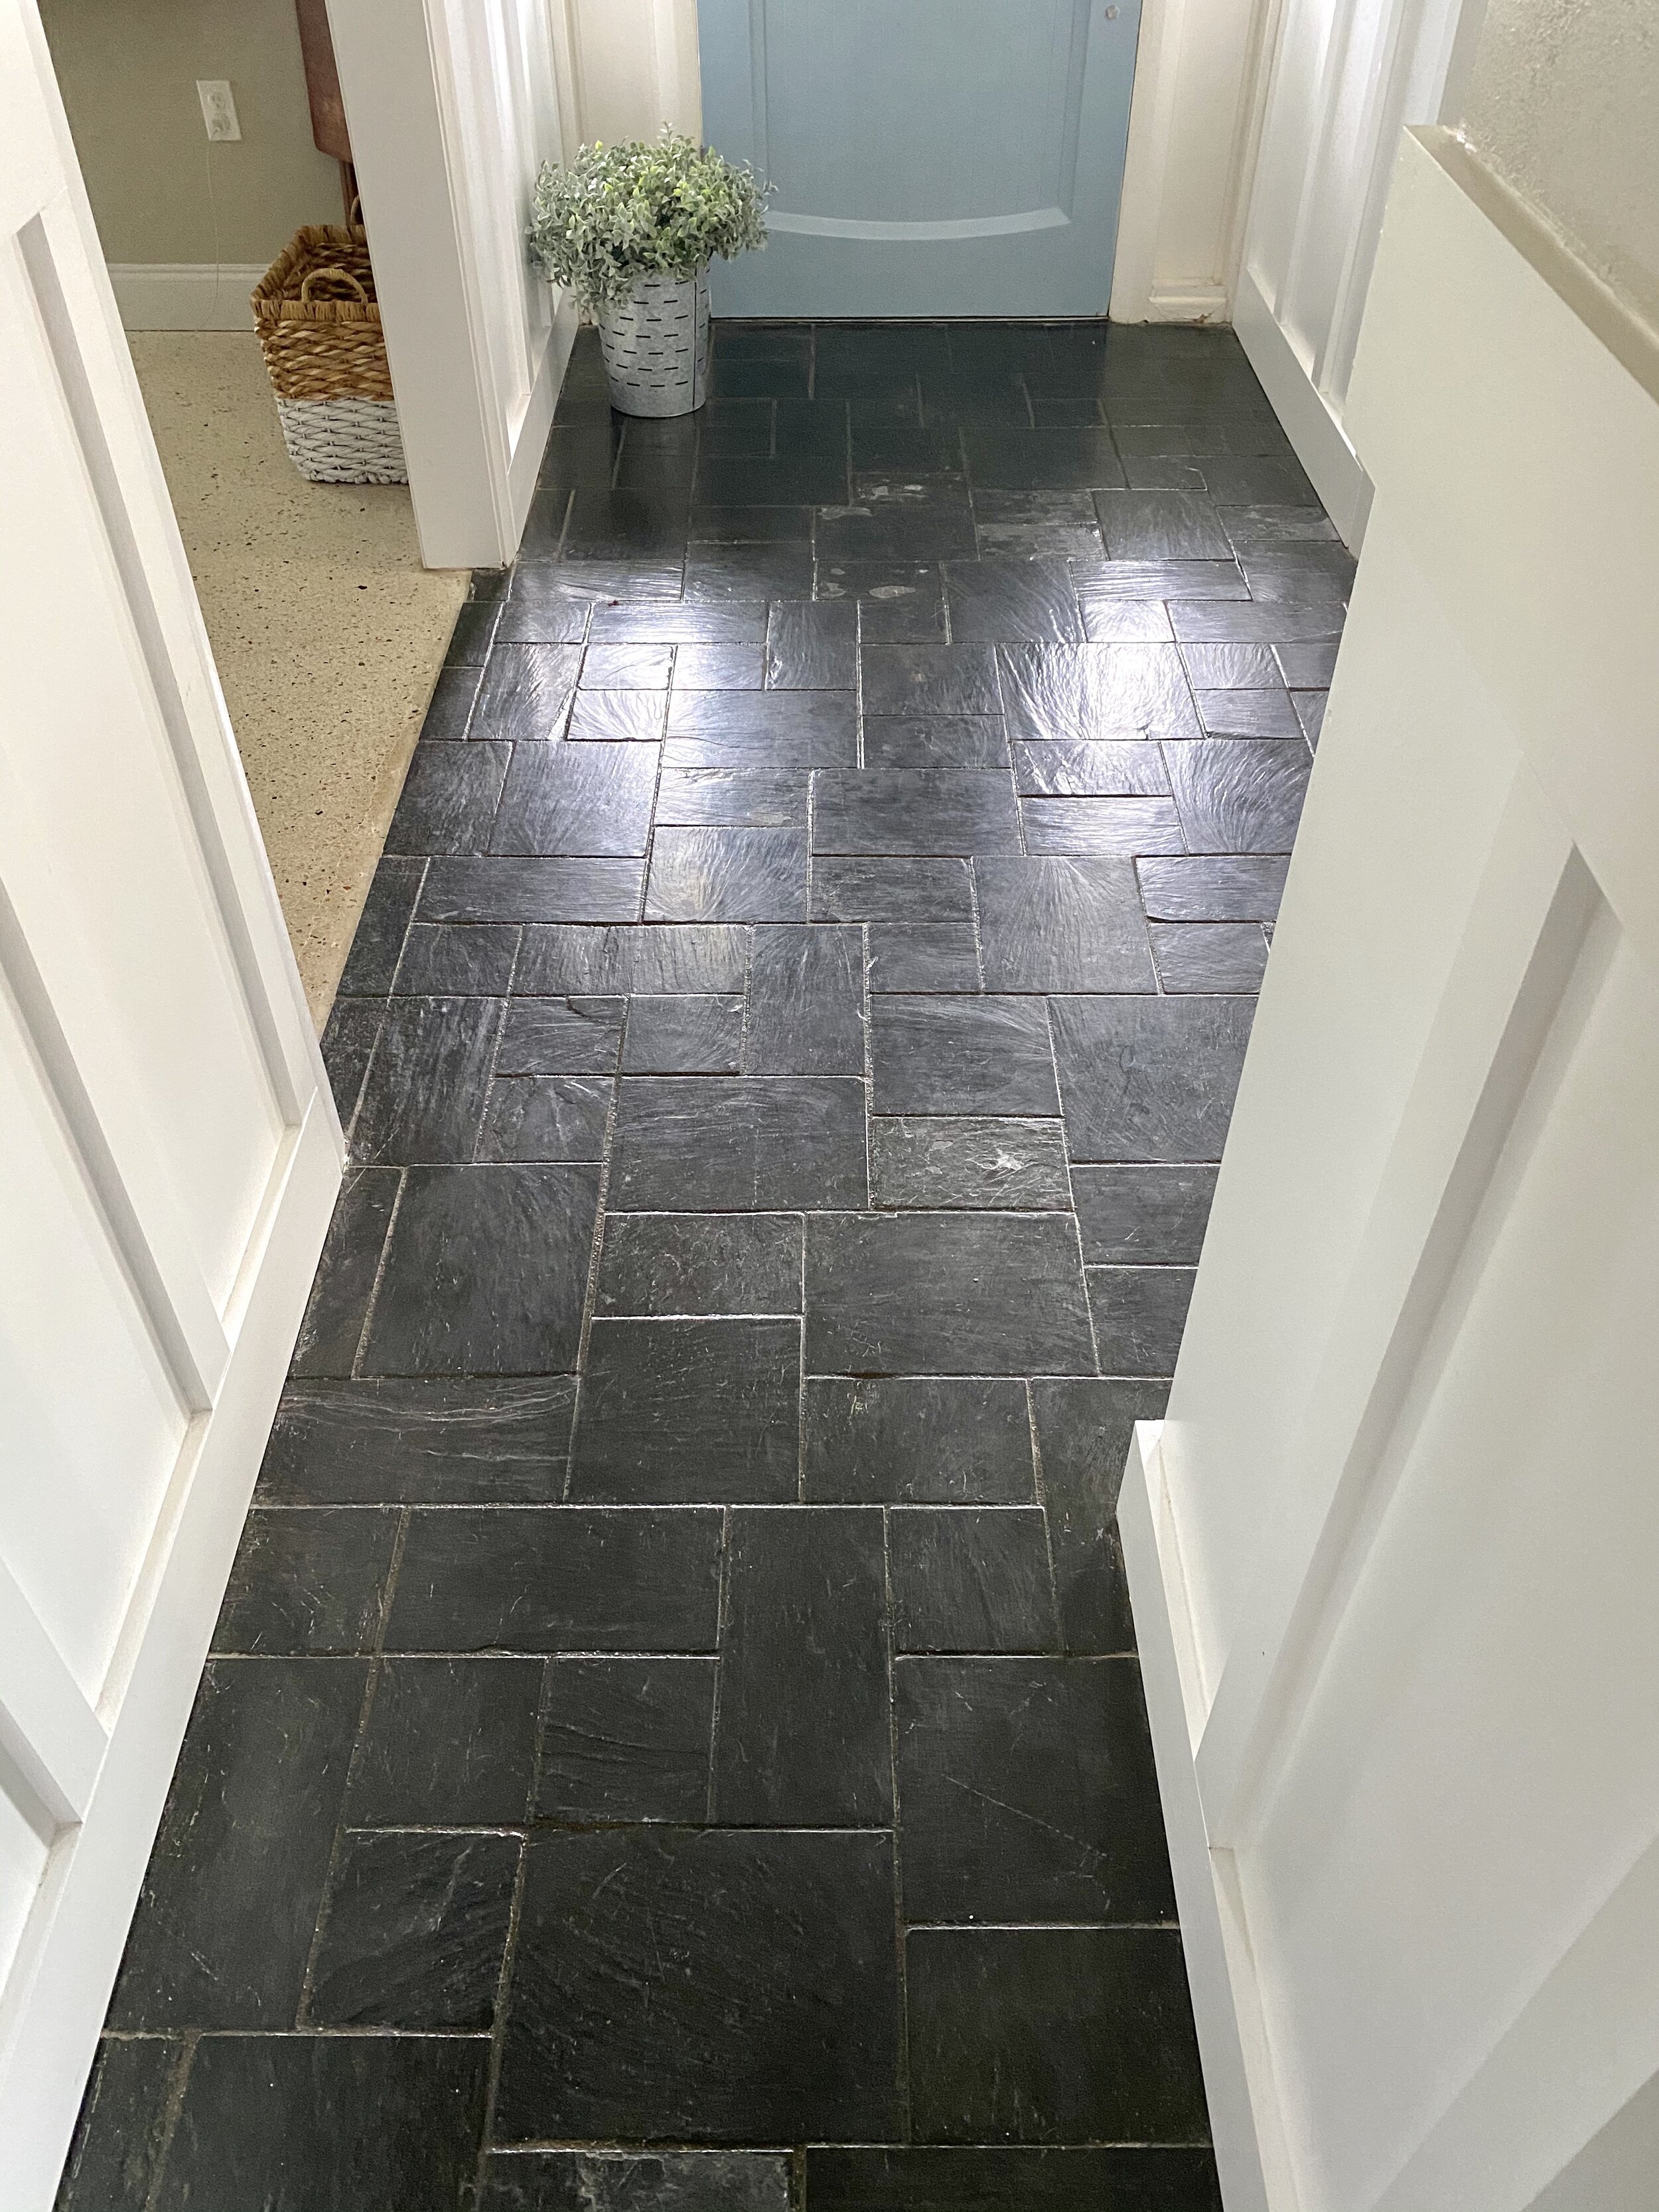
I do plan on doing a follow-up blog post in the future to give an update on how the paint holds up for us in such a high traffic area. This project was extremely easy to do and I think any beginner would be more than capable of doing it. Something that really impressed me was that this paint did not smell at all. It was almost completely odorless. I was so pleased with this entire project and would 100% use this product again on other tile in my home. This is a very affordable option if you are wanting to change the look of your flooring. The before and after photos speak for themselves. The slate tile was chipped, scratched, and discolored before starting this project. Now it is rich and glossy without a single defect and looks brand new again!


HEY THERE, I’M ASHLEY!
Here to inspire beginner DIYers!