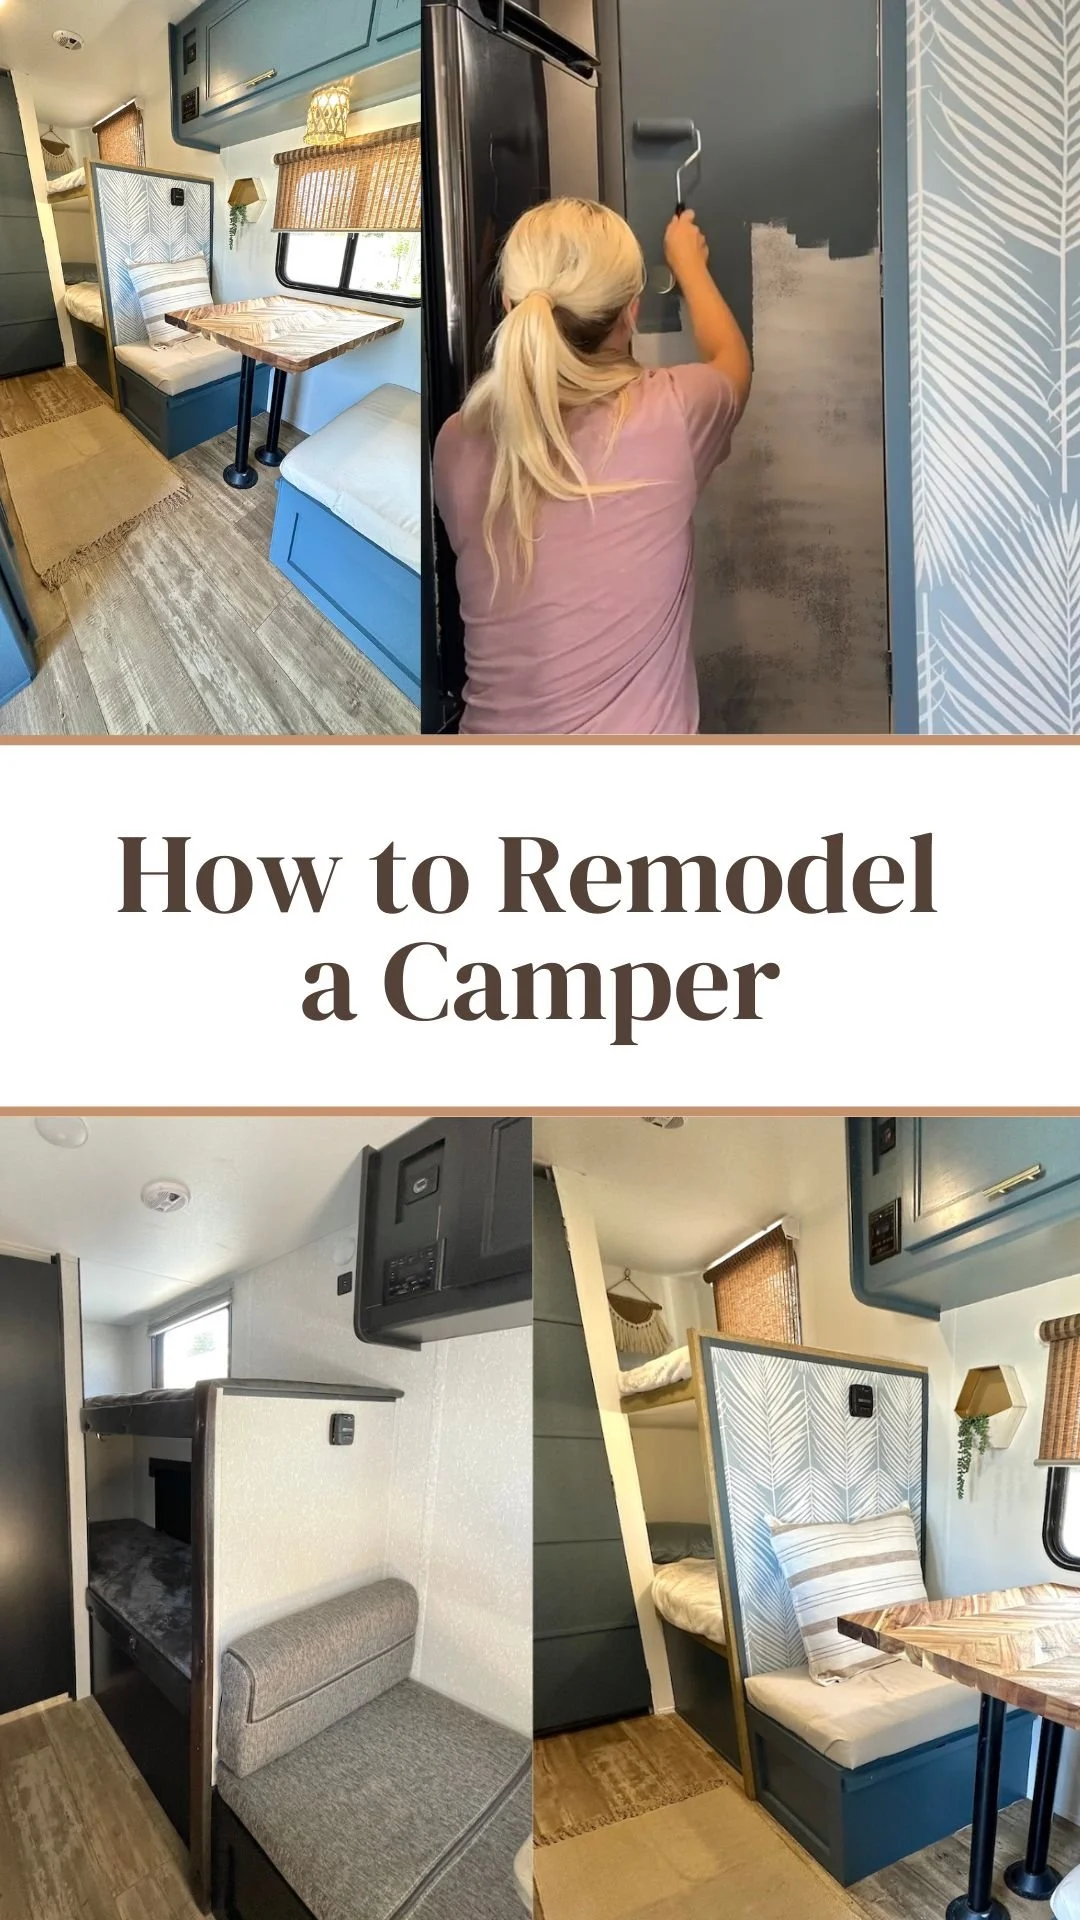
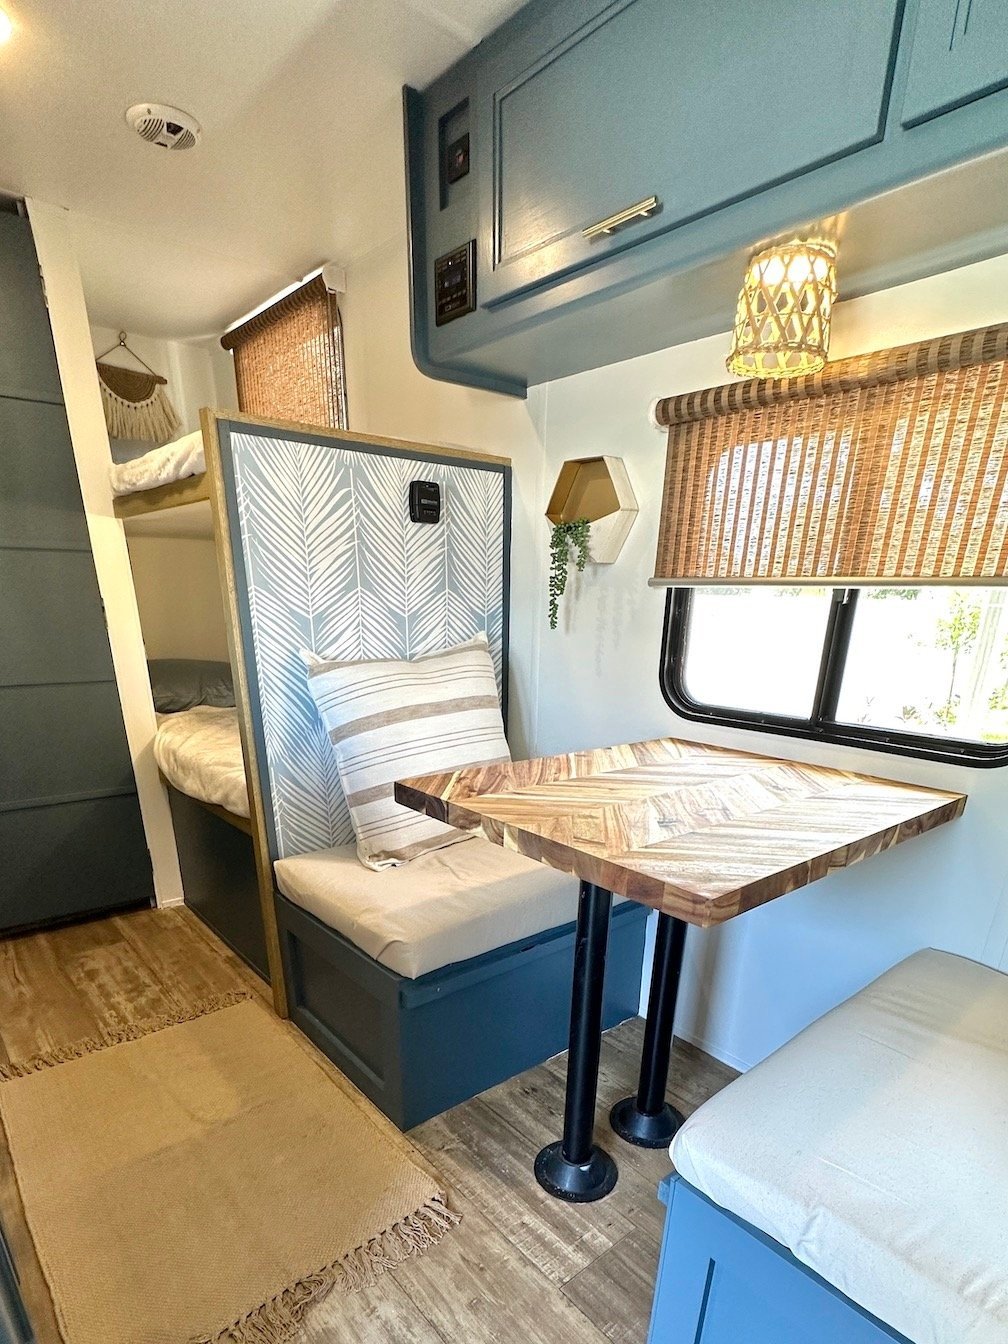
Our Coastal Camper Remodel
We bought this Forest River Wolf Pup 16BHS camper in April of 2022. Being a DIYer and loving to design spaces, I knew I wanted to give the interior a makeover and put my touch on it. This RV remodel ended up being my longest project taking me a full year to complete and it presented tons of challenges along the way.
In the end, I think it was worth the wait and I love the final look of the renovated camper. In this blog post I will be sharing a brief overview of everything we did to remodel the camper.
Painting Camper Walls
To start renovating the camper, I painted all the interior walls white. I started with a water-based primer and first tried using a paint sprayer. That ended up being a mess and a disaster so I ditched the paint sprayer and finished painting with a trusty paint roller. I do love how fresh and crisp the new white paint looks. I used Sherwin Williams Pure White.
2. Painting Camper Cabinets
My plan was to give this camper a coastal look and feel so it was only fitting to paint the cabinets blue. If you plan to paint RV or camper cabinets, make sure you sand the existing cabinets really well, use an oil-based or shellac primer and then use a paint designed specifically for cabinets.
I went with the color Needlepoint Navy by Sherwin Williams which is almost an exact match for the color Spellbound by Benjamin Moore. My two favorite types of paint for painting cabinets are Sherwin William’s Urethane and Benjamin Moore Advance. Both of these are self-leveling and will leave you with a smooth, hard finish.
3. Adding a Kitchen Backsplash in the Camper
To make the camper feel more homey, I wanted the kitchen to feel like a real kitchen. To do that, I decided to add a tile-look backsplash. I used this faux marble peel-and-stick backsplash. I did a little research online and on YouTube before installing it and read that some people had issues with the peel-and-stick backsplash falling off with extreme temperature changes from winter and summer so I did use an extra spray adhesive on the wall while installing.
Since the faux marble tile I used is peel-and-stick, no additional adhesive is required but I did this as a precaution to hopefully prevent any peeling in the future.
4. Installing Wallpaper in the Camper
Accent walls have always been my favorite way to add character to a room. I found this blue palm tree peel-and-stick wallpaper and knew it would be a perfect accent in the camper.
Just like the backsplash, I wanted to add an extra adhesive to prevent the wallpaper from peeling off in the future so I just used normal wallpaper adhesive on the wall before applying the wallpaper and it worked great. Again, the wallpaper I used was peel-and-stick so the extra adhesive isn’t required but I wanted to make sure it wasn’t going to fall off in the future.
5. Adding Wood Trim to the Camper
There were some dark brown fake leather trim that wrapped around the dinette seats, bunk beds, and door that I did not care for. We removed it and replaced it with wood trim that we stained a light brown. The color stain we used was called Driftwood by Minwax and we used a brad nailer and finishing nailer to attach them.
6. Recovering the Camper Dinette Cushions
The dinette cushions had a dark gray cover on them that didn’t match with the coastal look I was going for so I decided to recover them. I picked up a thick, creamy colored canvas fabric from Hobby Lobby and covered just the seat cushions. I did not use the back cushions and instead we used large pillows.
First, I used a thin wood backer board, then used 3M spray adhesive on the wood backer board and then stuck the seat cushions to the wood. I gave that a few minutes to cure and then I covered the cushions with the new fabric and used my craft stapler gun to staple the edges of the fabric to the wood backer board.
7. Replacing the Camper Dinette Table Top
The existing dinette table top was in great shape but it was thin and made of particle board covered in a fake wood veneer that we didn’t like. I found the most beautiful piece of butcher block at Lowe’s with a chevron pattern and we used that for the new dinette top. We did add a butcher block clear protectant on it.
8. Removing Cabinet Panels in the Camper
Throughout this camper there are thin wood panels covering up cabinet space. The panels are stapled and nailed in place making the space behind them unusable. We removed two of these panels above the bed and one beneath the cooktop. In those spots I added baskets which we use for extra storage.
9. Replacing the Camper Mattress
One of the complaints I read about online with this particular camper was how the queen mattress was not comfortable. We replaced the thin existing mattress with this memory foam RV mattress and are so happy we did. It is so comfortable!
10. Adding Bathroom Door Trim
I ended up painting the bathroom door with the same blue paint I used on the cabinets. It looked a little plain after painting it so I added 4 thin strips of wood horizontally with a pin nailer to add a little character and replaced the doorknob with this gold one.
11. Installing a Bathroom Shelf in the Camper
Camper bathrooms are tiny and have zero storage. I saw a few posts online in a camper Facebook page from people who built a tall shelf to go above the toilet and we loved that idea.
Using some leftover wood from a past project, we built a tall, shallow shelf to go from the floor to the ceiling and allow storage for toilet paper, towels, and toiletries. I stained it the same color as the wood trim throughout the camper.
12. Installing Roller Shades in the Camper
All of the windows in the camper had paper accordion blinds that we didn’t care for. I replaced them all with bamboo roller shades and I think it looks so much better. I simply screwed the new roller shades into the wall as the directions stated just as you would if you were installing them in your home.
13. DIY Camper Woven Light Covers
I got so many questions about the woven light covers when I shared them on my Instagram. I actually had an extremely hard time finding anything that would work to hang around the lights and make them look like little chandeliers. Then when I was shopping at Hobby Lobby I saw these glass vases with the woven basket around them and I knew they would work perfectly.
I removed the woven part and used that to go around the camper ceiling lights (I kept the glass vase in my garage for a future project). For now I just have them attached to the edges of the light with double sided tape but I did plan to screw them in place using these small corner brackets.
14. Replacing the Camper AC Unit
The inside AC unit was working fine when we bought the camper but needed some improvement. It never regulated on and off and just ran non-stop turning the inside of the camper into an icebox.
Again, in the camper Facebook group I joined I saw many people say they replaced their inside unit with this one and we decided to do the same. It took my husband less than an hour to install it and we are loving it. It has a digital screen, is a bit quieter, and regulates itself on and off only blowing cold air when needed.
If you want to see video from this camper makeover, head over to my Instagram page and checkout the 4 videos on the profile which detail the full renovation.


HEY THERE, I’M ASHLEY!
Here to inspire beginner DIYers!