
Affordable DIY Shelf Gallery Rail
If you are like me and have spent any time scrolling through kitchen inspiration on Pinterest then you have probably seen a gallery rail. When we renovated our kitchen last year I had always planned on incorporating a gallery rail on our floating shelves.
I quickly found out that they are really pricey so I set out to find a way to DIY them and save some money. Luckily, a few DIYers like me had already found a more affordable way to get the look and I ordered the same supplies to create my own.

DIY Gallery Rail Materials
I was able to create a gallery rail using lamp parts! I ordered them from the website Grand Brass Lamp Parts and doing it this way saved me hundreds of dollars. Here is what I ordered:
14in Long - 1/8ips Thread (3/8in O.D) Threaded Pipe Stem with 3/16in long thread on both ends
10in Long - 1/8ips (3/8in O.D) Brass Pipe Stem with 2 Threads x 5 threads on the end ends
8in Long - 1/8ips (3/8in O.D) Brass Pipe Stem with 2 Threads x 5 threads on the end ends
1/8ips Female Threaded - 7/8in Diameter 90 Degree Ball Armback

How to Make a DIY Gallery Rail
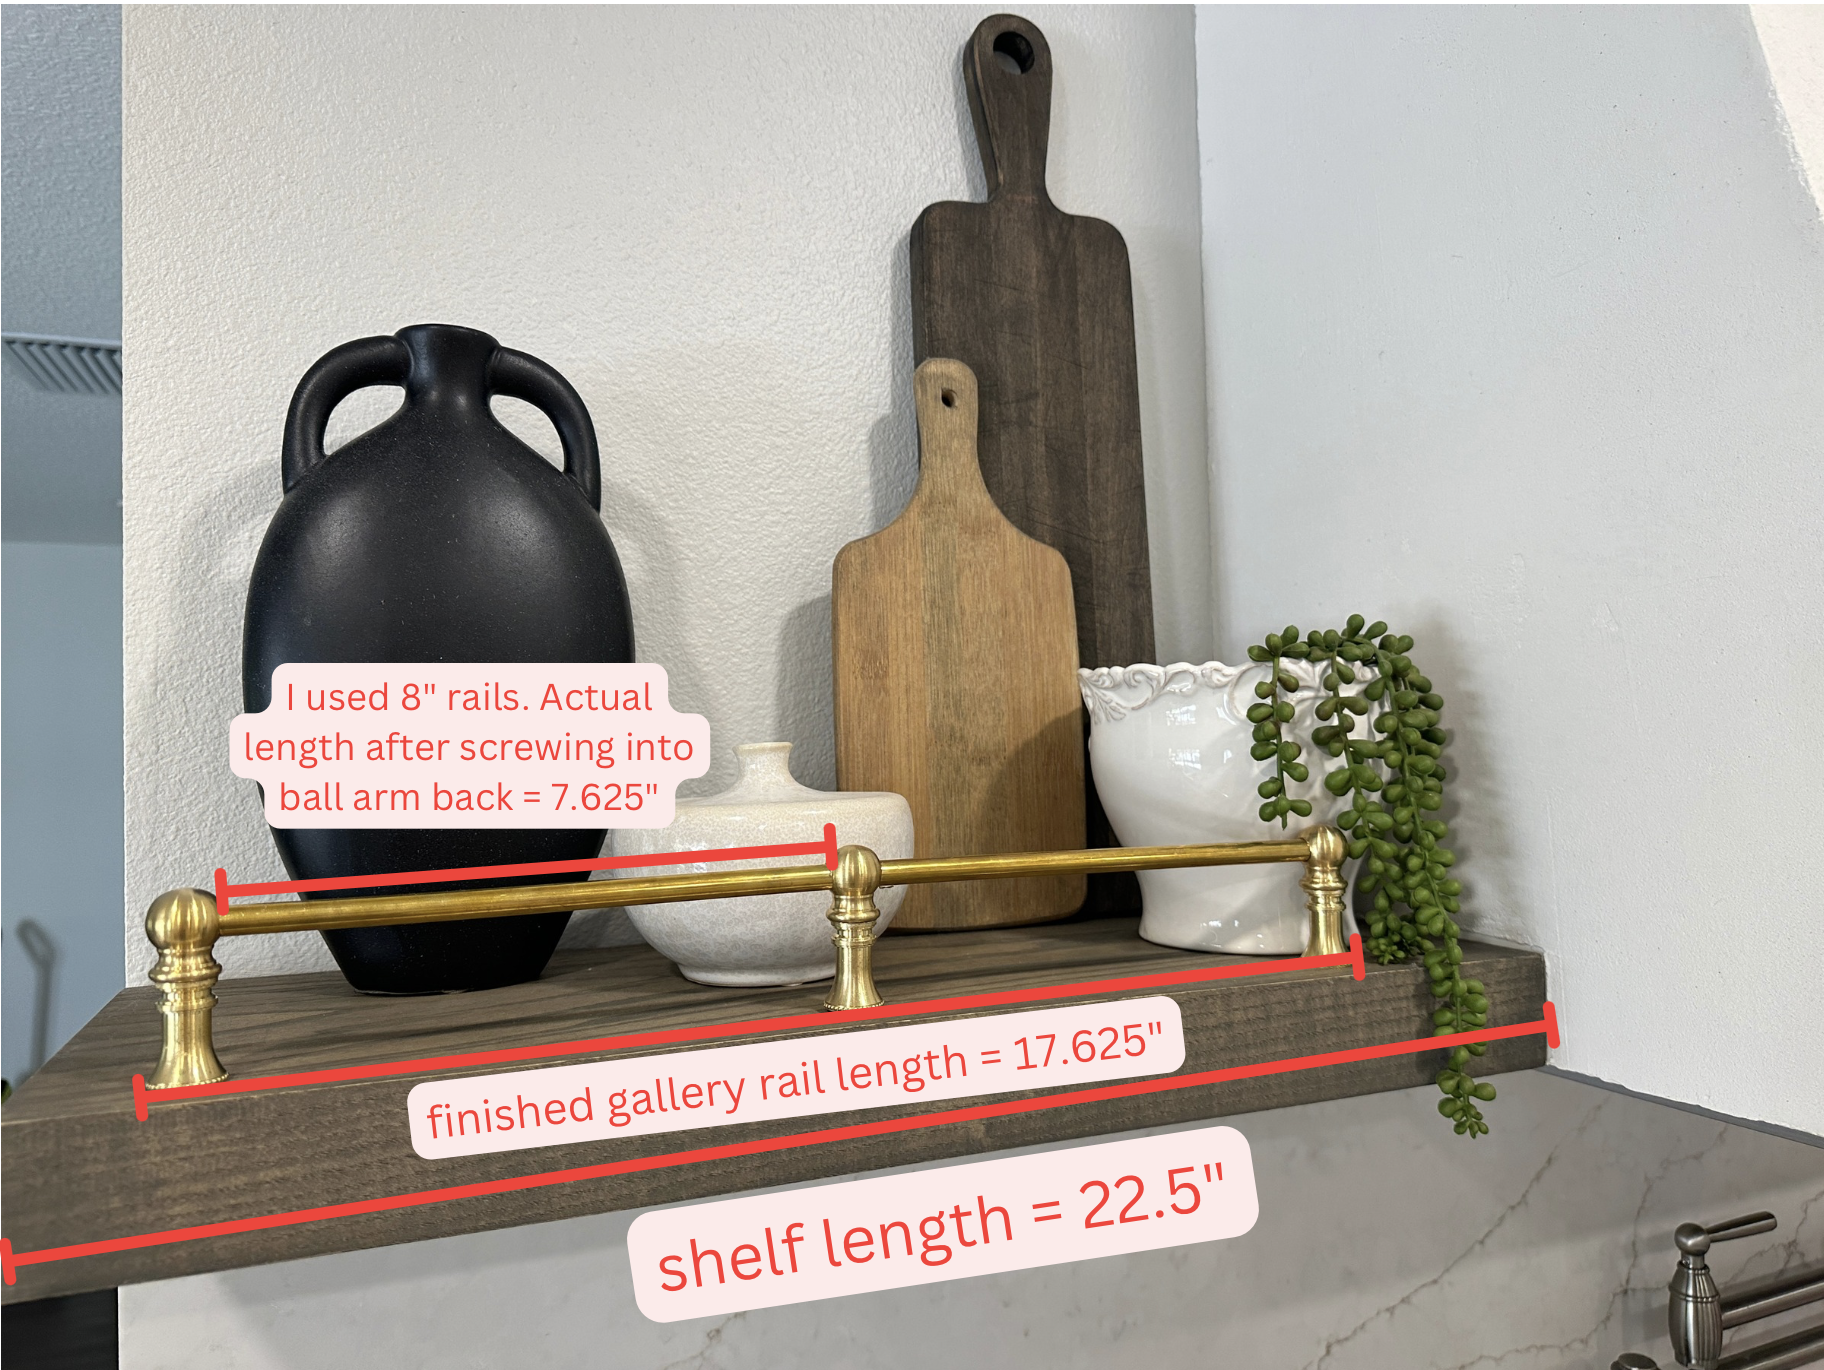
This project is super easy. The hardest part is determining what length pipes you need to order. I included photos below of my three floating shelves with the overall length of my shelves, the length of pipe I went with, and the finished length of the gallery rail. You will notice that I had to go with 3 different size pipe for my 3 different shelves.


Once you have determined which length pipes you need and have placed the order, the actual assembly is super easy.
Lay out a towel or some wax paper over your workstation and lay out all your pieces that you will be using.
Screw the pipes to your Ball Armback pieces using the Tee-Ball Armback for the center pipes and using the 90 Degree Ball Armback on each end of your rail.
Turn your rail over so that the ball armback pieces are facing up toward you and you can see the bottoms of them.
Using this metal super glue, put 3-4 small dots on glue onto the rim of the bottom of the ball armback pieces and press the beaded neck pieces against the ball holding firmly for 10-15 second.
Allow to lay there are dry for 30-60 minutes and your gallery rail is done!
Too easy right!?


Installing a DIY Gallery Rail
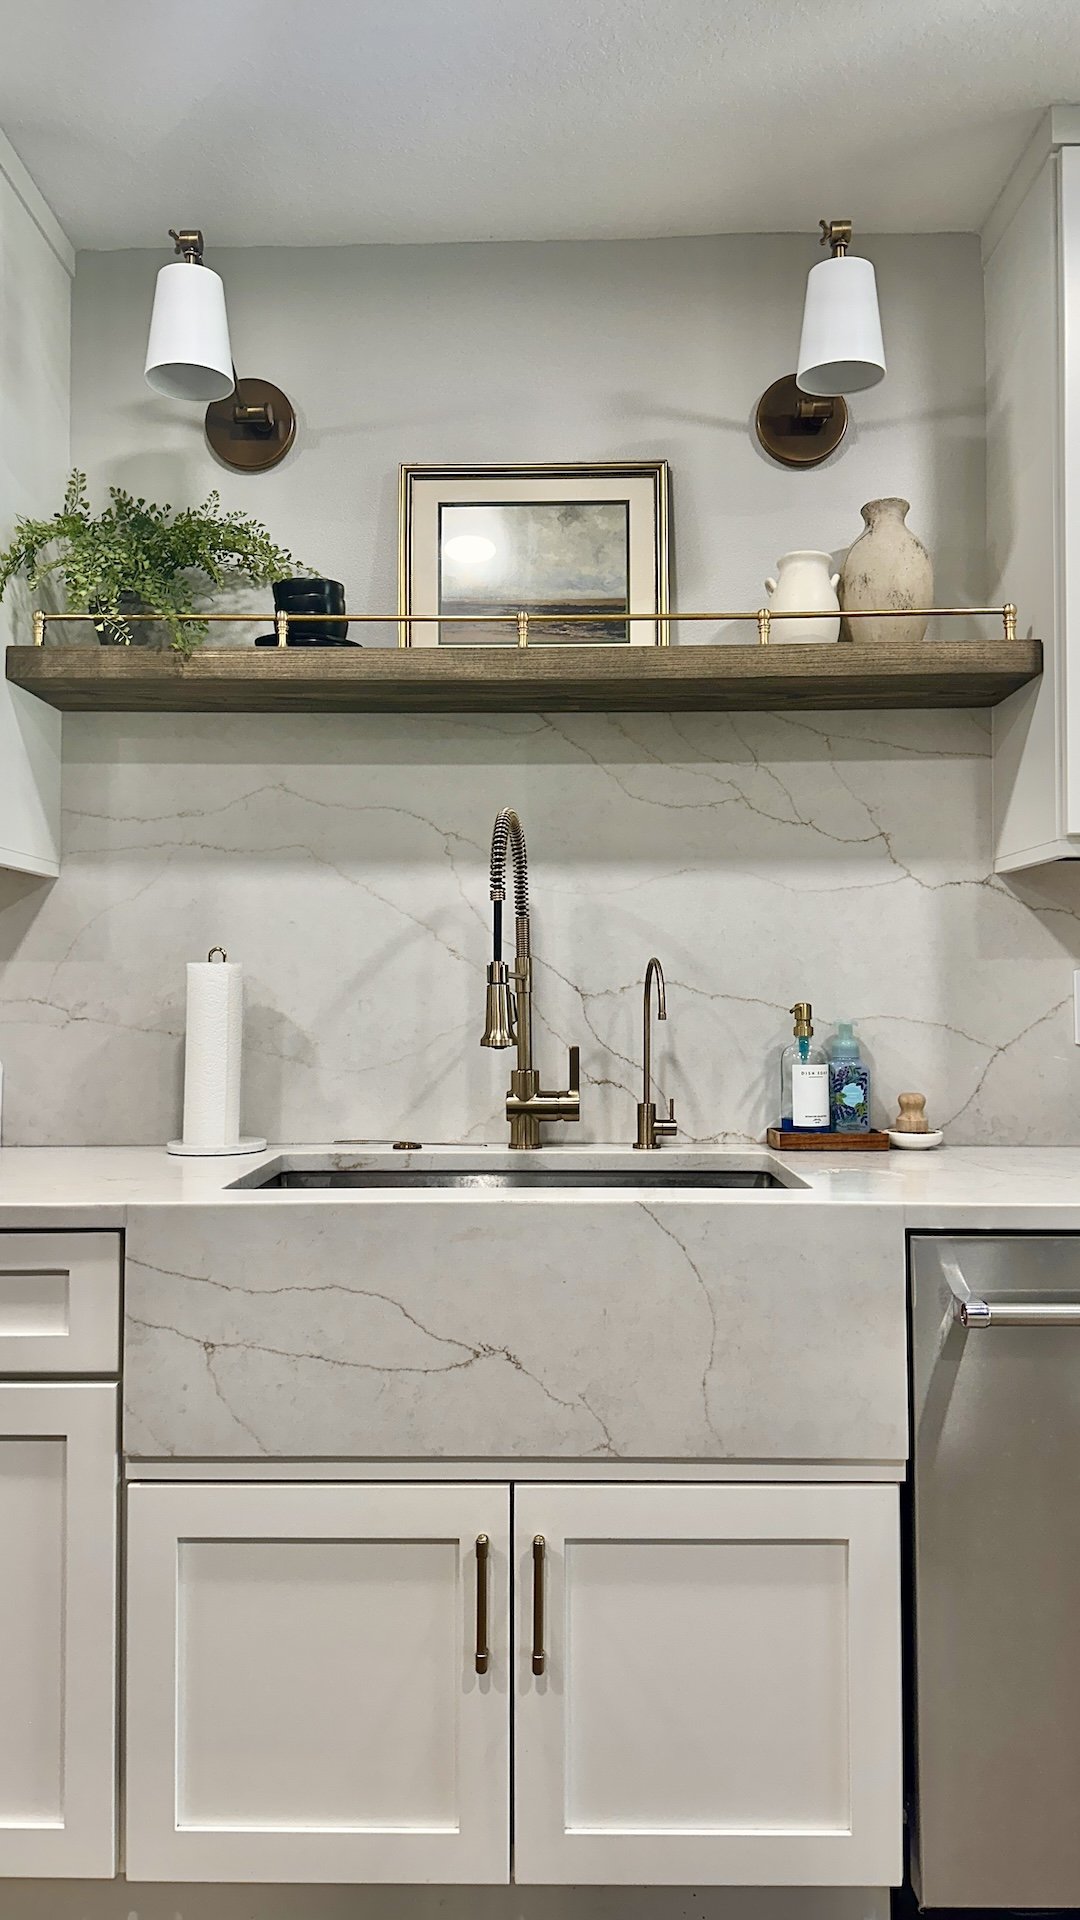
Now here is a little secret…I didn’t actually attach this gallery rail to my wood shelves. I just couldnt bring myself to drill holes into the shelf and I figured that if I ever did change my style and no longer wanted the rails, I can just easily take them off. They do sit perfectly fine on the shelf and you would never know that they are not attached to the wood.

Now if you did want to permanently attach the gallery rail to the wood shelf, you could do so using wooden dowels. You would have to make sure that the opening of your beaded neck piece has the same diameter as the wooden dowels.
You would use a hammer to gently tap the wooden dowel into the bottom of your neck pieces. Then you would hold your gallery rail onto your wood shelf and mark where each dowel is. This part needs to be very accurate and exact because the next step is drilling holes into your wood shelf where you marked the position of your dowels.
Once you have drilled your holes, you will line up your gallery rail so the dowels line up with your drilled holes and then push and tap the dowels into the holes.


HEY THERE, I’M ASHLEY!
Here to inspire beginner DIYers!